- 5 -
©2023 ECHO Incorporated. All Rights Reserved
X7672230407
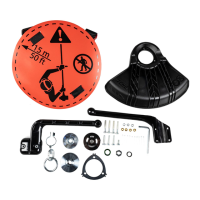
5. Install blade (I) on upper plate pilot. Blades
must be installed so the rotation arrow on the
blade faces the gear case. Secure the blade
with lower xing plate (J) and 10 mm nut (K).
Turn nut counterclockwise on PTO shaft to
tighten.
6. Align the hole in the upper plate with the notch
in the gear case. Insert locking tool (A) to pre-
vent the splined shaft from turning. The arrow
on gear case points to the notch. Tighten the
10 mm nut securely.
7. Insert split pin (L) in hole in PTO shaft, and
bend pin legs around shaft counterclockwise to
retain the 10 mm nut.
IMPORTANT: Never reuse a split pin. Install a new
split pin each time a blade is installed or replaced.
8. Remove the locking tool.
Your ECHO trimmer is now set up to for safe blade
application. Always save your original equipment
shield, upper plate adapter, fasteners, and trimmer
head for re-installation for trimmer line cutting ap-
plication. Do not use a trimmer line head with blade
shield and adapter, otherwise the trimmer head
line will rapidly damage the shield. When convert-
ing back to trimmer line application always remove
and retain blade shield, fasteners, upper, and lower
adapter plates, and spacers from the gear case.
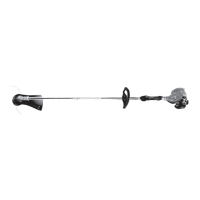
Balance the Unit
1. Put on harness and attach unit to harness.
2. Slide the harness clamp up and down until the
unit balances with the head approximately
2 - 3 in. (51 - 76 mm) from the ground.
3. Tighten the clamp screw.
Note: In case of emergency, the trimmer/brushcutter
can be released from the harness by pulling up on
the quick-release collar.
A
X or Y
I
J
K
2 - 3 in.