CS-350WES
27
FUEL SYSTEM
4-5 Checking and replacing fuel vent
NOTE: Fuel tank vent prevents a vacuum from
forming in fuel tank when fuel in the tank is being
consumed. When the pressure in the tank becomes
too high, fuel tank vent releases the pressure.
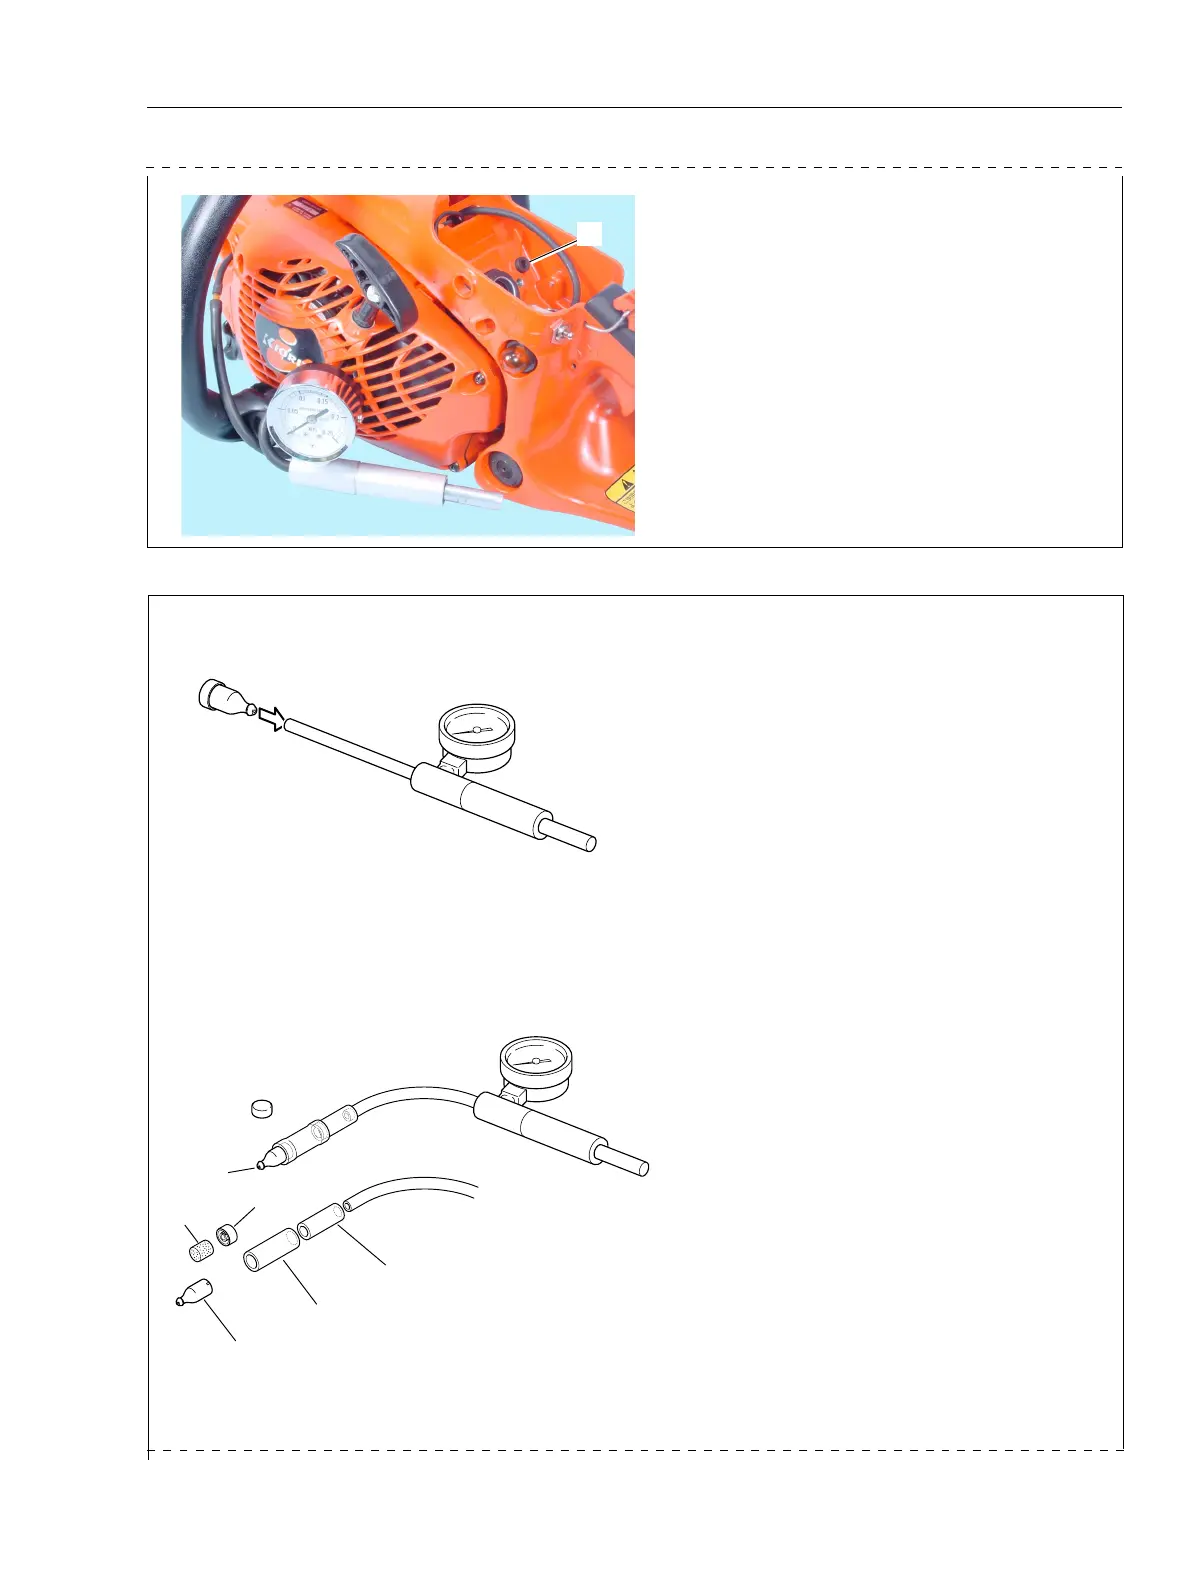
1. Remove starter assembly and fuel tank vent.
Connect pressure tester to fuel tank vent.
2. Apply pressure approx. 49 kPa (0.5 kgf/cm
2
)
(7 psi), make it sure the pressure should be stable
in range of 9.8 kPa - 39.2 kPa (0.1 - 0.4 kgf/cm
2
)
(1.4 - 6 psi).
3. If it is not in the range, clean fuel tank vent by
compressed air gently or replace with new one.
NOTE: Do not disassemble check valve in the vent
assembly. Damage to the check valve will occur.
4. Remove cap (E) of fuel tank vent, and clean
sponge (F).
5. Cut pipe 363024-04010 (B) and 382011-01110
(C) in approx. 30mm (1 1/4 in) length, and connect
them to pressure tester as shown. Connect tank vent
(D) without cap to the pipe as shown.
6. Plug hole (d) by finger and apply pressure 19.6
kPa (0.2 kgf/cm
2
) (3 psi). The pressure should be
hold steady.
7. When the finger is removed to unplug the hole
(d), the tank vent should pass air freely without
holding any pressure. If it does not, replace the vent
with new one.
5. Remove fuel cap, and remove fuel strainer from
fuel pipe.
6. Connect pressure tester to the fuel pipe and apply
pressure approx. 49 kPa (0.5 kgf/cm
2
) (7 psi).
7. When the pressure drops, remove carburetor and
apply pressure plugging fuel pipe end (A). If pressure
drops, remove rear handle and check pipes and
connector. Replace them as required.
(d)
(D)
(E)
A
(C)
(B)
(F)
4-4 Checking fuel tank and pipe (continued)
(continued)
 Loading...