The document provided is an installation guide for the EchoMaster IntelliHaul Integrated Towing Assistance Package, specifically model FC-CHMSL-SIL. This system is designed to enhance towing assistance by integrating a camera system into the vehicle's display.
Function Description:
The IntelliHaul Integrated Towing Assistance Package provides an additional camera view to assist with towing maneuvers. It integrates with the vehicle's existing infotainment system, specifically designed for 4-inch and 8-inch screens. The system is not compatible with IOB (presumably a specific infotainment system or option). The core component is a CHMSL (Center High Mount Stop Lamp) camera, which is installed into the third brake light assembly of the vehicle. This camera provides a view that can be manually activated by the user, offering an improved perspective for hitching, monitoring a trailer, or general rear-view assistance during towing. The system retains the functionality of the factory reverse camera if the vehicle is already equipped with one.
Important Technical Specifications:
- Model Number: FC-CHMSL-SIL
- Compatibility: Designed for vehicles with 4-inch and 8-inch infotainment screens only.
- Incompatibility: Not compatible with IOB systems.
- Camera Type: CHMSL camera, integrated into the third brake light.
- Input Options: Supports both OEM installed reverse cameras and EchoMaster/aftermarket cameras, selectable via dip switch 2.
- Vehicle Year Compatibility (Dip Switch 3):
- UP position: 2015-2016 models
- DOWN position: 2017-2018 models
- Monitor Size Selection (Dip Switch 1):
- UP position: 8-inch screen
- DOWN position: 4-inch screen
- Camera Activation: Camera input 4 is automatically activated when the vehicle is in reverse gear if dip switch 2 is set to ECHO. The CHMSL camera (connected to CAMERA 3) can be manually turned ON/OFF by the user.
- Module Connections:
- 8-pin power harness
- 16-pin main camera extension cable
- LVDS connections (male/female) for integration with the HMI module.
- Power Requirements: The CD mechanism, which is reconnected during installation, is labeled for 12V 2A.
Usage Features:
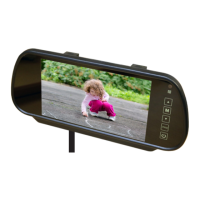
- Integrated Display: The camera feed is displayed on the vehicle's existing 4-inch or 8-inch infotainment screen.
- Manual Camera Activation: The CHMSL camera can be manually accessed by pressing and holding specific buttons on the radio:
- 8-inch Radio: Press and hold the "BACK" button for three seconds to enter the IntelliHaul camera view. Press "BACK" again to return to the previous screen.
- 4-inch Radio: Press and hold the "HOME" button for three seconds to enter the IntelliHaul camera view. Press "BACK" to return to the factory screen.
- Reverse Camera Integration: The system can automatically activate a reverse camera input (input 4) when the vehicle is in reverse, depending on dip switch settings.
- Factory Reverse Camera Retention: If the vehicle already has a factory reverse camera, this system is designed to retain its functionality.
- Delayed Access: The camera is accessible after 7 seconds while in reverse.
Maintenance Features (Installation-related):
- Vehicle Protection: Prior to installation, it is crucial to cover all vehicle surfaces with tape or plastic protection film to prevent scratches and damage. EchoMaster explicitly states it is not responsible for damage incurred during installation.
- Battery Disconnection: The vehicle owner's manual should be consulted to disconnect the battery before installation.
- Airbag Connectors: CAUTION: Do not disconnect any airbag connectors or indicators, as this may activate diagnostic codes requiring dealer reset and potential fees.
- Trim Removal: Care must be taken when removing vehicle trim panels, especially in extreme hot or cold climates, to avoid damage. Using painter's blue tape and nylon trim panel removal tools is recommended.
- Connector Handling: When disconnecting connectors, pull by holding the connectors themselves, not the wires, to prevent damage.
- Part Storage: Removed parts should be placed on a protected surface to prevent damage.
- Tool Recommendations: The installation guide lists specific tools:
- 7mm Driver
- 10mm Driver
- Nylon Trim Removal Tools
- Torx - 15 driver
- Painter's tape
- Wiring Management: Zip ties are recommended to secure loose wiring after connecting the LVDS cables.
- Module Mounting: The module is mounted to a bracket using four M3 screws (provided) and then secured in the dash using existing 7mm bolts. If the vehicle is not equipped with a CD/DVD player, alternative mounting instructions are provided (screws not provided for this scenario).
The installation process involves significant vehicle disassembly, including removing the dash trim panel, LCD display, CD mechanism, glove compartment, and the third brake light assembly. Routing the camera extension cable requires fishing it through the headliner and along the door sill to the passenger's kick panel. The module is then connected to the vehicle's wiring and the camera extension harness, with dip switches configured according to the vehicle's specifications (screen size, reverse camera type, and model year). Finally, all removed panels are reinstalled, and the system is tested.