− 10 −
ENGLISH
Installing
■Speaker installation position
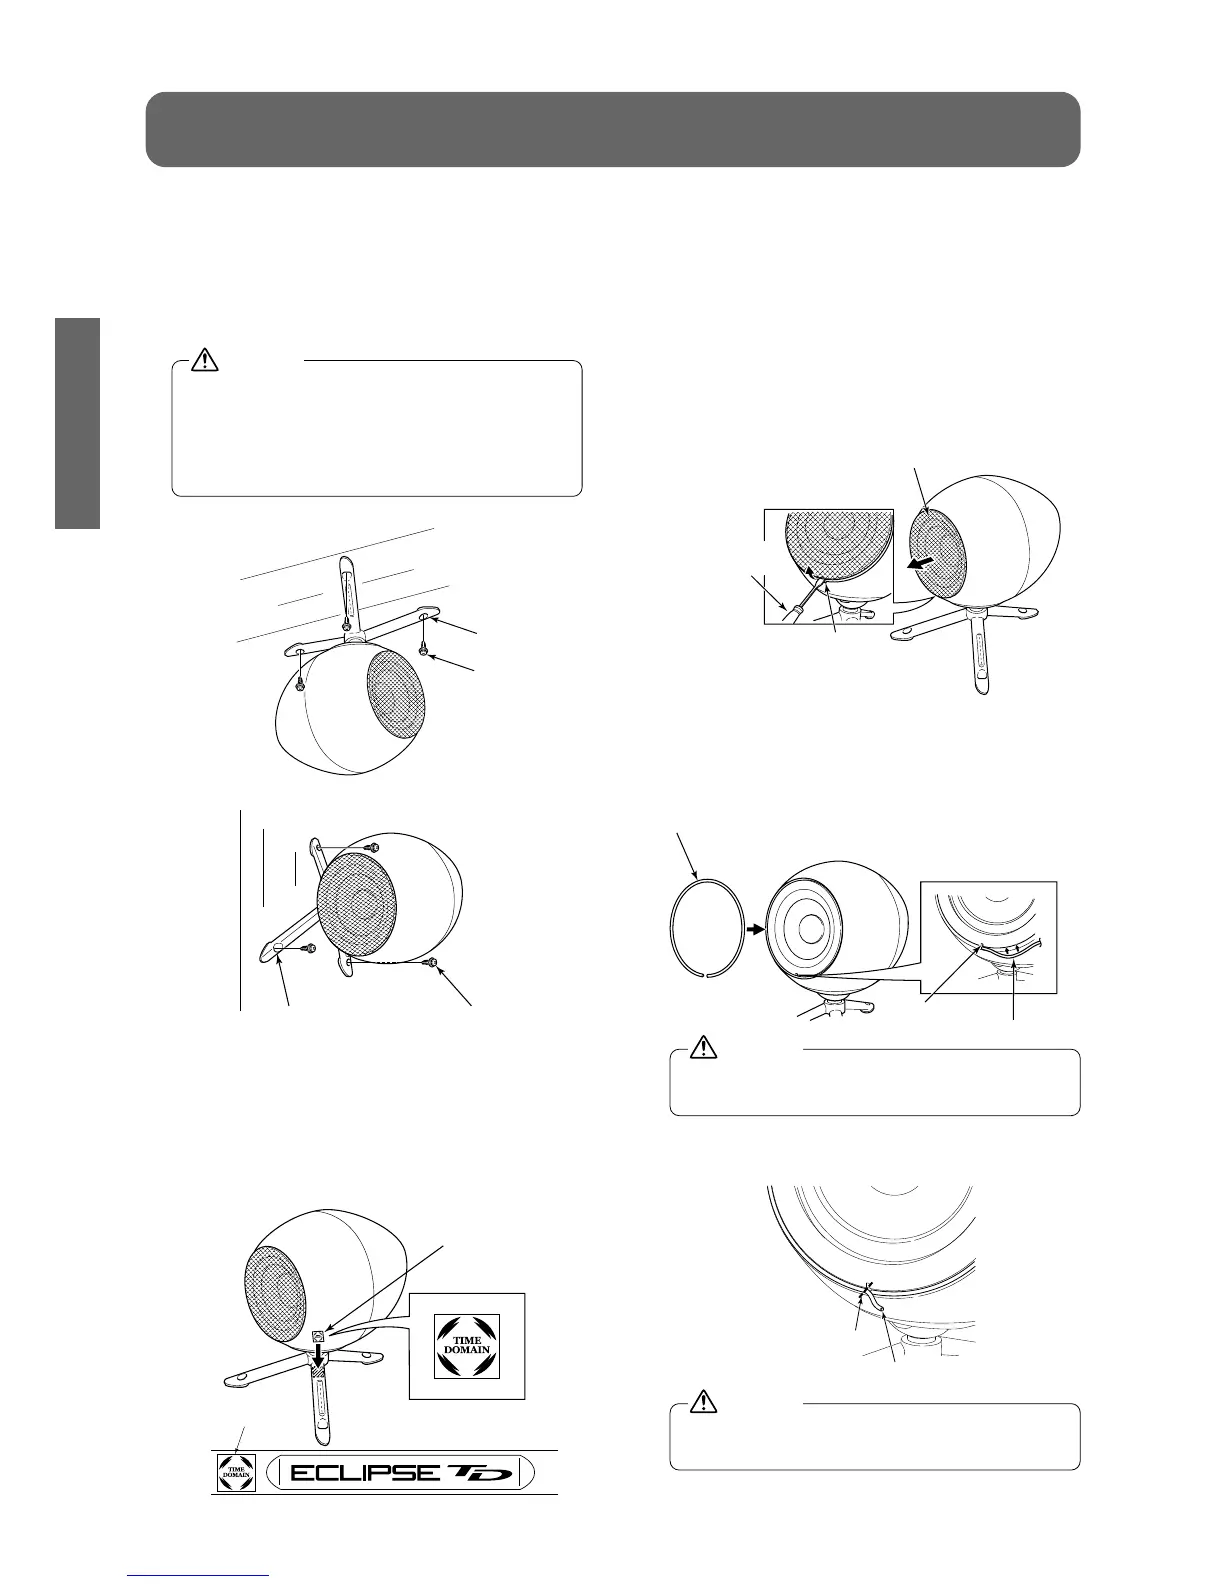
The speaker can be suspended from the
ceiling or attached perpendicularly to the wall
as well as being placed on the floor. Insert
screws through the holes in the tripod legs to
secure the speaker to surfaces such as these.
Consult a qualified technician for advice on
installation locations and installation met-
hods. If the speaker is installed in an ina-
ppropriate place or by using an inappro-
priate installation method, it may fall down.
●Installing to a ceiling
●Installing to a wall
■
Attaching the "TIME DOMAIN" logo sticker
Attach the "TIME DOMAIN" logo sticker to
the speaker.
Remove and stick the released paper.
●Attachment example
■Removing the protective net and
installing the rubber spacer
The speaker's protective net can be removed if
desired. When the protective net is removed,
install the rubber spacer before using the speaker.
(1)Removing the protective net
1.
Insert a flat-tipped screwdriver or similar
tool into the groove of the protective net
and lift it up to raise the protective net.
2. Remove the protective net.
(2)Installing the rubber spacer
1. Push the rubber spacer into the groove
of the speaker starting from the notch in
the speaker.
Do not touch the paper cone of the speaker
with your hands.
2. Use scissors to cut off any unneeded
part of the rubber spacer.
Be careful not to damage the cone of the
speaker with the scissors.