-
12
-
English Español Français Italiano
Nederlands
SvenskaEnglish
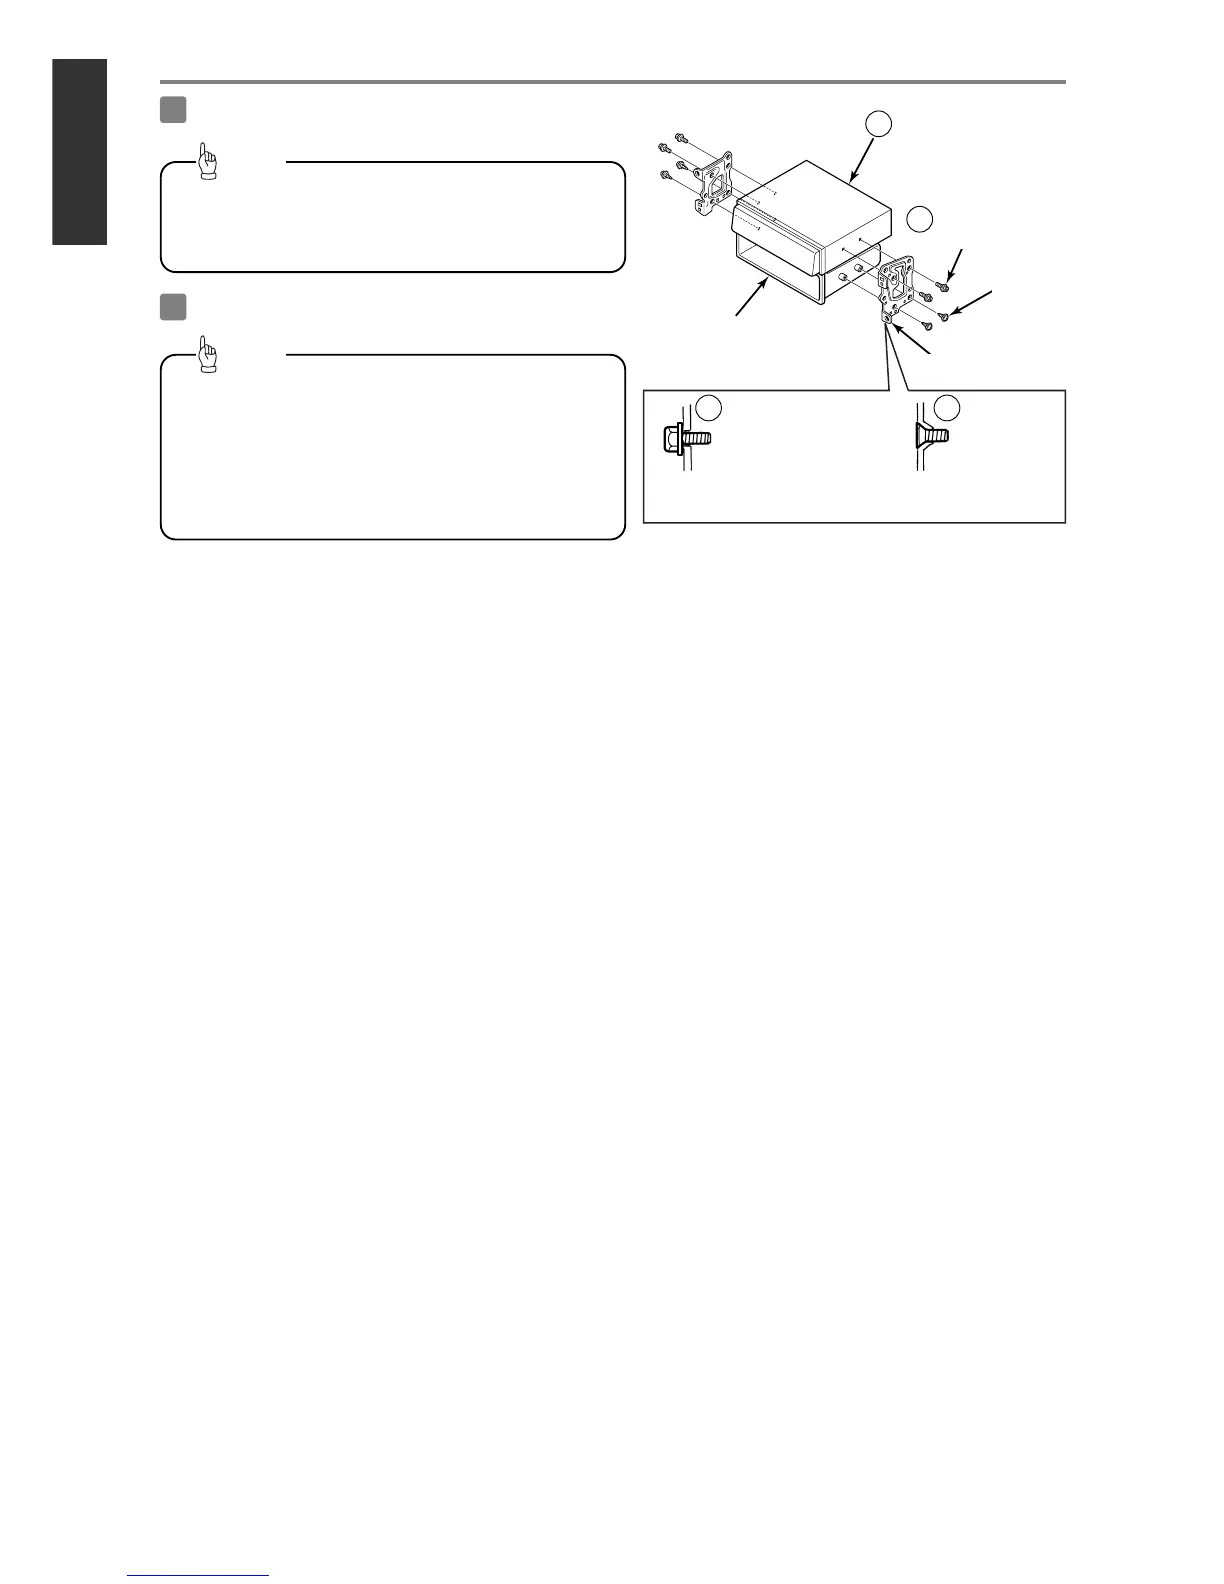
Attach the brackets to the main unit.
3
Install the main unit in the vehicle.
4
Main unit
Pocket
Hex-head bolt
(Red:M5 x 8) x 4
Screw
x 4
Select the screws in accordance with the shapes
of the screw holes in the mounting bracket.
6
1
Mounting bracket
Hex-head bolt
(Red:M5 x 8) x 4
Flat head
screw
(
Red:
M5x8) x 4
6 7
Be sure to use the supplied accessory mounting
screws (Red:M5 x 8) as the mounting screws. If
any other screws are used, they may damage the
inside of the main unit.
Tip
••
Be careful not to forcefully push on the main unit's
display or buttons during installation. This may
result in damage to the main unit.
••
This installation method is only one example.
When installing the main unit to the vehicle, be
sure to ask the place of purchase for information
on the installation method used.
Tip