-
11
-
Remove the pocket and any other accessories
from the center cluster to make room for the main
unit.
1
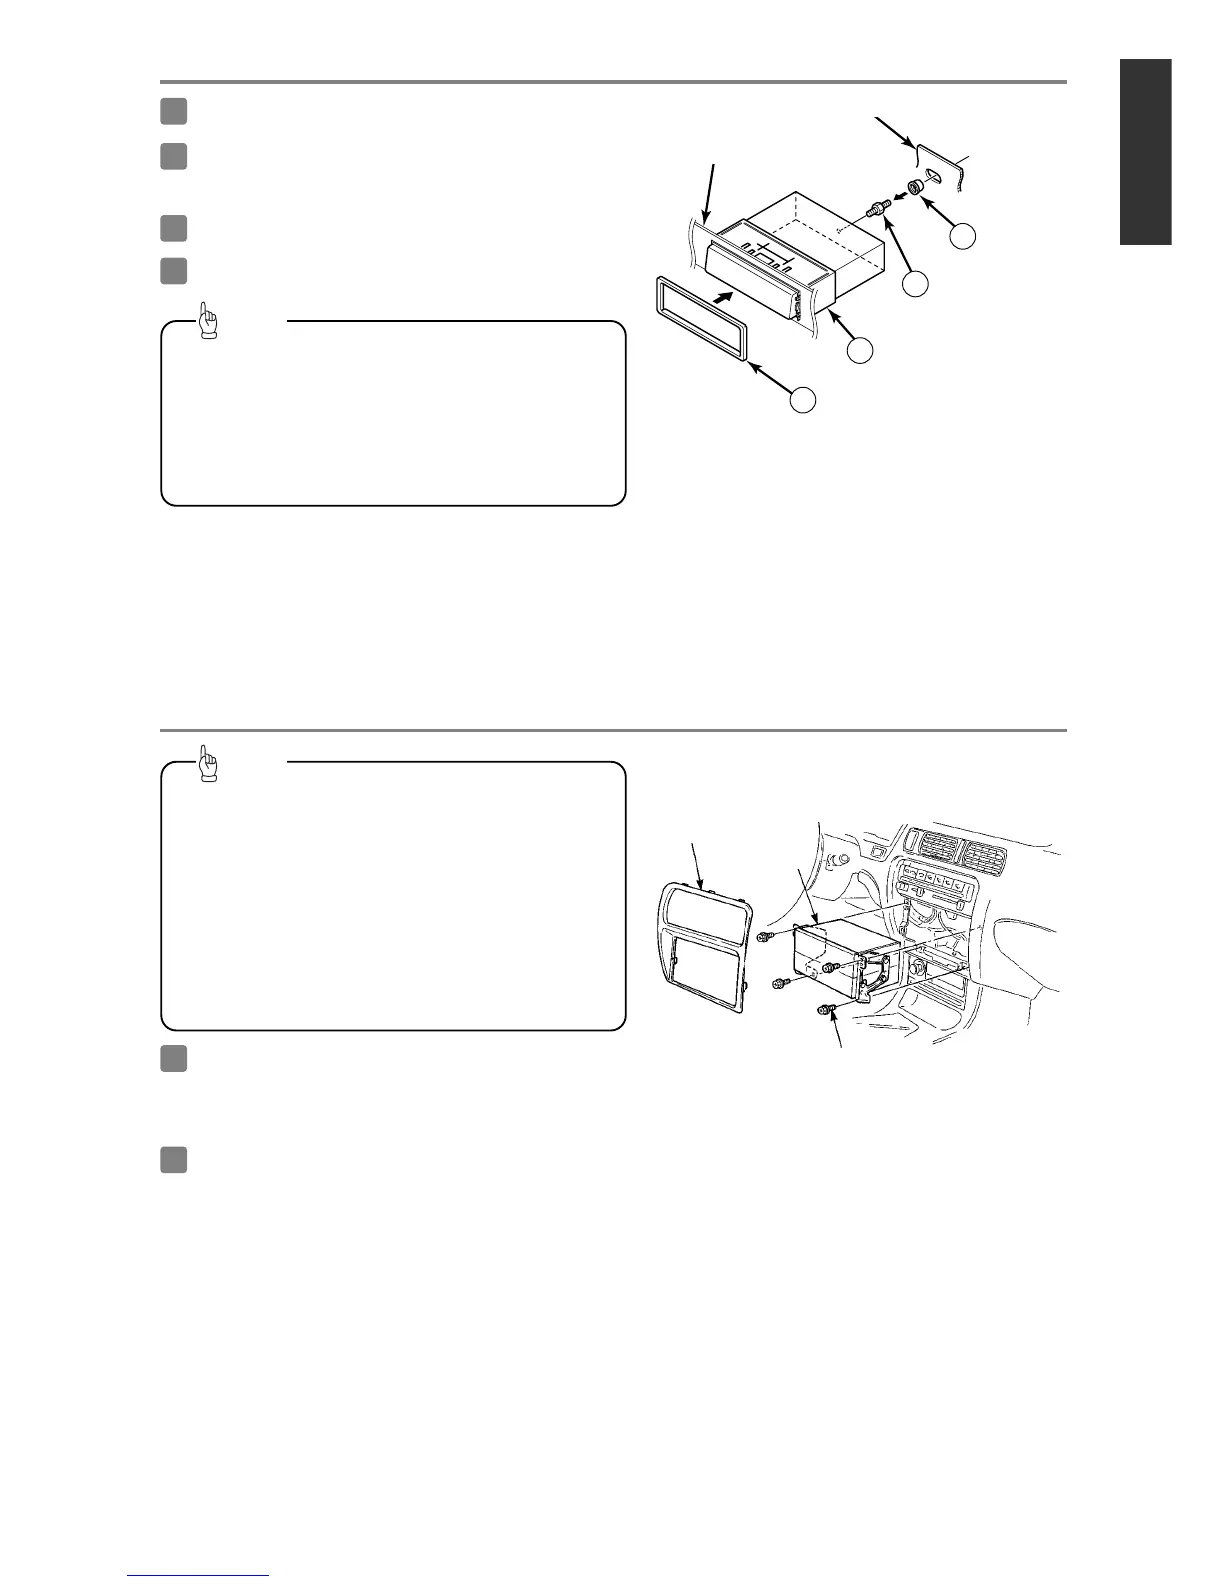
Remove the mounting brackets for the pocket.
2
Mounting bolts
Pocket, etc
Center cluster panel
7
6
5
Install the bezel on the main unit.
Fasten the rear of the main unit.
Insert the main unit into the mounting sleeve until
it locks in place.
-
Mounting the main unit (If installing the main unit using the side brackets of the vehicle)
-
Bezel
5
Mounting sleeve
3
Bushing
9
Metal of vehicle
Stud bolt
8
Dashboard or console box
Mount the stud bolt to the main unit.
4
••
Carefully bind any excess length of wire that
is connected to the main unit and secure it
to an area of empty space in the vehicle so
that it does not not dislodge or interfere with
the main unit or vehicle-side equipment. If
the wires are not handled correctly,
operating problems or short-circuits may
occur, and this may result in the danger of
fire or other accidents.
••
Connect all wires before installing the main
unit.
Tip
••
Be careful not to forcefully push on the main unit's
display or buttons during installation. This may
result in damage to the main unit.
••
This installation method is only one example.
When installing the main unit to the vehicle, be
sure to ask the place of purchase for information
on the installation method used.
Tip
Español Français Italiano
Nederlands
SvenskaEnglish