9
English
Hardware Installation Guide
Installation Steps
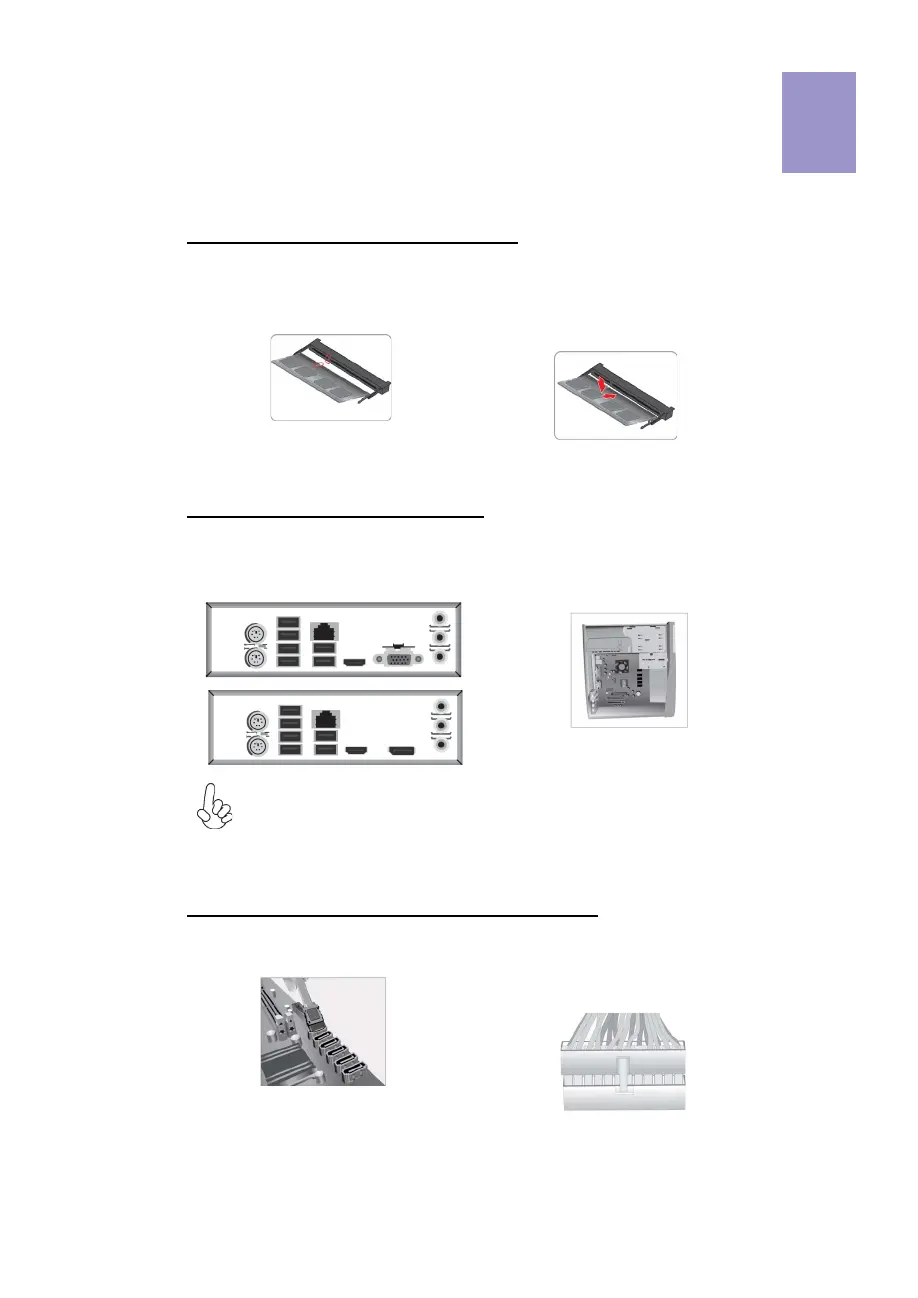
Step 1. Installation of Memory Modules:
1-1. Align the cutouts on the DIMM
module edge connector to the notches
in the DIMM slot.
Step 2. Installation of Motherboard:
2-1. Replace the back I/O plate of the
case with the I/O shield provided in
motherboard’s package.
1-2. Insert the memory module to the
slot and press it down until it seats
correctly. Make sure the slot latches
cling to the edge of the DIMM module.
2-2. Place the motherboard within the
case by positioning it into the I/O plate.
Secure the motherboard to the case
with screws.
VGA port(rear panel I/O) and DP port (rear panel I/O) are alternative options
of the motherboard.
Step 3. Connecting Cables and Power Connectors:
a. Connect the SATA hard drive to its
SATA cable
b. Connect 24-pin power cable
Please note that when installing 24-pin
power cable, the latches of power cable
and the ATX connector match perfectly.