Do you have a question about the ECS H110M4-C3V and is the answer not in the manual?
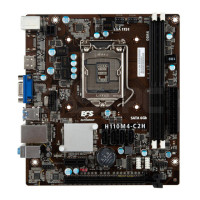
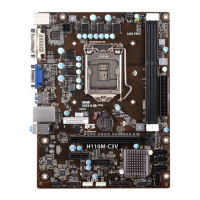
The ECS H110M4-C3V/H110M4-C3D is a Micro ATX motherboard designed for Intel® Skylake processors, supporting CPUs up to 95W TDP. It features the Intel® H110 Chipset and a dual-channel DDR4 memory architecture with two 240-pin DDR4 DIMM sockets, supporting up to 32 GB of RAM. Users should consult the ECS website for the latest CPU and memory support lists.
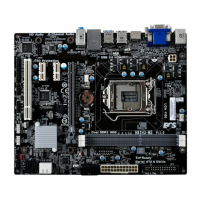
For expansion, the motherboard includes one PCI Express x16 Gen3 slot for graphics interfaces and one PCI Express x1 Gen2 slot. Storage is handled by the Intel® H110 Express Chipset, providing four Serial ATA 6Gb/s connectors for various storage devices.
Audio capabilities are provided by the Realtek ALC662-VDD-GR 6-CH High Definition audio CODEC, compliant with HD audio specifications. Network connectivity is managed by the Realtek RTL8111H Gigabit LAN.
The rear panel offers a comprehensive set of ports, including one PS/2 mouse connector (green) and one PS/2 keyboard connector (purple). For display output, it features one HDMI port (or one DVI port) and one D-sub port (VGA port). Connectivity is further enhanced with two USB 2.0 ports and two USB 3.0 ports. A single RJ45 LAN connector provides network access, and audio is supported by three 6-channel audio jacks (line-in, line-out, microphone).
Internally, the motherboard provides essential connectors for system integration. These include a 24-pin ATX Power Supply connector and a 4-pin ATX 12V Power connector. Fan control is available via a 4-pin CPU_FAN connector and a 4-pin SYS_FAN connector. For additional USB connectivity, there is one USB 3.0 header supporting two extra USB 3.0 ports and two USB 2.0 headers supporting four additional USB 2.0 ports. Four SATA 6Gb/s connectors are available for internal storage. Front panel connectivity is facilitated by a front panel audio header and a front panel switch/LED header. Other internal headers include a COM header, a Clear CMOS jumper, a Buzzer header, a Case open header, and a ME unlock header.
The system utilizes an AMI BIOS with 64Mb SPI Flash ROM. It supports Plug and Play, STR (S3)/STD (S4), and Hardware Monitor functions. Audio and LAN can be disabled in the BIOS. An F7 hotkey is available for boot-up device options, and it supports ACPI & DMI. The PgUp key can be used as a hotkey to clear CMOS (PS2 KB Model only). A unique feature is the ability to copy BIOS parameters to a USB flash drive. AP (Application Program) support includes eBLU, eDLU, eSF, and Cyberlink Media Suite. Note that Microsoft .NET Framework 3.5 is required for eBLU, eDLU, and eSF. The Cyberlink Media Suite is a free bundle software included with the ECS DVD.
The motherboard adheres to the Micro ATX form factor, with dimensions of 225mm x 170mm.
The manual provides a detailed, multi-language quick installation guide, covering English, Brazilian Portuguese, Hindi, French, Deutsch, Russian, Spanish, Indonesian, Arabic, Simplified Chinese, and Korean.
After hardware installation, connect peripherals like the keyboard, mouse, and monitor. Then, connect the power and turn on the system, installing all necessary software.
The BIOS Setup Utility displays system configuration and allows setting parameters. To enter setup, press or F2 during Power-On Self Test (POST). If a "CMOS Settings Wrong" message appears on first power-on, enter BIOS and select "Load Default Settings" to reset to default values. Changes to system hardware (e.g., CPU, memory) may also trigger this message. The installation sequence may vary based on the case type and devices used.
The device complies with Part 15 of FCC rules, ensuring it does not cause harmful interference and accepts any received interference. It conforms to EC/EMC directives: EN 55022, EN 61000-3-2, EN 61000-3-3, EN 55024, and EN 60950, covering radio disturbance, supply system disturbances, immunity characteristics, and electrical safety for information technology equipment. The product is CE and FC marked.
| Brand | ECS |
|---|---|
| Model | H110M4-C3V |
| Category | Motherboard |
| Language | English |