Page 5
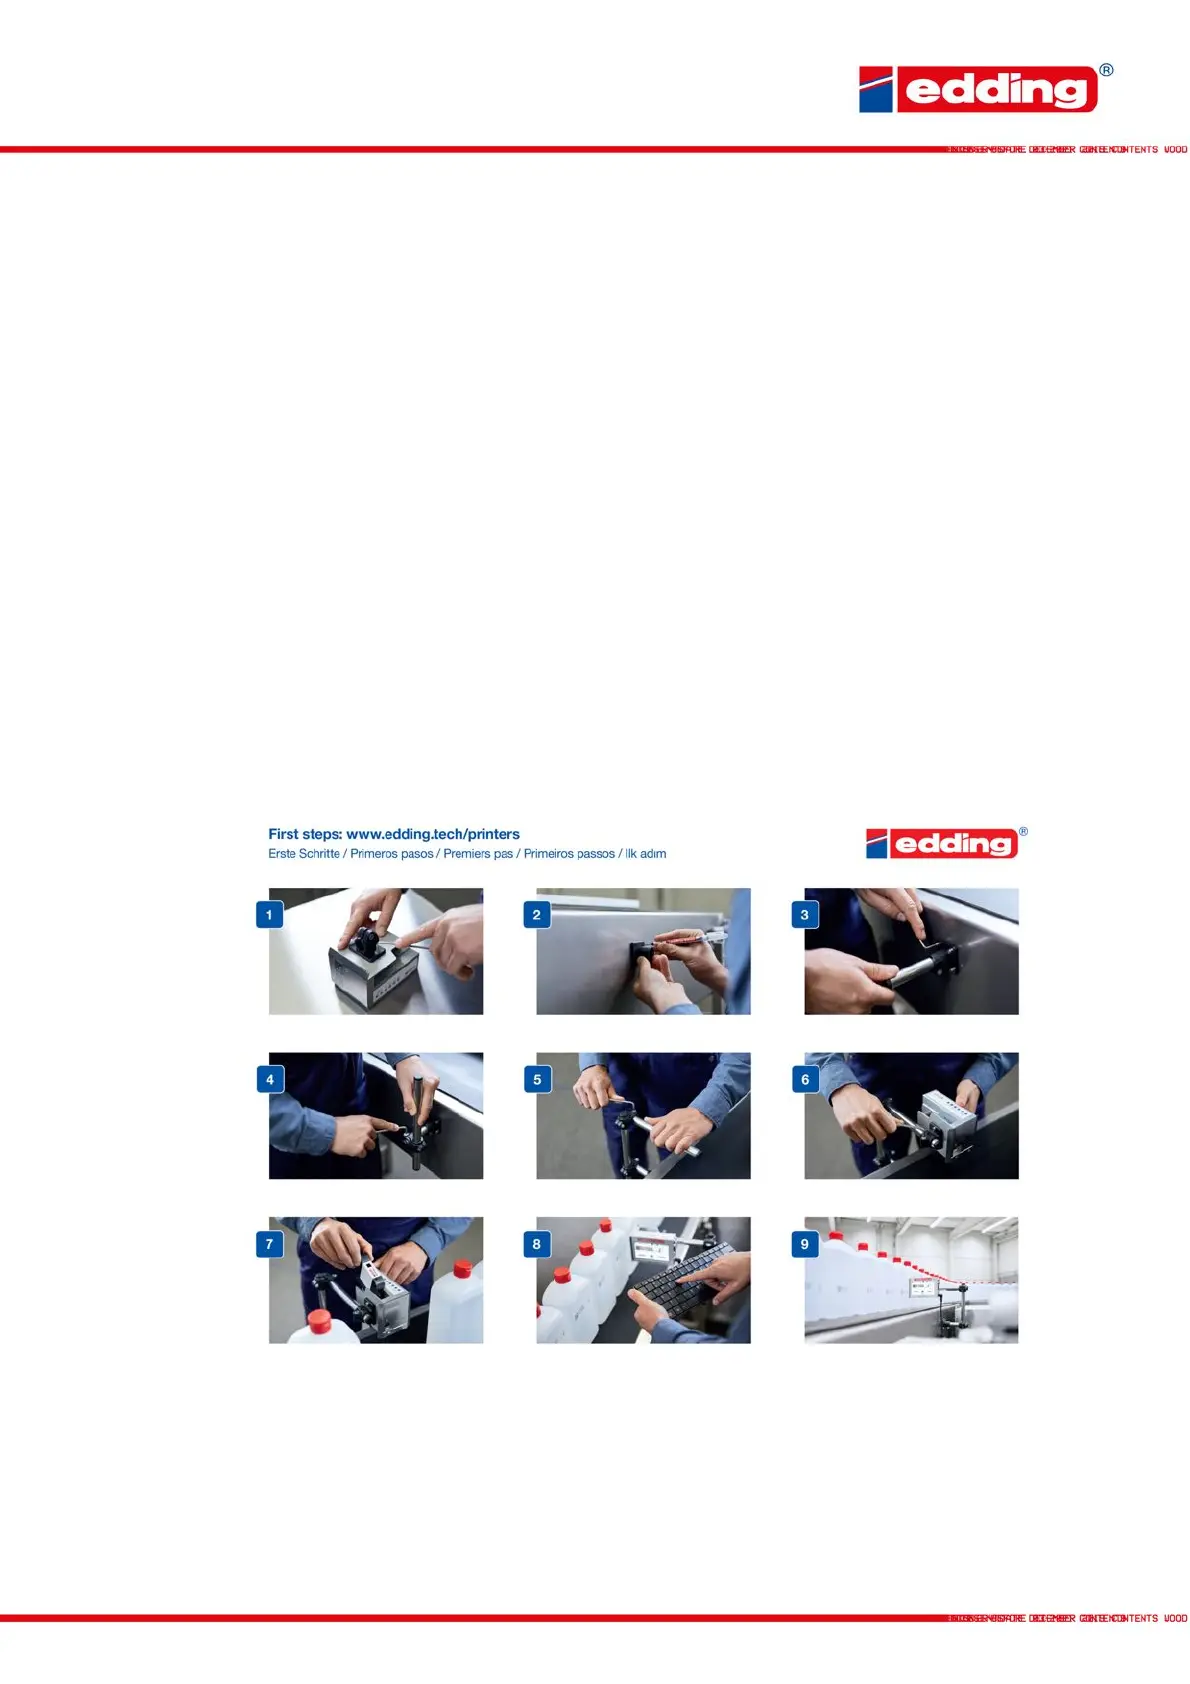
Step-by-Step introduction:
1. Screw attachment piece to printer using two of the supplied screws
2. Mark base piece at the mounting position using the supplied drill hole marker
3. Attach base piece using the supplied screws and nuts, and screw first mounting rod
to the base
4. Attach second rod using the first cross clamp
5. Depending on mounting position, attach third rod as required using the second
cross clamp
6. Screw printer to the mount. To ensure optimum print quality, position the printer so
that you keep a print distance of max. 6 - 8 mm to the print object.
7. Insert cartridges at an angle (approx. 15°) and lock with the fixing lever. If excessive
dust and ink accumulate on the print head (causing deterioration of the print image),
clean the nozzle surface with the cleaning cloth supplied with the cartridge.
8. Commission printer according to the following section
9. Printer is ready!
Some menu items/options contain an additional description on the printer itself. Just click on the
icon and a message with additional information/description will appear.
In the event of functional printer errors that cannot be corrected autonomously, please contact
your on-site/local distribution partner.