COPYRIGHT©EDECOA, ALL RIGHT RESERVED,PSW-USA-Rev2.6
5 / 17
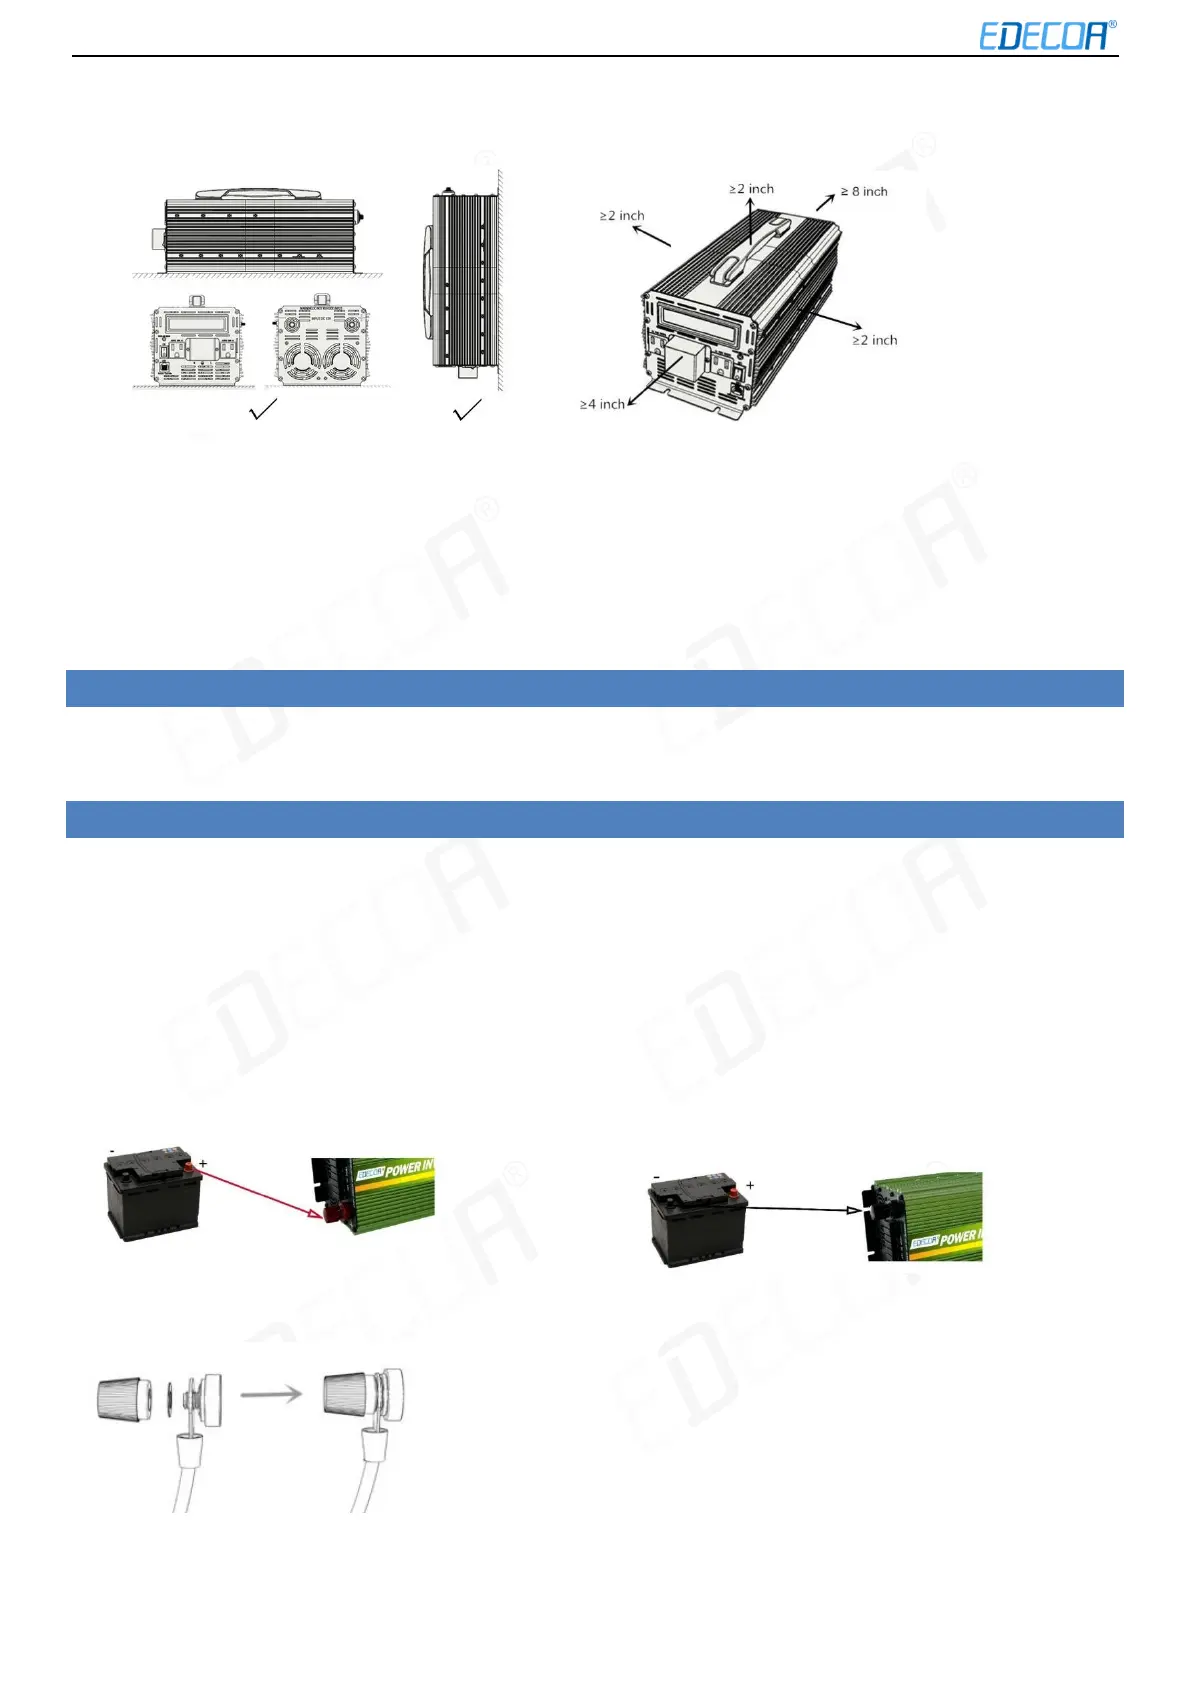
Figure 3-1 Proper installation Figure 3-2 Installation Space (Unit: inch)
Do not install the inverter in an inclined position (forward, backward, overturned), horizontally mounted or inverted.
4.5 Installation space requirements
It is recommended that the inverter be mounted at an adequate height for easy operation and subsequent
maintenance.
When installing the inverter, make sure that there is enough space around the inverter to ensure adequate installation
and cooling space, as shown in Figure 3-2.
5. OPENING THE DEVICE
Non-professional personnel must not open the inverter as there is high voltage inside. Before opening the device,
please remove cables of both DC and AC sides, turn on the switch and leave the inverter alone for 1 hour.
6. CON NECTION
Please read the manual carefully and install the inverter properly. If you have questions, please contact our service team.
It may cause damage to the inverter or cause injury if you do not act in accordance with the instructions from the manual.
6.1 Battery connection
1. Set the switch to the "OFF" position when connecting the inverter to the power source. The energy source may be a
battery or other stable DC power supply. It must be ensured that the DC voltage of the power source is matched to
the rated DC voltage of the inverter. Higher voltages can cause damage the inverter.
2.
3. The load power should not exceed the rated power of the inverter.
The two DC-input connectors of the inverter are color-coded:
The red terminal for the positive pole (+) The black terminal for the negative pole (-).
Inverter DC input installation method: