10
Hard surface Cleaning with Chemical feed
system:
e chemical feed system is designed to deliver accurate
chemical dilution for touchless surface cleaning.
1. Fill the solution tank of your CR2 with sucient wa-
ter for the task at hand.
2. Connect solution hose and accessory pressure gun.
3. Select the appropriate tip and install on the cap of the
chemical feed (#8 on page 7).
4. Place a bottle into bottle holder (#9 on page 7).
5. Take the feed tube attached to the cap (#8 on page 7)
and place it inside the bottle.
6. Take the cap from #8 on page 7 and thread it onto the
bottle of chemical to secure it in place.
7. Turn the chemical dispensing valve (#11 on page 7)
to the le toward the word “SOAP”.
8. Chemical will draw Accurately only in the “LOW”
pressure setting of your pressure gun. To activate the
“LOW” pressure, pop the collar of the gun out.
9. In “LOW” pressure, apply chemical to the walls and
xtures starting from the lowest point to the highest.
10. Spray the oor as you make your way out of the
room.
11. Allow the chemical to dwell according to the chemi-
cal manufacturers recommendations.
12. You may use the brush on your squeegee/brush wand
to agitate particularly soiled areas.
13. When you are ready to rinse away the chemical, sim-
ply turn the chemical dispensing valve (#11 on page
7) to the word “RINSE”.
14. Set your pressure gun to the desired pressure and
angle of spray by adjusting the collar. Rinse surfaces
starting from the top down.
15. See “Recovering liquid” for nal steps.
Recovering liquid from hard surfaces:
e CR2 is equipped with two dedicated tools for liquid
recovery: e squeegee/brush wand and the Gulper tool.
1. Connect recovery vacuum hose to the recovery inlet
barb (#7 on page 7).
2. Place the vacuum switch (see #18 on page 7) into the
“ON” position.
3. Using either the squeegee/brush wand or the Gulper
tool, to extract the liquid from the surface. (see page
8).
4. Monitor the levels in the recovery tank and empty
as necessary. Use defoamer to ensure your vacuum
motor does not take in foam/uid.
Using the blower feature:
To use, this feature connect the Blower hose (#5 on page
8) to #13 on page 7 and turn on the vacuum motor.
Convenient for:
• Blowing uid o countertops and walls onto the
oor
• Drying faucets and other xtures
• Blowing o dust
NOTE: Do not leave the blower hose on during nor-
mal extraction as it will restrict suction.
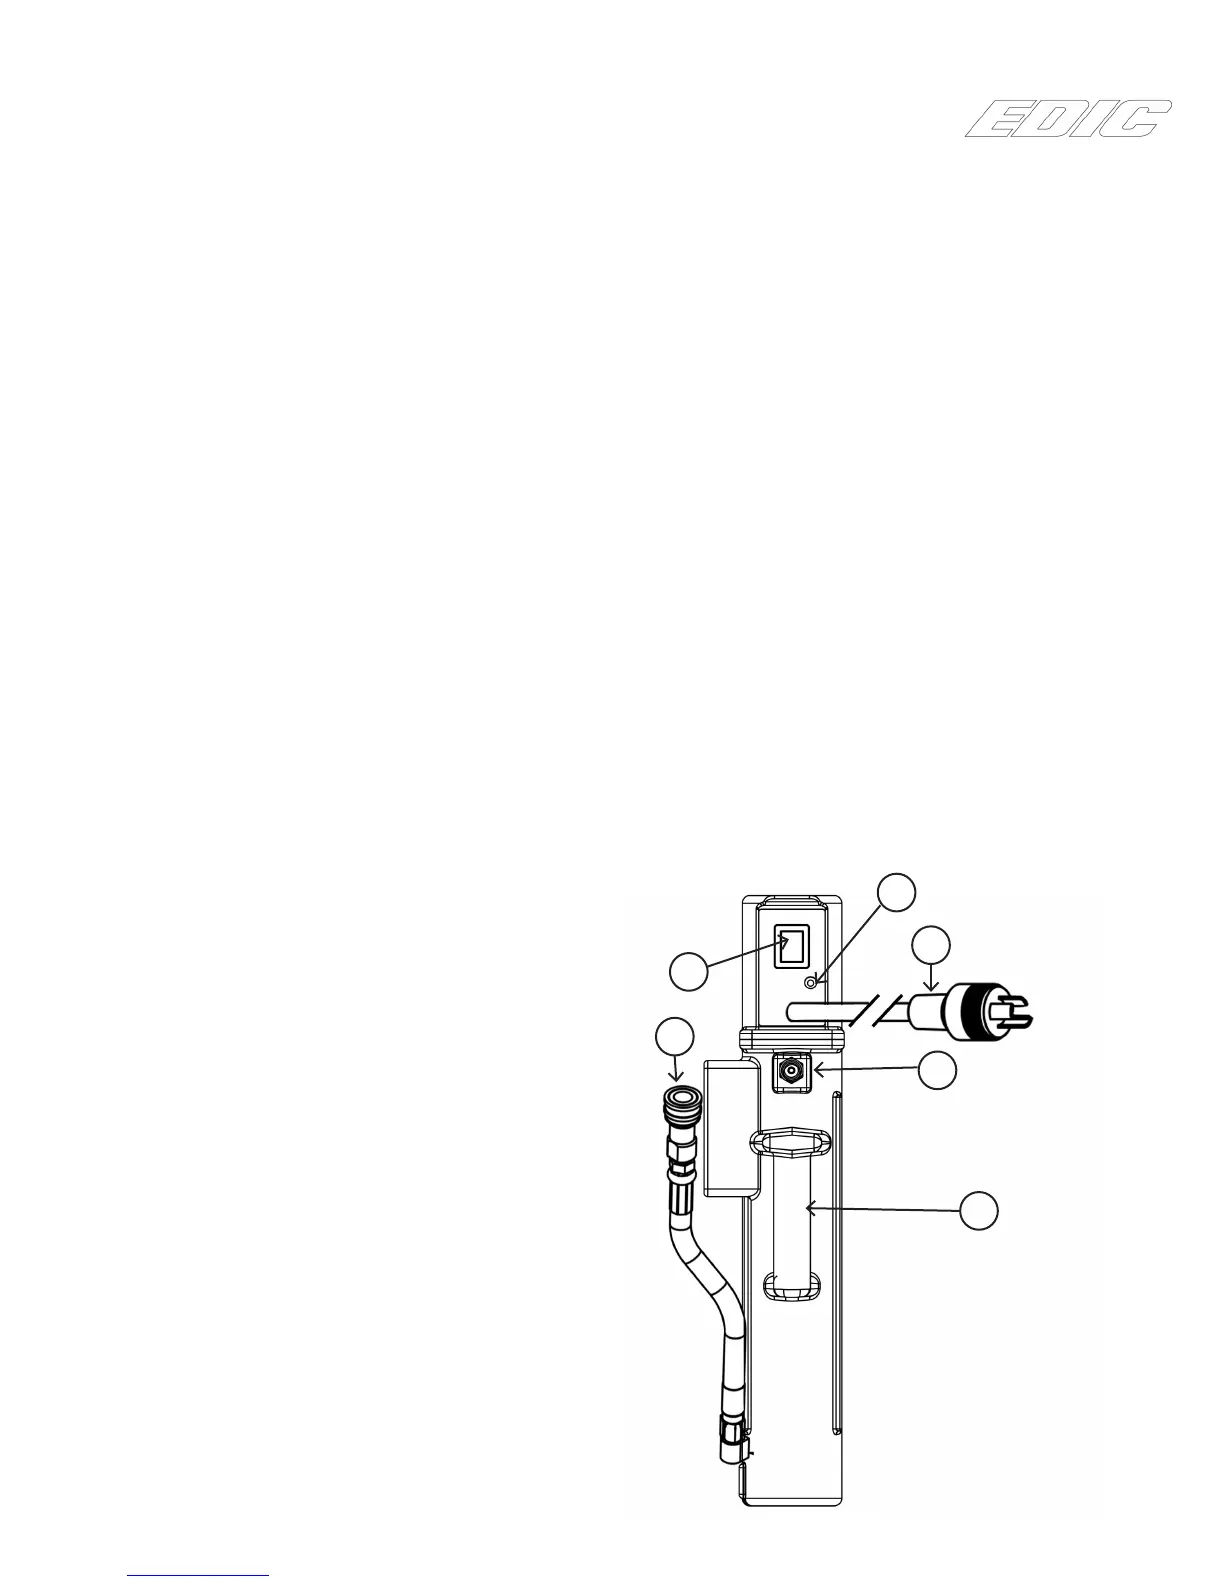
Installing an accessory heater:
If a 600HR Heat “n” Run heater system has been pur-
chased for the CR2, use the following illustration to
familiarize yourself with the heater.
1
2
4
5
3
6