9
Assembling the accessory racks:
e CR2 is shipped with the accessory racks and hard-
ware in the solution tank. When you receive your CR2,
it is necessary to secure the racks to the body. e only
tool required to complete the assembly is a Phillips head
screwdriver.
e CR2 comes equipped with pre-installed threaded
inserts in the body. e two larger racks and accessory
bag are installed on the le side of the machine (when
holding the handle). e three smaller racks are installed
on the right side (when holding the hanlde).
SOLUTION HOSE/POWER CORD RACK (3x)
D13698-3
10-32 x 1/2" TRUSS HEAD SCREW (10x)
VACUUM HOSE RACK (2x)
D13697-3
ACCESSORY RACK ASSEMBLY
ACCESSORY BAG
14591
ACCESSORY BAG
RETAINER D14577
Opening the machine:
is unit can be opened by simply removing two bolts
located on the back of the machine. e unit will open
forward by liing up on the handle. If you need to open
the unit further, you may release the vacuum hose going
from the base of the vacuum plate to the bottom of the
recovery tank by loosening the hose clamp at the base of
the recovery tank.
2 BOLTS
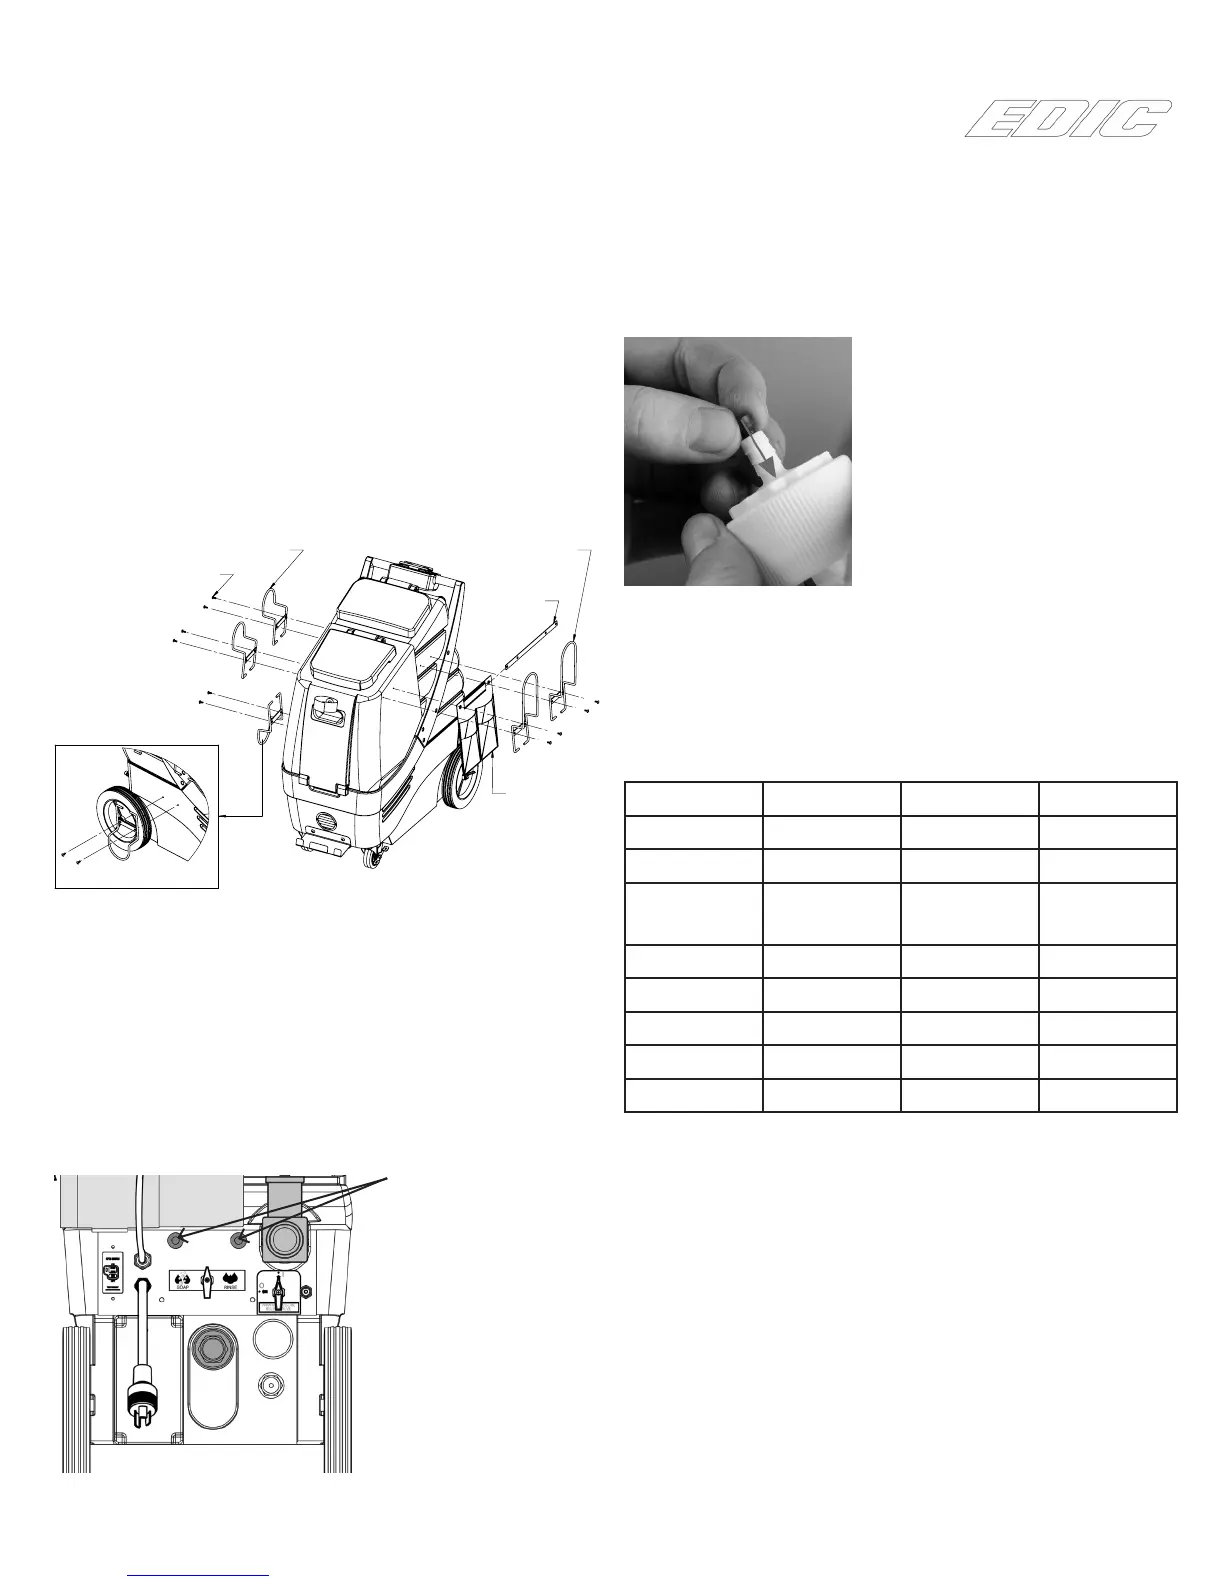
Installing metering tips for the Chemical feed
system:
Remove the semi-clear hose from the bottle cap (#8 on
page 7). Metering tips have a threaded pattern that is
matched to the bottle cap.
Select the appropriate metering tip, using the chart below,
and thread it clockwise into the threaded tube on the
bottle cap. Turn counter-clockwise to remove.
Metering tip color guide:
TIP COLOR RATIO OZ/GAL ML/L
TAN 128:1 1 7.8
PINK 64:1 2 15.6
LIGHT
BLUE
43:1 3 23.4
RED 32:1 4 31.2
GREEN 26:1 5 39.1
YELLOW 13:1 10 78.2
PURPLE 6.5:1 20 156.4
NO TIP 5:1 25 203