A505-75-880 Issue B
Page 8 © Edwards Limited 2008. All rights reserved.
Edwards and the Edwards logo are trademarks of Edwards Limited.
Installation
10.Use the two 1/4 inch tube inserts (11) to fit the length of 1/4 inch outside diameter vinyl tube (12) between the
GV pump nitrogen inlet fitting (13) and the nitrogen inlet connector (10) on the base assembly.
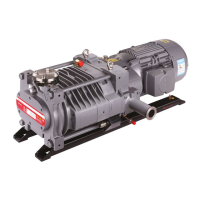
11.Refer to Figure 2. Ensure that the levelling feet (6) are fully raised, then push the pump and base assembly on its
castors (7) into its final operating location.
12.Lower and adjust the levelling feet (6), so that the pump is level and so that it does not rest on the castors.
13.Pass the pump electrical supply cable through the cable-gland (4) and route the cable to the pump-motor.
14.Connect the electrical supply cable to the pump-motor (refer to the GV80 manual), then tighten the cable-gland
(4) to secure the cable.
3.4 Fit the acoustic panel
1. Refer to Figure 1. Slide the motor partition (1) into the rear panel (5), then fit the assembly to the base
assembly so that the motor partition goes over the pump-motor, and so that the locating holes in the bottom of
the motor partition and rear panel go over the locating pins on the base assembly (8).
2. Fit the front panel (12) to the base assembly; ensure that the locating holes in the base of the panel fit over the
locating pins on the base assembly (8).
3. Fit the inlet partition (4) onto the base assembly (8).
4. Fit the top panel (2); ensure that the locating holes under the top panel fit over the locating pins on the tops of
the front and rear panels (12, 5).
5. Fit the right-hand side panel (3) to the base assembly (8): slide the locating holes on the base of the panel over
the locating pins on the base assembly, then swing the top of the panel into place. Ensure that the pump-outlet
does not damage the acoustic foam when you fit the panel. Use the two catches (13) to secure the side panel to
the top panel.
6. Fit the left-hand side panel (11) to the base assembly (8): slide the locating holes on the base of the panel over
the locating pins on the base assembly, then swing the top of the panel into place. Use the two catches (13) to
secure the side panel to the top panel.
7. Refer to Figure 3. Connect your cooling-water supply pipeline to the cooling-water inlet (3) on the services panel
(1).
8. Connect your cooling-water return pipeline to the cooling-water outlet (2) on the services panel (1).
9. Connect your nitrogen supply pipeline to the nitrogen inlet (4) on the services panel.
 Loading...