STRING TRIMMER ATTACHMENT — STA1600/STA1600-FC 19
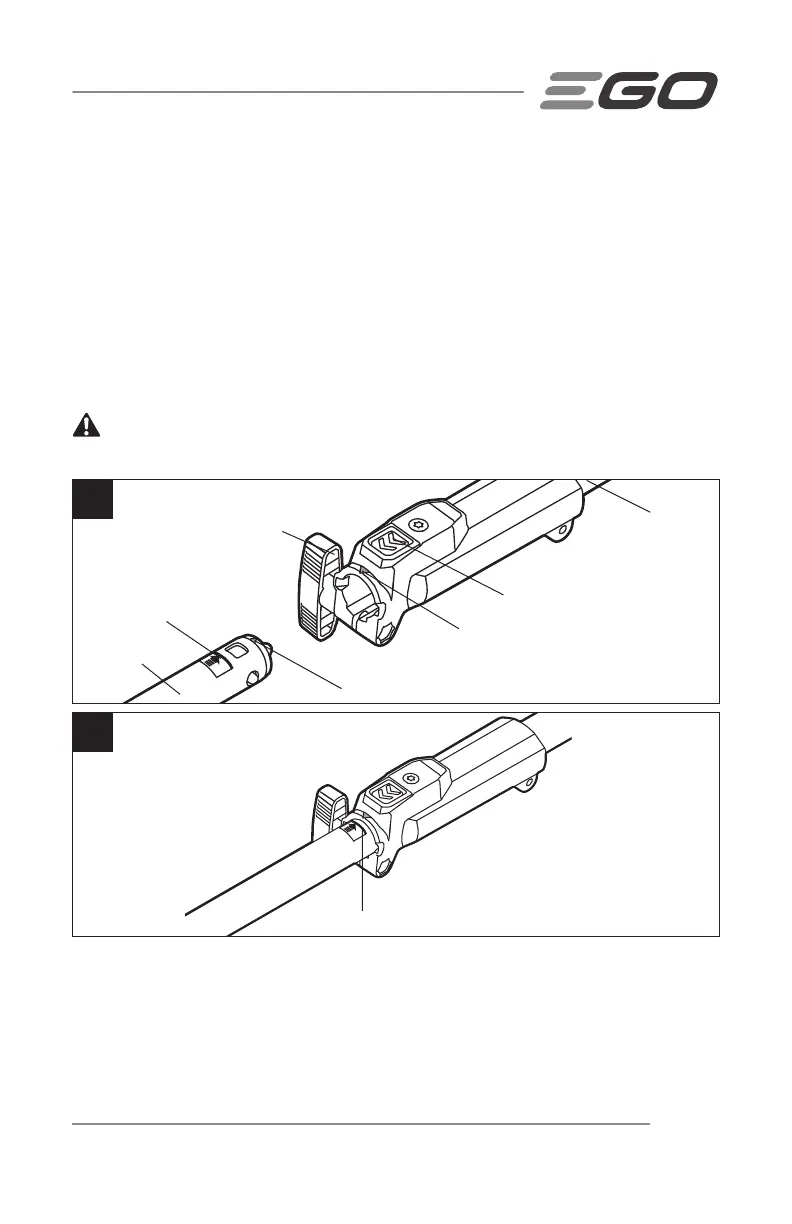
3. If the end cap is on the string trimmer attachment shaft, remove it and save it in a
safe place for later use. Align the arrow on the string trimmer shaft with the arrow
on the coupler (Fig. 4a) and push the string trimmer shaft into the coupler until
you hear a clear “CLICK” sound. The coupler should be positioned all the way to
the RED LINE labeled on the string trimmer shaft: the red line must be flush with
the coupler edge (Fig. 4b).
4. Pull the shaft of the string trimmer attachment to verify that it is securely locked into
the coupler. If not, rotate the string trimmer shaft from side to side in the coupler until a
clear “CLICK” sound indicates that it is engaged.
5. Tighten the wing knob securely.
WARNING:
Be certain that the wing knob is fully tightened before operating the
equipment; check it periodically for tightness during use to avoid serious personal injury.
4a
Arrow on the Coupler
Arrow on the Attachment Shaft
Attachment Shaft
Shaft-release Button
Power-head Shaft
Wing Knob
4b
Red Line
Red Line
REMOVING THE ATTACHMENT FROM THE POWER HEAD
1. Stop the motor and remove the battery pack.
2. Loosen the wing knob.
3. Press the shaft-release button and, with the button depressed, pull or twist the
attachment shaft out of the coupler.