GB
- 19 -
5.1 Fitting the additional handle (Fig. 2)
•
The angle grinder must not be used without
the additional handle (3).
•
The additional handle can be secured in any
of three positions (A, B, C).
Tool side Suitable for
Left (position A / as
shown)
Right-handed users
Right (position B) Left-handed users
Top (position C) Using cutting wheels
5.2 Replacing and adjusting the guard (Fig.
3)
Replacing:
•
Remove the flange nut (b) and the clamping
flange underneath.
•
Undo the screw (a) on the guard (4).
•
Turn the guard (4) through 180° in clockwise
direction so that the guard points upwards.
•
Remove the guard (4).
To mount, proceed in the reverse order.
Adjusting:
•
Adjust the guard (4) to protect your hands
so that the material being ground is directed
away from your body.
•
The position of the guard (4) can be adjusted
to any specific working conditions. Undo the
screw (a) and turn the cover (4) into the requi-
red position.
•
Ensure that the guard (4) correctly covers the
gear wheel casing.
•
Retighten the screw (a).
•
Ensure that the guard (4) is secure.
Make sure that the guard is perfectly secure.
Never use the angle grinder without the gu-
ard.
5.3 Test run for new grinding Wheels
Allow the right-angle grinder to run in idle for at
least 1 minute with the grinding or cutting wheel
fi tted in place. Vibrating wheels are to be replaced
immediately.
6. Operation
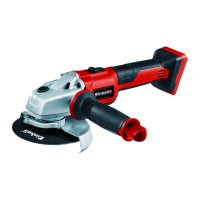
6.1 Charging the Li battery pack (Fig. 1a-1b)
1. Remove the battery pack (6) from the handle,
pressing the pushlock button (8) downwards
to do so.
2. Check that your mains voltage is the same as
that marked on the rating plate of the battery
charger. Insert the power plug of the charger
(7) into the mains socket outlet. The green
LED will then begin to fl ash.
3. Push the battery pack onto the battery char-
ger.
In section 10 (Charger indicator) you will fi nd a
table with an explanation of the LED indicator on
the charger.
If the battery pack fails to charge, check for the
following:
•
voltage at the power socket
•
whether there is good contact at the charging
contacts of the charging unit
If the battery pack still fails to charge, send
•
the charger and charging adapter
•
and the battery pack
to our customer service center.
To ensure that items are properly packaged
and delivered when you send them to us,
please contact our customer service or the
point of sale at which the equipment was
purchased.
When shipping or disposing of batteries and
cordless tools, always ensure that they are
packed individually in plastic bags to prevent
short circuits and fi res.
To ensure that the battery pack provides long ser-
vice, you should take care to recharge it promptly.
You must recharge the battery pack when you
notice that the performance of the device drops.
Never allow the battery pack to become fully di-
scharged. This will cause it to develop a defect.
6.2 Switch (Fig. 4)
The angle grinder comes with a safety switch
which is designed to prevent accidents. To switch
on, push the On/Off switch (2) to the right and
then forwards. To switch off the angle grinder,
depress the On/Off switch (2) at the back. The
On/Off switch (2) will jump back into its starting
position.
Anl_TC_AG_18_115_Li_Solo_SPK13_4431130_11017.indb 19Anl_TC_AG_18_115_Li_Solo_SPK13_4431130_11017.indb 19 14.11.2023 13:47:0514.11.2023 13:47:05

 Loading...