GB
- 20 -
6. Operation
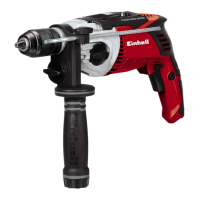
6.1 ON/OFF switch (Fig. 11/Item 5)
•
First fit a suitable drill bit into the tool (see
5.3).
•
Connect the mains plug to a suitable socket.
•
Position the drill in the position you wish to
drill.
To switch on:
Press the ON/OFF switch (5)
Continuous operation:
Secure the ON/OFF switch (5) with the locking
button (4).
To switch off :
Press the ON/OFF switch (5) briefl y.
6.2 Adjusting the speed (Fig. 11/Item 5)
You can infi nitely vary the speed whilst using the
tool.
•
Select the speed by applying a greater or les-
ser pressure to the ON/OFF switch (5).
•
Select the correct speed: The most suitable
speed depends on the workpiece, the type of
use and the drill bit used.
•
Low pressure on the ON/OFF switch (5): Lo-
wer speed (suitable for: small screws and soft
materials)
•
Greater pressure on the ON/OFF switch (5):
Higher speed (suitable for large/long screws
and hard materials)
Tip: Start drilling holes at low speed. Then increa-
se the speed in stages.
Benefi ts:
•
The drill bit is easier to control when starting
the hole and will not slide away.
•
You avoid drilling messy holes (for example
in tiles).
6.3 Preselecting the speed (Fig. 12/Item 6)
The speed controller (6) enables you to defi ne the
maximum speed.
•
Set the speed controller (6) to the required
position.
•
With the On/Off switch (5) pressed right in,
the motor will now run as quickly as was set
at the speed controller (6).
•
The setting can also be made during opera-
tion.
Constant electronics
This tool is equipped with constant electronics.
With constant electronics, the set speed is kept
constant even when the tool is working under
load.
6.4 Clockwise/Counter-clockwise switch
(Fig. 11/Item 7)
•
Change switch position only when the drill is
at a standstill!
•
Switch the direction of the hammer drill using
the clockwise/counter-clockwise switch (7):
Direction Switch position
Clockwise (forwards and drill) Pushed in to the
right
Counter-clockwise (reverse) Pushed in to the
left
6.5 Drill / hammer drill selector switch
(Fig. 12/Item 3)
•
Change switch position only when the
drill is at a standstill!
Drill:
Drill / hammer drill selector switch (3) in the drill
position. (Position A)
Use for: Wood, metal, plastic
Hammer drill
Drill / hammer drill selector switch (3) in the ham-
mer drill position. (Position B)
Use for: Concrete, rock, masonry
6.6 Defi ning the speed range (Fig. 13)
The speed selector switch (10) enables you to
work within a specifi c speed range.
Switch position, setting 1 (A)
Speed range: High torque, low speed
Switch position, setting 2 (B)
Speed range: Low torque, high speed
Important. Do not attempt to make this setting
whilst the drill is in use.
Anleitung_TE_ID_1050_CE_SPK7.indb 20Anleitung_TE_ID_1050_CE_SPK7.indb 20 16.10.13 15:4116.10.13 15:41