13
GAS CONNECTION
Prior to connecting the appliance check that the data on the rating plate affixed to the bottom of the
appliance, correspond to those of the gas mains.
A duplicate Data Label is supplied to adhere in an accessible area next to the appliance. This appliance is
suitable for Natural Gas and Universal LPG; ensure that the available gas supply matches the Data Label.
Once installed, check there are no leaks using a soapy solution (never a flame).
The appliance’s gas inlet fitting is a ½” male threaded cylindrical gas type in accordance with the UNI-ISO
228-1 standards.ISO 7
The gas connection is situated at the rear of the appliance, 105mm from the right side and 45mm from the rear of
the hotplate.
There are two ways to carry out the connection to the main gas line:
A. The hotplate can be connected with rigid pipe as specified in AS5601 .
B. The hotplate can be connected with a Flexible Hose, which complies with AS/NZS 1869 (AGA Approved), 10mm
ID, class B or D, no more than 1.2m long and in accordance with AS5601. Ensure that the Hose does not contact
the hot surfaces of the hotplate, oven, dishwasher or other appliance that may be installed underneath or next to the
hotplate. WARNING: Ensure that the hose assembly is restrained from accidental contact with the flue or flue outlet
of an under bench oven. The hose should not be subjected to abrasion, kinking or permanent deformation and
should be able to be inspected along its entire length. Unions compatible with the hose fittings must be used and
connections tested for gas leaks. The supply connection point shall be accessible with the appliance installed.
CAUTION !!
Carry out the connection avoiding all kinds of stress to the appliance.
ELECTRICAL CONNECTION
The electrical connection must be carried out in accordance with the current standards and laws in force.
Prior to connecting check that:
• the system and electrical sockets amperage is adequate for the appliance’s maximum power (see data label
affixed on the bottom of the appliance).
• the socket or system has an effective earth connection in accordance with current standards and with the law. All
responsibility is disclaimed if this is not complied with.
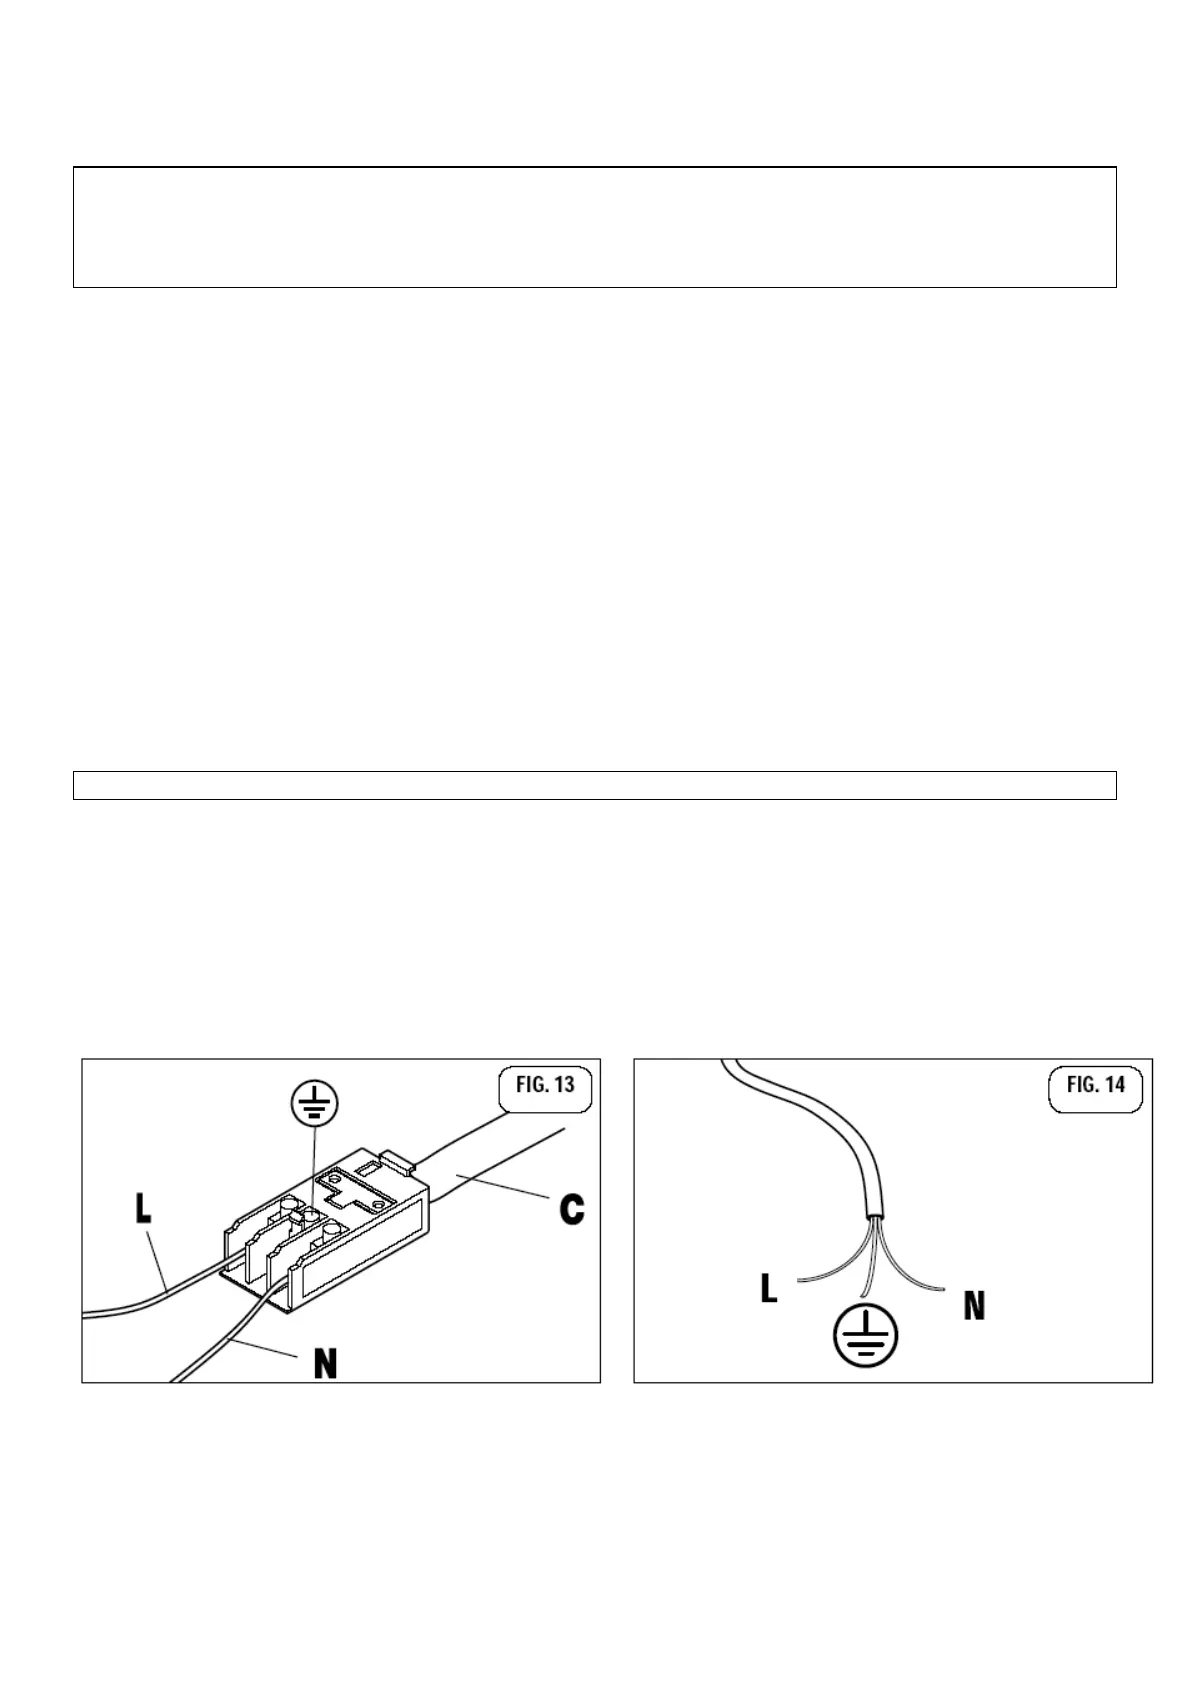
When connecting to the mains with a socket:
• Fit to the power cable (C)(if without – fig. 13) a standardized plug, suitable for the load which is indicated on the
data label. Connect the wires making sure they correspond as shown below, and remember that the earth wire
must be longer than the phase wires (fig. 14):
letter L (phase) = brown wire
letter N (neutral) = blue wire
symbol (earth) = green/yellow wire.
• The power cable must be laid so that no parts of it ever reach an over temperature of 75 K.
• For connecting do not use reductions, adapters or shunts as they could cause false contacts resulting in