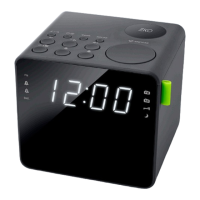
The EKO AM/FM Alarm Clock Radio, model KAC7, is a compact and versatile device designed to provide timekeeping, alarm functions, and radio entertainment. It features a sleek, modern design with a black finish and a green accent on the side. The front of the device displays the time in a clear, digital format, and it is equipped with various buttons for control and settings.
Function Description:
The EKO KAC7 serves multiple functions:
- AM/FM Radio: It allows users to tune into both AM and FM radio frequencies for listening to broadcasts.
- Alarm Clock: The device includes alarm functions, allowing users to set alarms to wake up to either a buzzer or a radio station. It supports two independent alarms (ALARM 1 and ALARM 2).
- Clock Display: It displays the current time digitally.
- Sleep Function: This feature allows the radio to play for a set duration (120, 90, 60, 30, 15, or 10 minutes) before automatically turning off, ideal for falling asleep to music.
- Nap Function: A dedicated nap function provides a short period of sleep, with the buzzer sounding after the set time.
- AUX Source Connectivity: The device can connect to an external audio source (e.g., MP3 player) via an AUX input, allowing it to function as a speaker for other devices.
- Dimmer: The display brightness can be adjusted to suit user preference.
Important Technical Specifications:
- Power Supply: Input: 230-240V ~ 50Hz
- Power Consumption: 4W
- Speaker Driver: 1 x 2.25"
- Backup Clock Batteries: 3V (2x AAA, not included)
- FM Frequency: 87.5 - 108 MHz
- AM Frequency: 522 KHz - 1620 KHz
Usage Features:
Basic Operation:
- Antenna: For optimal FM/AM reception, the wire antenna should be fully extended. If reception is weak, rotating or repositioning the unit may improve it.
- Backup System: All settings, including the clock, are memorized. In case of power failure, if backup batteries are not installed, the screen will flash, indicating the need to redo settings.
- Power ON/OFF: Press the Standby button (8) once to turn on the unit. Press and hold the Standby button (8) for two seconds to turn off the unit.
- Selecting a MODE: When the unit is powered ON, press the Standby button (8) to cycle through modes: FM / AM / AUX.
Setting the Clock:
- In standby mode, press and hold the Clock Setting / Memorisation button (2) until the display flashes.
- Set the time by pressing the HR. (3) and MIN (4) buttons for hour and minute respectively.
- Press the Clock Setting / Memorisation button (2) to confirm the time.
Tuning the Radio:
- Manual Tuning: When the unit is powered on, repeatedly press the Mode Selector (FM / AM / AUX) button (8) to select AM or FM band. Press and hold the Volume Down button (3) or Volume Up button (4) to start the auto scan process. MANUAL SEARCH - Press once to manually scan through radio stations.
- Presets: The device can store up to 10 FM and 10 AM stations.
- Automatically Store Radio Stations: In FM mode, press and hold the Auto Scan / Preset Stations button (5) for a few seconds. The unit will automatically save the first 10 FM stations. If a channel is already preset, the previous station will be cleared and replaced by the new station.
- Manually Store Radio Station:
- Repeatedly press the Mode Selector (FM / AM / AUX) button (8) to select FM or AM band.
- Select a radio station manually or in automatic search.
- Press the Clock Setting / Memorisation button (2). "P 01" blinks on the screen.
- Press the Volume Down button (3) or Volume Up button (4) button to select a channel.
- Press the Clock Setting / Memorisation button (2) to save it.
- Repeat steps 1-5 to store other stations.
- Listening to Station Presets: Press the Mode Selector (FM / AM / AUX) button (8) to select FM or AM band. Then press the Auto Scan / Preset Stations button (5) and repeat the operation as many times as necessary to select your station. Press the Volume Down button (6) or Volume Up button (7) to adjust the sound level.
Setting the Alarm and the Alarm Mode:
- In standby mode, press and hold the ALARM 1 button (10) for a few seconds until the display blinks.
- Press the Volume Down button (3) or Volume Up button (4) button to select the source of wake up [BB] buzzer, or [F] radio.
- Press the ALARM 1 button (10) then press HR. (3) and / or MIN. (4) button to set the time of wake up.
- Press the ALARM 1 button (10) to confirm, the alarm 1 indicator lights up.
- Note: Same procedure applies for alarm 2 with ALARM 2 button (9).
- If you wake up with the radio, select your desired station, then long press the Power ON/OFF button to turn off the radio before the alarm time reaches. For station selecting, please refer to "LISTENING TO RADIO".
- The previous level of listening is stored; the volume of the alarm will be identical. If you wake up with the radio, do not forget to check the volume level. Press Power ON/OFF button (8) and Volume Down button (6) or Volume Up button (7) then press Power ON/OFF button (8) again.
- If you use the sleep mode with low sound level, you should use the buzzer to wake you up.
Stopping the Alarm:
- Alarm Repetition (Snooze): Press the Snooze Button (11) button. The alarm stops and will sound again 9 minutes later.
- Alarm Stop: Press the Power ON/OFF button (8) or ALARM 1 button (10) button. The alarm 1 will sound again the next day at the same time.
- Alarm Cancellation: In Standby mode, press the ALARM 1 button (10) button to cancel the alarm 1 permanently. The alarm 1 indicator lights off.
- Note: Same procedure applies for Alarm 2 with ALARM 2 button (9) button.
Sleep Function:
To fall asleep with the radio, Press the Power ON/OFF button (8) button then the NAP (Wakeup) / SLEEP Function button (1) button to select 120-90-60-30-15-10 or 5 minutes of listening. Indicator lights up. The unit will automatically turn off after the specified time. To cancel the sleep function, repeatedly press the NAP (Wakeup) / SLEEP Function button (1) button until "OFF" display or Long press the Power ON/OFF button (8) button until indicator lights off.
Nap Function:
This function wakes you up after a short period of time. Only the buzzer may be selected.
- In standby mode, press the NAP (Wakeup) / SLEEP Function button (1) button to select 120-90-60-30-15-10 or 5 minutes for your nap. The indicator lights nap.
- To stop the alarm, press the NAP (Wakeup) / SLEEP Function button (1) or Power ON/OFF button (8).
- To cancel the function, press the NAP (Wakeup) / SLEEP Function button (1) button repeatedly until OFF is displayed.
Connecting the AUX Source:
- Connect your auxiliary source (e.g. mp3 player) to the AUX IN jack on the back of unit (cable not included).
- When the unit is on, press the Power ON/OFF button (8) button on unit repeatedly to select AUX mode. The display will show "AU" for a few seconds and change to clock time.
- Start playback from your auxiliary source.
- Adjust the volume to desired level.
- To stop playback, disconnect your auxiliary source from the AUX IN jack.
Dimmer:
Press the Dimmer button (11) button to select the brightness of the screen: high, low or off.
Maintenance Features:
General Safety Precautions:
- Read the manual thoroughly before use and keep it for future reference.
- Ensure the product is placed on stable furniture and not overhanging edges.
- Do not place the product on high furniture without securing both the furniture and the product to a stable support.
- Do not place the product on cloth or other conductive materials.
- Warn children of the dangers of climbing on furniture to reach the product or its controls.
- Do not expose the product to rain or moisture, or temper/modify it.
- Only use accessories outlined and recommended by the manufacturer.
- Avoid exposing the product to splashing water.
- Do not place any object on top of the product.
- The apparatus should be positioned in a sufficiently stable location to prevent injury from falling.
- Do not expose the apparatus to dripping or splashing liquids, and do not place objects filled with liquids (like vases) on the product. Dry location use only.
- No naked flame sources, such as candles, should be placed on the product.
- Do not cover ventilation openings with items such as newspapers, tablecloths, curtains, etc. This could result in temperature rise and fire.
- The double insulation symbol indicates that the appliance has double insulation between dangerous mains voltage and parts accessible to the user. In case of repairs, use only identical spare parts.
- If you notice any unusual odors or smoke, disconnect the unit immediately and contact the service center.
- Do not use the unit for long periods of time or when moving it.
- Dust could accumulate over time, causing heat generation and fire risk.
- The product is not intended for use by persons (including children) with reduced physical, sensory or mental capabilities, or young children of any age.
- Batteries must be removed by an adult; keep them out of reach of infants and children. Seek medical attention if a child has swallowed a battery.
- To maintain the product, use a dry cloth to wipe down marks or dust and unplug the product from the power socket before cleaning.
- Ensure to contact the call center for any repair or service required.
Placement Guidelines:
- Not wet or damp and Well ventilated.
- Away from direct sunlight or heaters.
- Away from splashes or food.
- Protected from excessive dust or grease.
- Do not place this equipment in a confined space such as a bookcase or similar unit. Allow 20cm above and 5cm spacing on both sides for proper ventilation.
- Do not place the Product near heat sources such as radiators, stoves or other audio visual equipment that produce heat.
- Do not place small metallic objects on top of the unit.
- Do not use or store flammable or combustible materials near the unit. Doing so may result in fire or explosion. Do not place any naked flame sources, such as lit candles, cigarettes or incense sticks on top of the product.
Troubleshooting:
The manual provides a troubleshooting guide for common issues:
- No Power: Check if the power cable is connected and if the power socket is switched on. Ensure the plug is connected and there is power at the AC outlet.
- Radio reception weak: Extend or re-position the FM pig-tail antenna. Re-position the main unit for FM reception. Keep the clock radio away from other electronic devices to avoid radio interference.
- No sound: Adjust volume control to minimum or increase the volume level. Adjust volume on the Bluetooth-connected device.
- Time reset to 12:00: Backup batteries exhausted or clock not set. Replace the batteries and set the clock following steps on page 10.
- Alarm does not sound: Alarm mode not active or clock not set. Activate the alarm following steps on page 10 and set the clock following steps on page 10.
- Clock/alarm setting erased: Power has been interrupted or power plug has disconnected. Make sure the plug is connected and reset the clock/alarm.