11
Make sure to place the projector on a flat and stable surface that is level. So that
the projector projects the video/image onto the wall nice and straight.
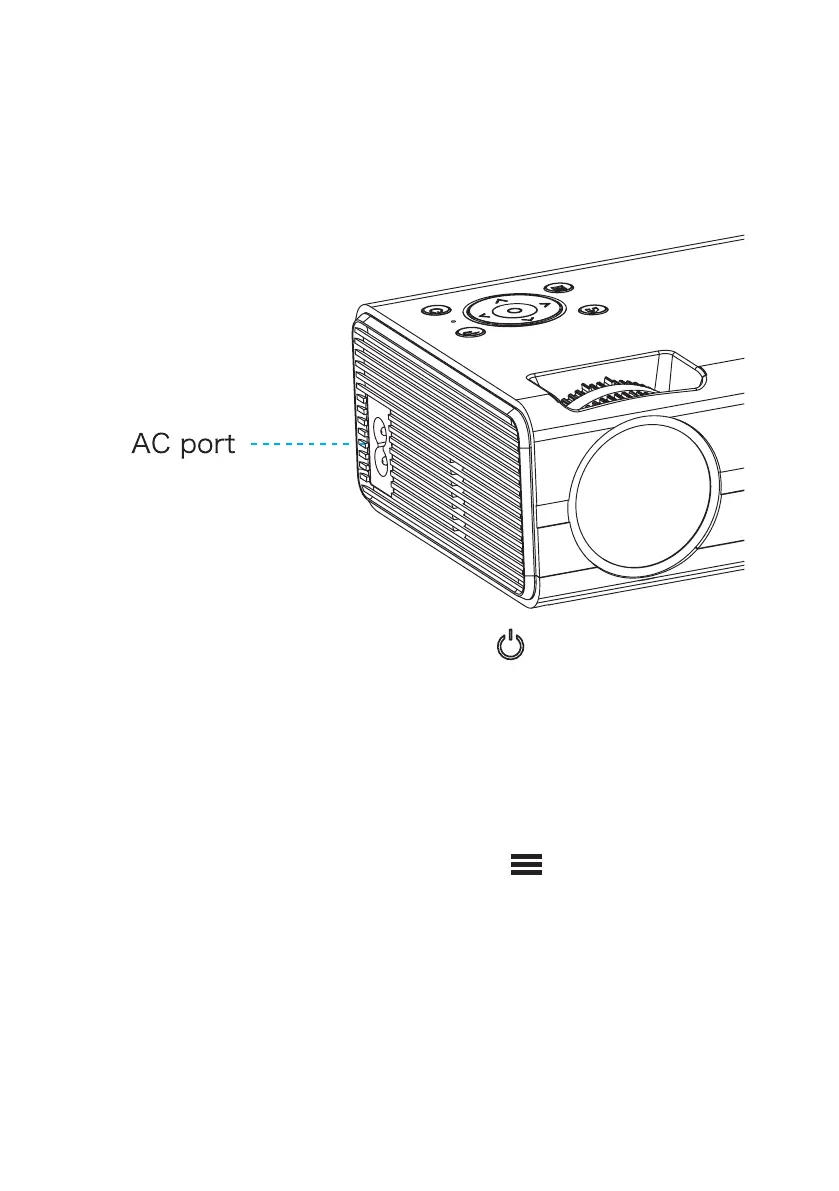
1. Plug in the Power cable into the AC Port of the Projector. Then plug in
the other end into a wall power socket.
FIRST TIME SETUP
2. Once the power is plugged in, Press the button located at the top
to turn on the projector.
3. You can now need to connect a source of media to play from to project
onto the wall. This can be through:
a. HDMI
b. USB
c. AV IN (Red, White, Yellow to 3.5mm Jack)
4. When you plug in a media source, you must select the INPUT source
you want to view. By doing this, press the button for the INPUT
menu to appear, then navigate with the arrow buttons, and press the
Circle button to select the INPUT.
5. Once you have selected the INPUT, you can now adjust the VOLUME and
manually adjust the focus of the projector lens to suite your needs
depending on the distance from the wall your projector is.
PLEASE FOLLOW THE NEXT STEPS ON HOW TO MANUALLY ADJUST THE FOCUS.
 Loading...