4 of 13
11. Right-click on the HR2 communication device added in step 4 above and select “Configure Attached
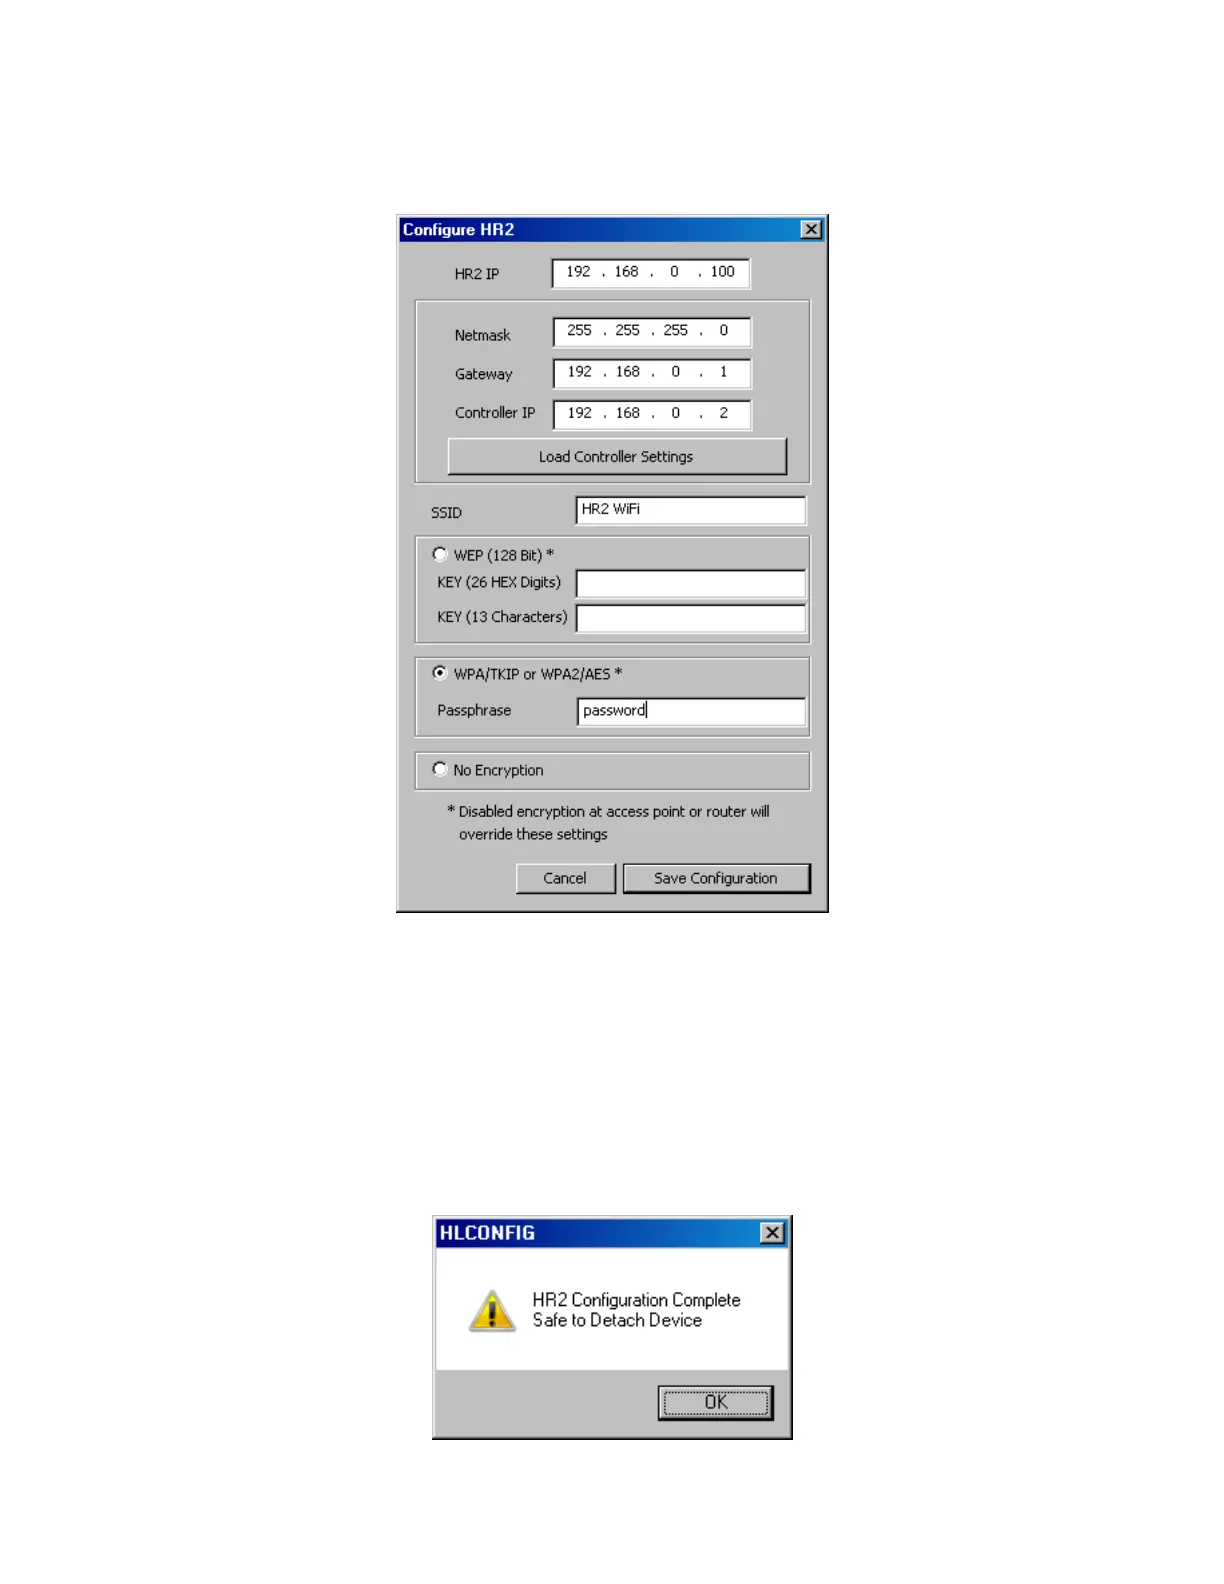
HR2” from the menu. This will bring up the Configure HR2 dialog box as shown below.
12. Click the Load Controller Settings to automatically set the net mask, Gateway address, and Controller
IP address. This will also set the HR2 IP address to a default value based on the Gateway address
loaded from the Controller. (Note: Your HC Controller must be assigned a static IP for this function!)
13. Enter your predetermined static IP address for the HR2 in the HR2 IP field. Note the static IP must be
outside of the network DHCP range, and not currently in use by another device. If you do not know
this address you will need to get it from your network administrator.
14. Enter the SSID for the wireless access point that the HR2 will be connecting to.
15. Select the encryption type and enter the wireless password in the appropriate field.
16. Click Save Configuration to write all of this information down to the remote. Once complete you will
get the notification below that it is safe to disconnect the USB.