4
Wall-mount enclosure installation
Tools and installation
The following tools are required to
install the controller:
• drill
• 6 mm drill bit
• Screwdriver
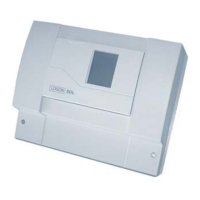
Open up the enclosure. You can
use the bottom part as a template
to locate the mounting holes. Drill 6
mm holes at the marked locations.
Fasten the bottom part of the enclo-
sure to the wall using the anchors
and screws provided. Connect the
sensor, supply and pump wiring to
the terminals as shown in the dia-
gram below.
Mount the controller on the connec-
tor provided. You can now refasten
the bottom cover of the enclosure.
Ensure that the electrical wiring is
connected properly and use the
strain relief provision when faste-
ning the wires.
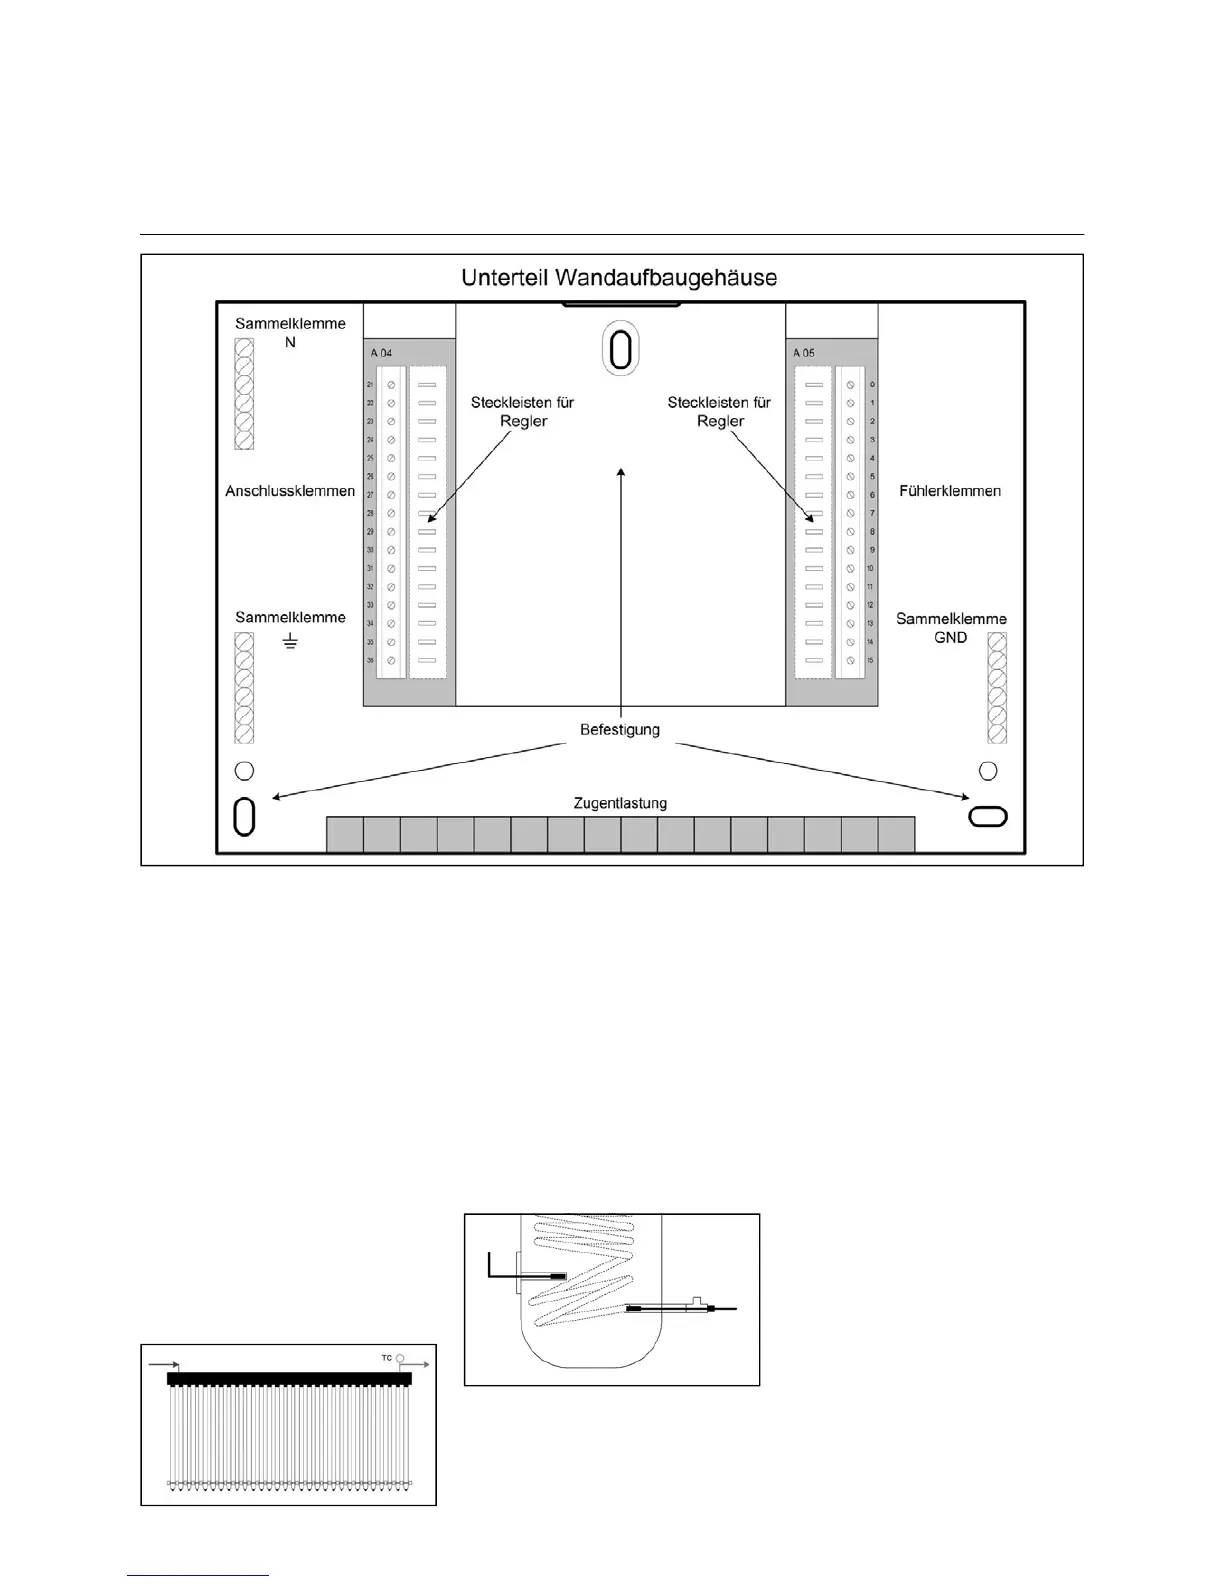
Sensor location
The collector sensors shall be mounted
in the supply connection (hot side) of
the collector.
Some solar system components can
become very hot (risk of burn injuries).
The return-line sensors can be mounted
in the lower part of the storage tank or the
return line from the solar heating system.
Thermowells are installed about halfway
up the storage tank to mount the upper
storage tank sensors.