K3 KSYN3 Gain Modification Page 3 of 5
Installing the New Resistor
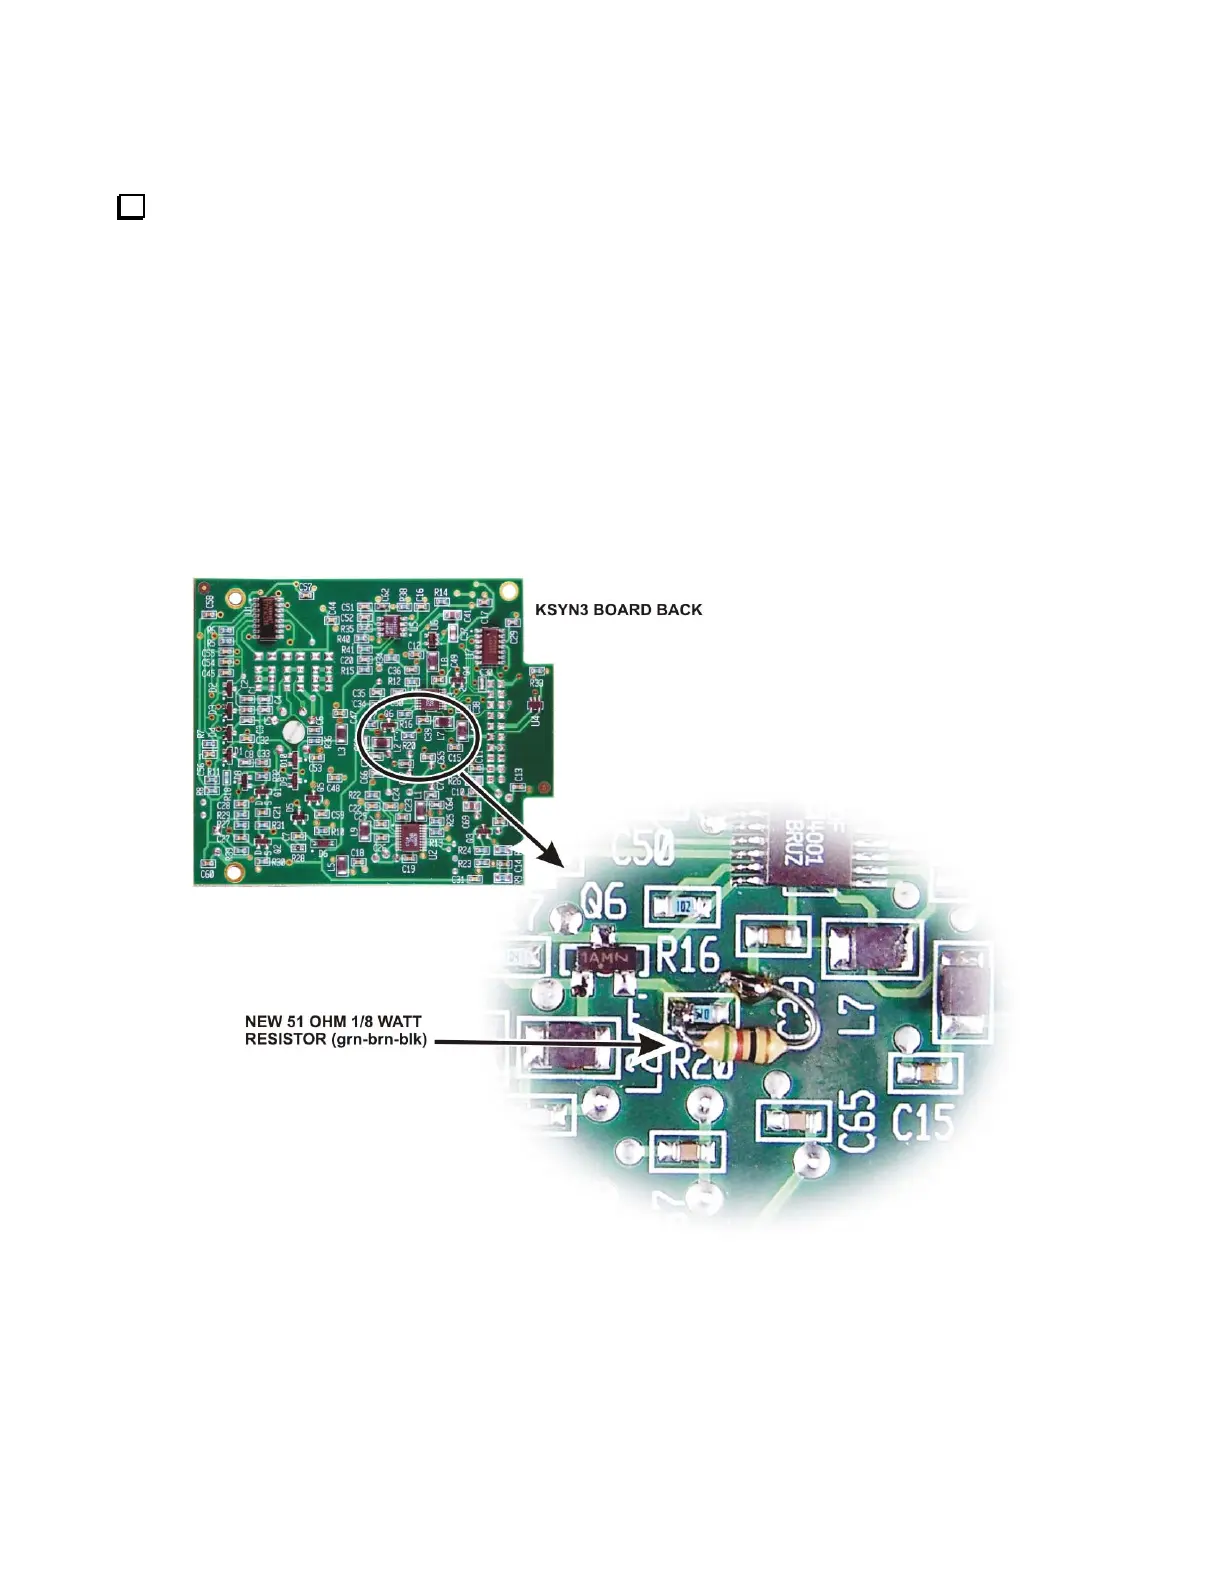
Use your DMM to check the resistance of R20. R20 is shown in Figure 3 below. If the resistance is close to
25 ohms your synthesizer has already been modified. Do not install the 51 ohm resistor. If the resistance is about
50 ohms, install the 51 ohm 1/8 watt resistor (grn-brn-blk) across it as shown in the figure. Note that:
One end of the leaded resistor is connected directly to R20. Do not hold your iron on the connection for
more than one or two seconds. Longer times may cause the SMD to pop off of the board. It is a 51 ohm
resistor and the low value allows heat to conduct quickly, desoldering both ends at once. Tin the lead on
your resistor first, then while holding it in place, quickly tack it onto the end of R20
The other end of the leaded resistor is soldered to a via (plated hole) in the KSYN3 board. This hole
may be open or already filled with solder. It is not necessary (or desirable) to poke the lead through the
via. If via is open, trim the lead so it will just enter the via without passing all the way through. If the via
is already filled with solder, lay the lead against the existing solder and tack it in place just as you did
with the end at R20.
Figure 3. New Resistor Installed on KSYN3 Board.



 To Next Page