7
4. Remove protective plastic film, if present, from the hood
body and hang on the wall bracket.
Install the two anti-tilt fasteners.
RANGEHOOD INSTALLATION (CONT)
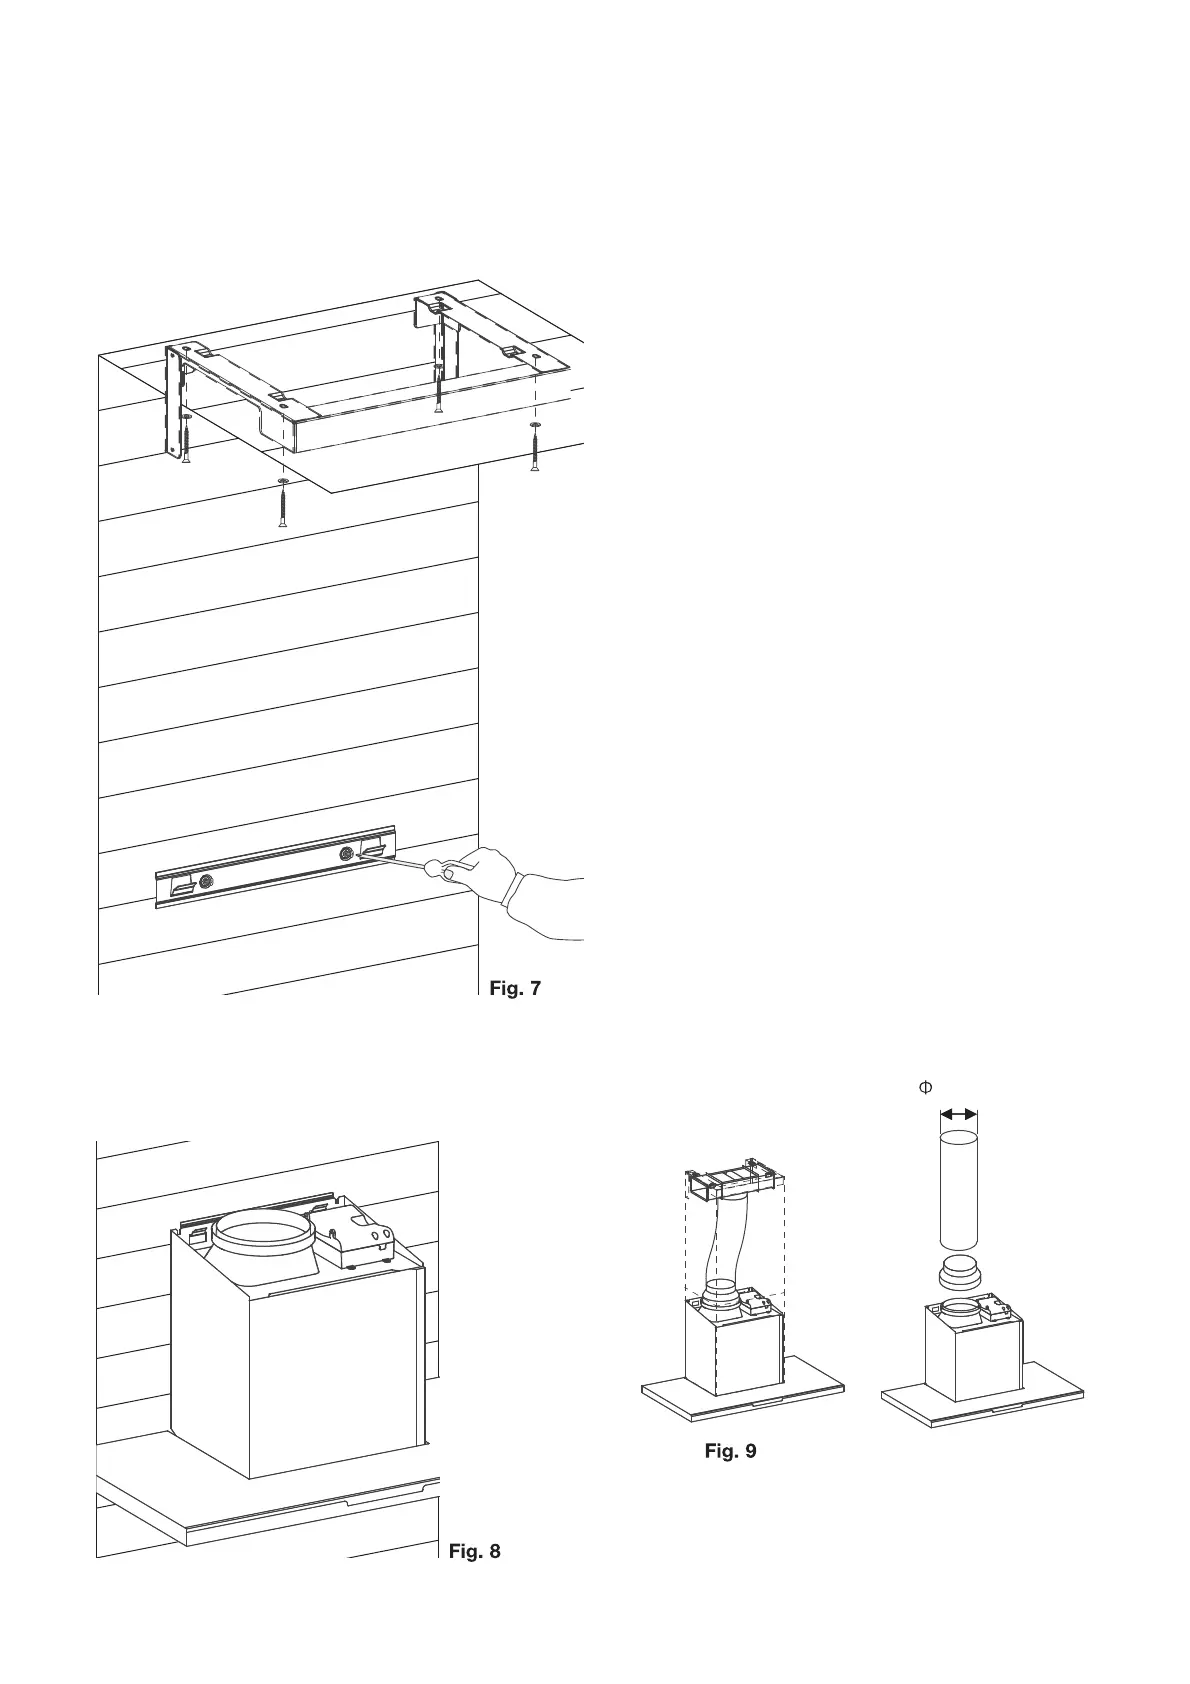
3. Install flue cover wall mounting brackets with suitable
fixings. Install suitable screws for cooker hood mounting
points (to support a total weight of 30kg) to the wall as
marked (Fig. 6).
Depending on the preferred installation/ducting mode,
follow step 5a or 5b below.
5a. Recirculating mode (Fig. 9).
Using the centre line, secure the recirculating T-piece to the
wall with suitable screws/fixings. Install flexible pipe between
T-piece and the exhaust transition duct. Use cable ties or
suitable duct tape to secure flexible pipe to T-piece and
transition duct (Fig. 11).
NOTE: When installed in recirculating mode, it is
recommended to use a carbon lter to prevent odours
being emitted back into the room.
5b. Ducted mode (Fig 10.)
The canopy rangehood has been supplied with a duct
transition and 150mm diameter flexible flue. Fit the flexible
flue to the duct transition (Fig. 10). Use cable ties or
suitable duct tape to secure flexible pipe to the duct
transition.
NOTE: For ducted mode, we recommend extending
ue pipe through the roof to external “china hat” to vent
exhaust externally. We do not recommend venting into
ceiling cavity.
NOTE: To ensure optimum performance of the
rangehood, the use of rigid ducting is recommended.
The use of bends should be avoided. All ducting must
be re retardant
150mm
Fig 10