5. When the time ends, press and turn
the knob for the heating functions to the
off position.
8.4 Setting: Time Delayed Start
1. Turn the knobs to select the heating
function and to set the temperature.
2. Press until the display shows: and
.
3. Turn the control knob to set the start time.
4. Press .
The display shows: --:-- .
5. Turn the control knob to set the end time.
6. Press
.
The timer starts counting down at a set start
time.
7. When the time ends, press and turn
the knob for the heating functions to the
off position.
8.5 Setting: Uptimer
1. Turn the knob for the heating functions to
to enter Menu.
2. Turn the control knob to select /
Uptimer. Refer to "Daily Use" chapter,
Menu: Settings.
3. Press .
4. Turn the control knob to turn the Uptimer
on and off.
5. Press .
8.6 Setting: Time of day
1. Turn the knob for the heating functions to
to enter Menu.
2. Turn the control knob to select / Time
of day. Refer to "Daily use" chapter,
Menu: Settings.
3. Turn the control knob to set the clock.
4. Press .
9. USING THE ACCESSORIES
WARNING!
Refer to Safety chapters.
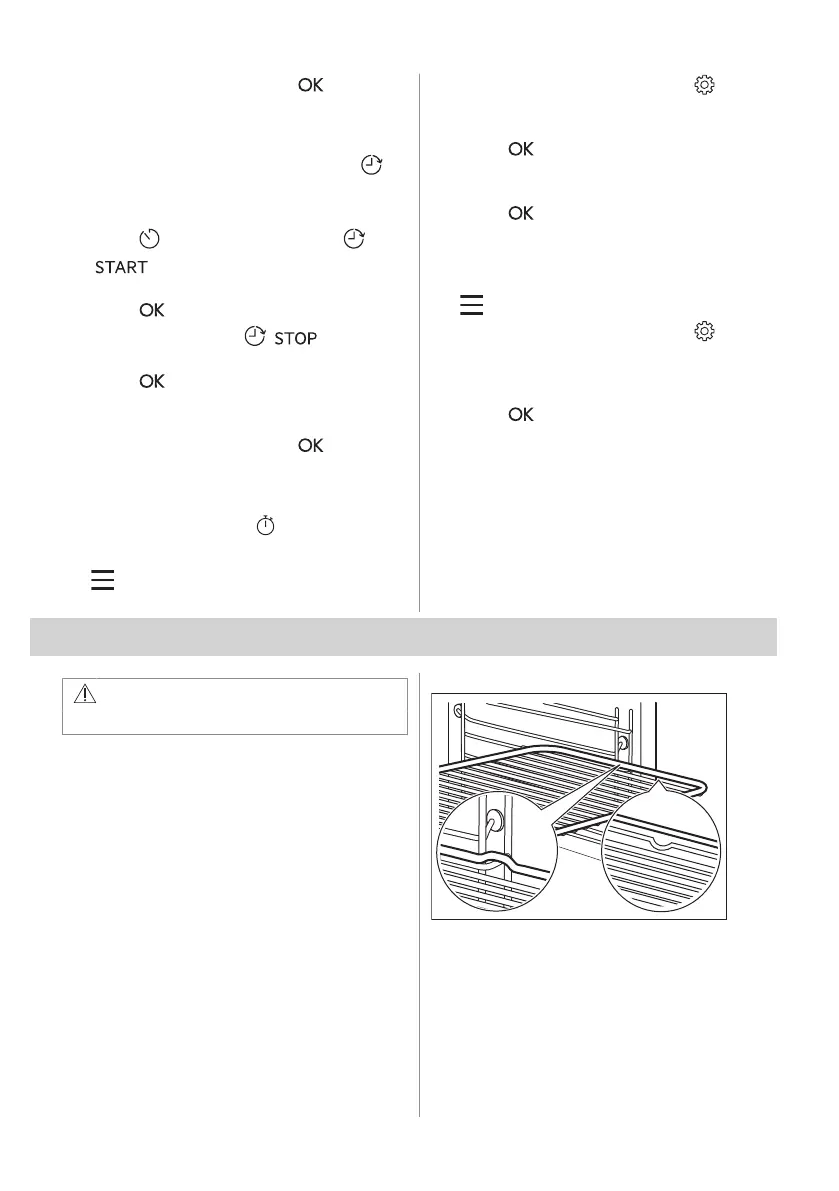
9.1 Inserting accessories
A small indentation at the top increases
safety and provides tilt protection. The
indentations are also anti-tip devices. The rim
around the shelf prevents cookware from
slipping off the shelf.
Wire shelf
Insert the shelf between the guide bars of the
shelf support. Make sure that the shelf
touches the back of the oven interior.
ENGLISH 13