Installation instructions
Pe#orming Installation Cycle
With your washer in final location, perform an Installation Cycle to assist in proper installation.
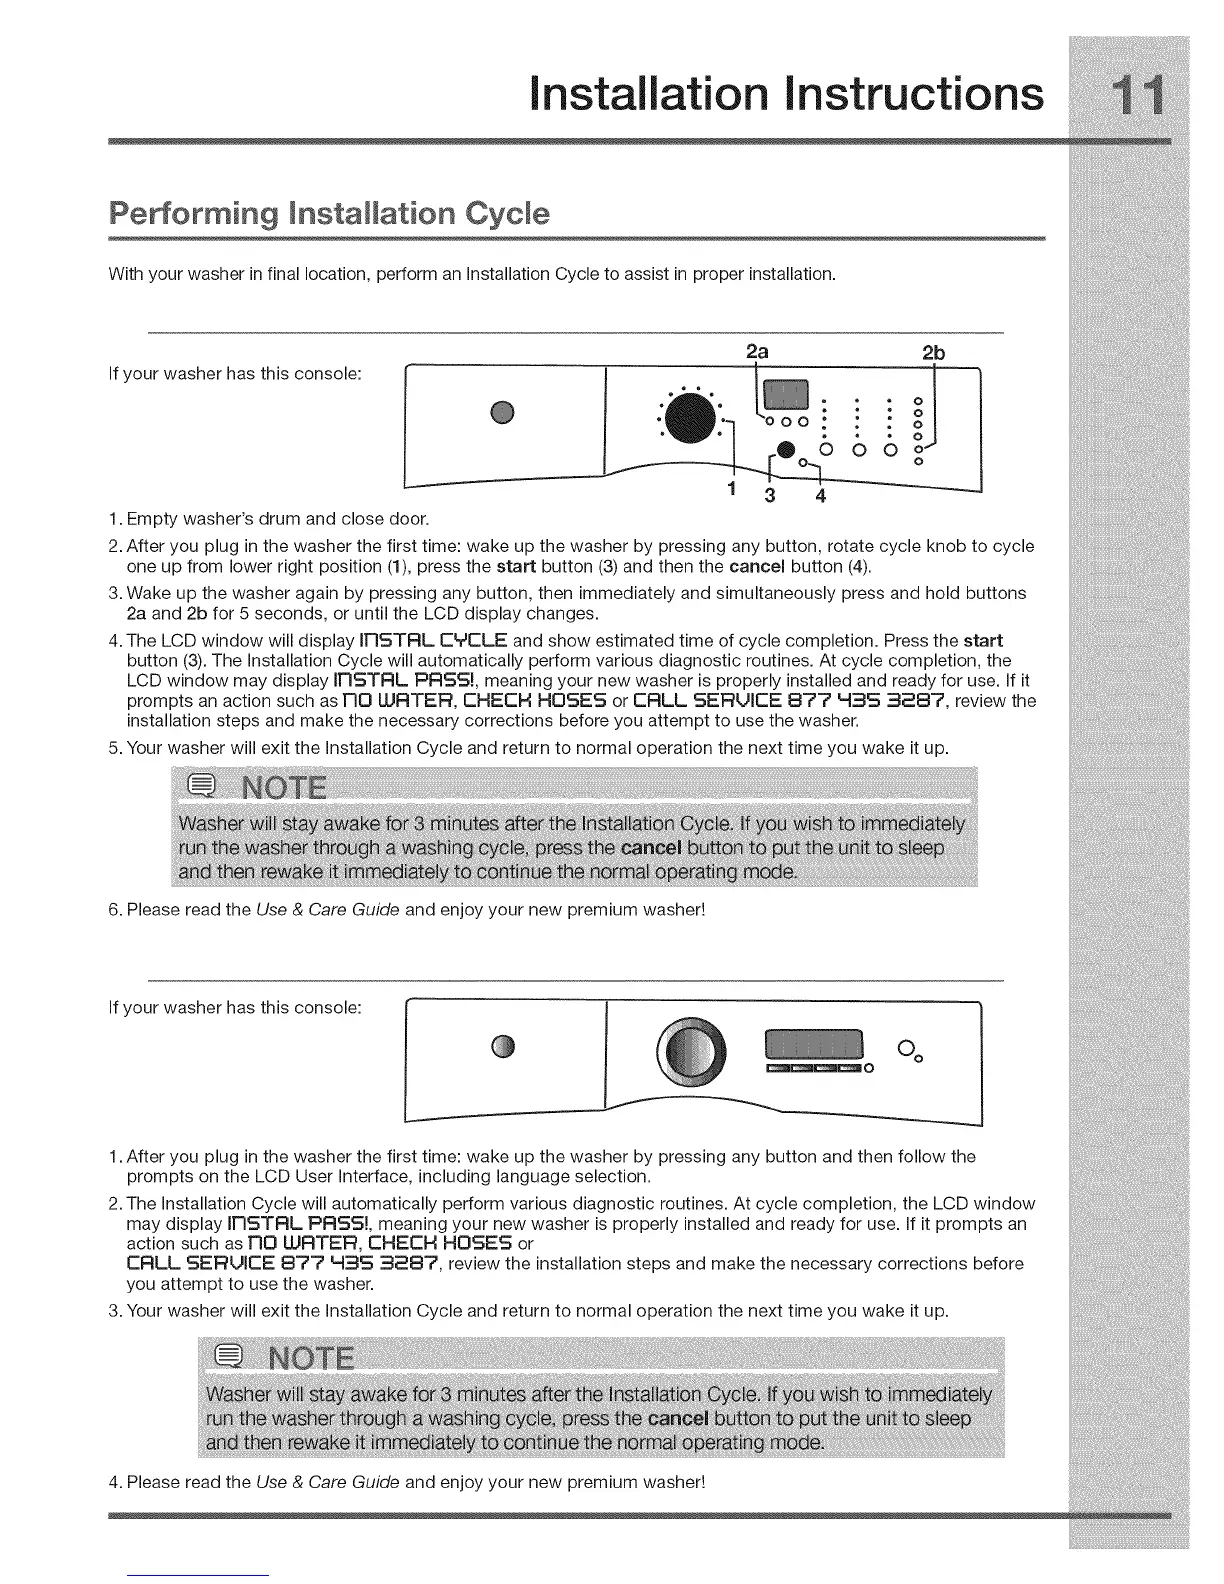
If your washer has this console:
1 3 4
1. Empty washer's drum and close door.
2. After you plug in the washer the first time: wake up the washer by pressing any button, rotate cycle knob to cycle
one up from lower right position (1), press the start button (3) and then the cancel button (4).
3. Wake up the washer again by pressing any button, then immediately and simultaneously press and hold buttons
2a and 2b for 5 seconds, or until the LCD display changes.
4. The LCD window will display IFISTRL CYCLE and show estimated time of cycle completion. Press the start
button (3). The Installation Cycle will automatically perform various diagnostic routines. At cycle completion, the
LCD window may display IFISTRL PRS5!, meaning your new washer is properly installed and ready for use. If it
prompts an action such as nO LIJRTER, CHECN HOSES or CRLL 5ERUICE 877 H3S 3287, review the
installation steps and make the necessary corrections before you attempt to use the washer.
5. Your washer will exit the Installation Cycle and return to normal operation the next time you wake it up.
6. Please read the Use & Care Guide and enjoy your new premium washer!
If your washer has this console:
oo
1. After you plug in the washer the first time: wake up the washer by pressing any button and then follow the
prompts on the LCD User Interface, including language selection.
2. The Installation Cycle will automatically perform various diagnostic routines. At cycle completion, the LCD window
may display InSTRL PRS5!, meaning your new washer is properly installed and ready for use. If it prompts an
action such as nO WRTER, CHECN HOSES or
CRLL SERUICE 8?? 43S 328?, review the installation steps and make the necessary corrections before
you attempt to use the washer.
3. Your washer will exit the Installation Cycle and return to normal operation the next time you wake it up.
4. Please read the Use & Care Guide and enjoy your new premium washer!