IInnssttaallllaattiioonn IInnffoorrmmaattiioonn
2-11
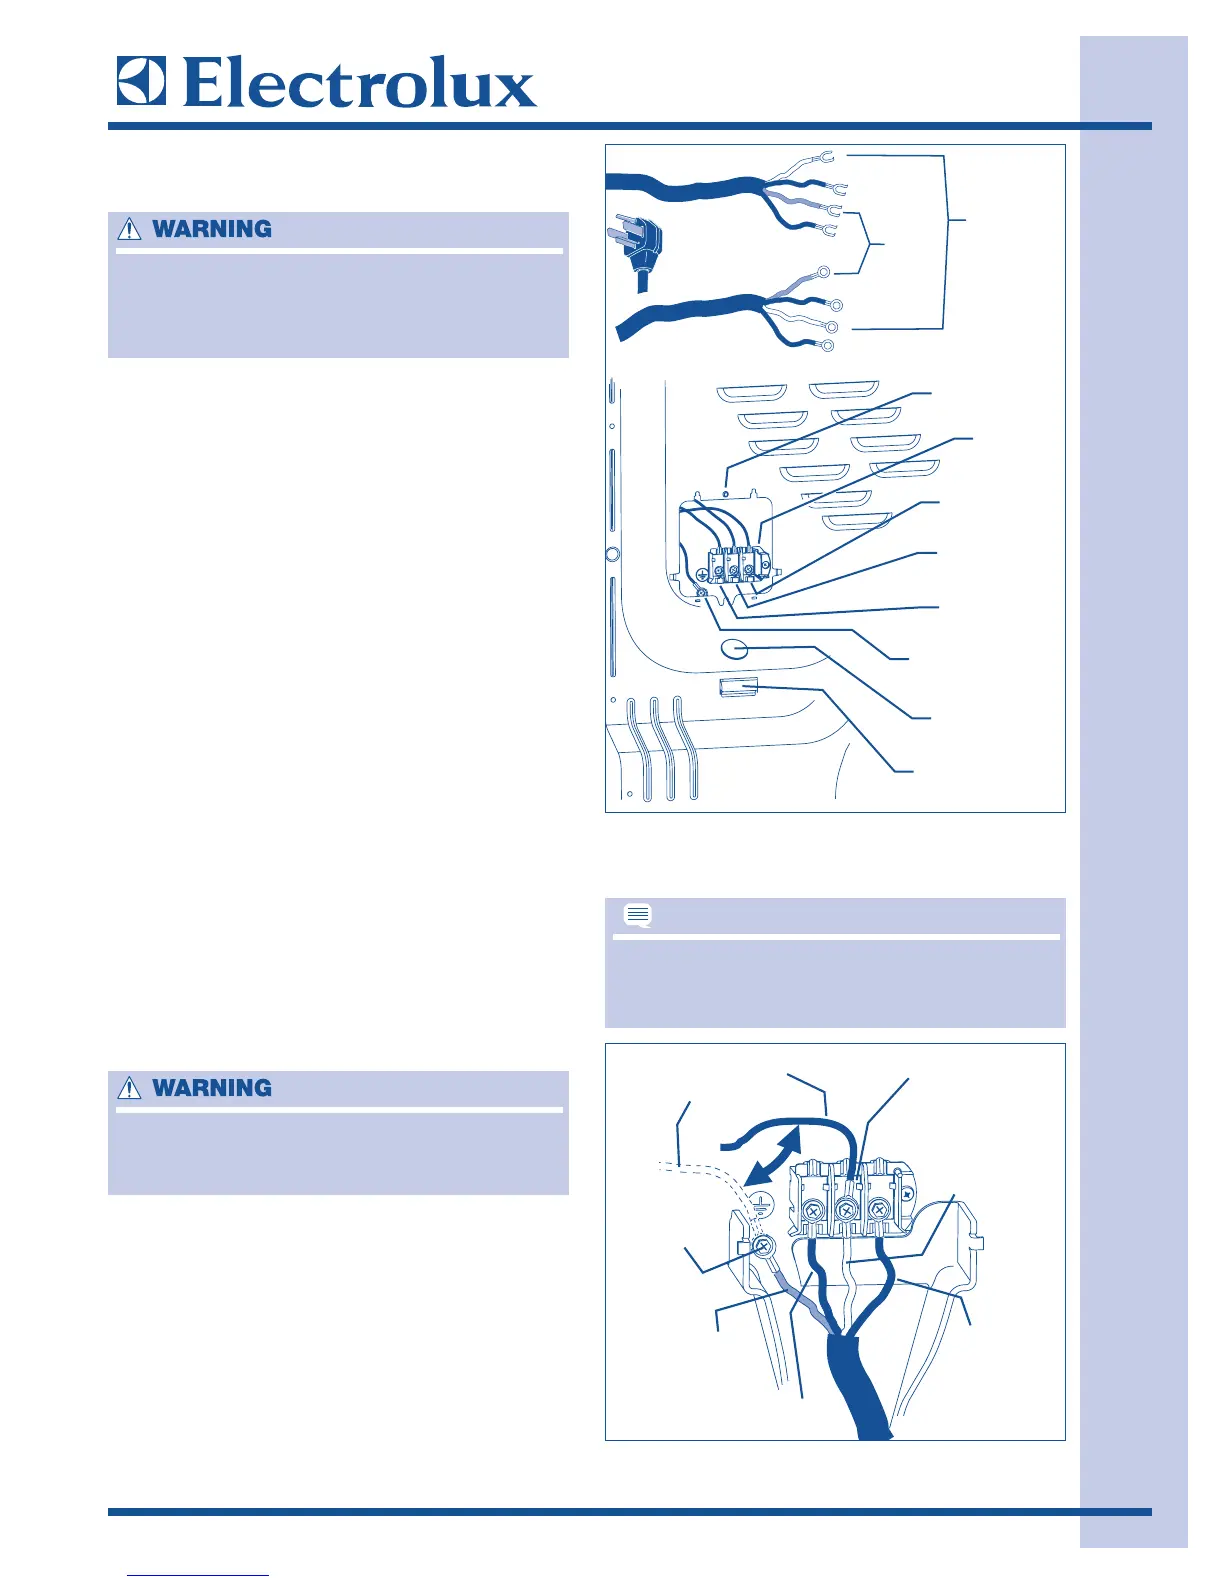
FFiigguurree 22--1111..
FFiigguurree 22--1100..
EElleeccttrriiccaall CCoonnnneeccttiioonn ((nnoonn--CCaannaaddaa)) -- 44 WWiirree CCoorrdd
1. Turn off power supply to outlet.
2. Remove the screw securing the terminal block
access cover in the lower corner on the back
of the dryer.
3. Install a UL-approved strain relief according
to the power cord/strain relief manufacturer’s
instructions in the power cord entry hole below
the access panel. At this time, the strain relief
should be loosely in place.
4. Thread an UNPLUGGED, UL-approved, 30
amp. power cord, NEMA 14-30 type ST or
SRDT, through the strain relief.
(See Figure 2-10)
5. Disconnect the internal (BLACK) dryer harness
ground wire from the (GREEN) ground screw
next to the terminal block. (See Figure 2-11)
6. Attach the ground (GREEN) power cord wire
to the cabinet with the ground (GREEN) screw.
Tighten the screw securely.
7. Move the internal dryer harness ground
(BLACK) wire to the terminal block and attach
it along with the neutral (WHITE) power cord
wire conductor to the center, SILVER colored
terminal on the terminal block. Tighten the
screw securely.
8. Attach the RED and BLACK power cord
conductors to the outer, BRASS colored
terminals on the terminal block. Tighten both
screws securely.
9. Follow manufacturer’s guidelines for firmly
securing the strain relief and power cord.
10. Reinstall the terminal block cover..
EELLEECCTTRRIICCAALL SSHHOOCCKK HHAAZZAARRDD
FFAAIILLUURREE TTOO DDIISSCCOONNNNEECCTT PPOOWWEERR SSOOUURRCCEE
BBEEFFOORREE SSEERRVVIICCIINNGG CCOOUULLDD RREESSUULLTT IINN
PPEERRSSOONNAALL IINNJJUURRYY OORR EEVVEENN DDEEAATTHH..
EELLEECCTTRRIICCAALL SSHHOOCCKK HHAAZZAARRDD
DDOO NNOOTT MMAAKKEE AA SSHHAARRPP BBEENNDD OORR CCRRIIMMPP
WWIIRRIINNGG// CCOONNDDUUCCTTOORR AATT CCOONNNNEECCTTIIOONNSS..