EasyManua.ls Logo

Electrolux EOF3H50BX - User Manual

Electrolux EOF3H50BX
24 pages
Print Icon
To Next Page IconTo Next Page
Loading...
EOF3H50BX
EN User Manual | Oven
Question and Answer IconNeed help?

Do you have a question about the Electrolux EOF3H50BX and is the answer not in the manual?

Summary

SAFETY INFORMATION

Children and vulnerable people safety

Safety instructions for children and vulnerable individuals.

General Safety

General safety precautions for using the appliance.

SAFETY INSTRUCTIONS

Installation

Instructions and warnings related to appliance installation.

Electrical connection

Details on proper electrical connection and safety.

Use

Guidelines and warnings for using the appliance safely.

INSTALLATION

Building in

Detailed instructions for building the appliance into cabinetry.

Securing the oven to the cabinet

Steps for securely fixing the oven within its cabinet.

CONTROL PANEL

Retractable knobs

Explanation of how to use the retractable control knobs.

Sensor fields; Buttons

Details on the sensor fields and buttons on the control panel.

BEFORE FIRST USE

Before first use

Pre-use checks and initial setup procedures.

DAILY USE

CLOCK FUNCTIONS

CARE AND CLEANING

TROUBLESHOOTING

What to do if...

Common problems and their solutions.

Overview

This document is a user manual for an Electrolux oven, model EOF3H50BX. It provides comprehensive instructions for installation, safe operation, maintenance, and troubleshooting.

Function Description

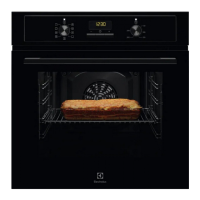
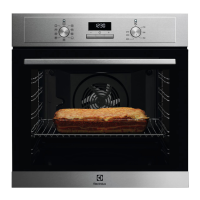
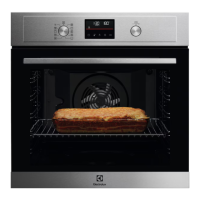
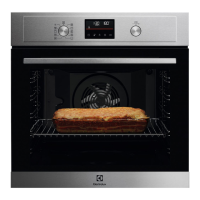
The Electrolux EOF3H50BX oven is designed for cooking purposes in a single household domestic indoor environment. It offers various heating functions to cater to different cooking needs, including:

  • Off position: Turns the oven off.
  • Light: Illuminates the oven cavity.
  • True Fan Cooking: Ideal for baking on up to two shelf positions simultaneously and drying food. It operates at a temperature 20-40°C lower than Conventional Cooking.
  • Moist Fan Baking: A function designed to save energy during cooking. It's suitable for baking cakes with a crispy bottom and preserving food. The temperature inside the appliance may differ from the set temperature, and heating power might be reduced.
  • Bottom Heat: Used for baking cakes with a crispy bottom and preserving food.
  • Fan Cooking: For roasting or roasting and baking food on more than one shelf position at the same cooking temperature, without flavor transference.
  • Turbo Grilling: Designed for roasting large meat joints or poultry with bones on one shelf position, making gratins, and browning food.
  • Defrost: For defrosting food like vegetables and fruit, with defrosting time depending on the amount and size of the frozen food.
  • Conventional Cooking: For baking and roasting food on one shelf position.
  • Grill: For grilling thin pieces of food and toasting bread.

The oven is equipped with an electric cooling system that automatically turns on during operation to keep surfaces cool and may continue to run after the oven is turned off until it cools down. A safety thermostat is integrated to prevent dangerous overheating by interrupting the power supply and restarting when the temperature drops.

Usage Features

The oven features a control panel with retractable knobs for selecting heating functions and temperature. The display shows clock functions and timer settings.

Setting the Oven: To use the oven, turn the knob for heating functions to select the desired mode, then turn the control knob to set the temperature.

Clock Functions: The oven includes several clock functions:

  • Time of Day: To set, change, or check the current time.
  • Duration: To set how long the oven will operate for a specific cooking function. When the set time ends, a signal sounds, and the oven turns off.
  • Minute Minder: A countdown timer that has no effect on the oven's operation. A signal sounds when the set time ends.

Accessories: The oven comes with a wire shelf, baking tray, and grill-/roasting pan. Telescopic runners are available to facilitate easier insertion and removal of shelves. The wire shelf and trays are designed with small indentations and a high rim to prevent cookware from slipping.

Cooking Recommendations:

  • The oven has four shelf positions, counted from the bottom.
  • It's recommended not to open the oven door during the first 3/4 of the set cooking time for cakes.
  • When using two baking trays, keep one empty level between them.
  • For fatty foods, use a deep pan to prevent permanent stains.
  • Add water to the deep pan during roasting to prevent excessive smoke and condensation.
  • Allow meat to rest for approximately 15 minutes after cooking before carving.
  • Cooking times vary based on food type, consistency, and volume; initial monitoring is advised to find optimal settings.
  • For Moist Fan Baking, dark and non-reflective tins and containers are recommended for better heat absorption.

Energy Saving Tips:

  • Keep the oven door closed during operation and avoid opening it too often.
  • Ensure the door gasket is clean and properly fixed.
  • Use metal cookware.
  • Avoid preheating the appliance when possible.
  • Minimize breaks between baking multiple dishes.
  • Utilize fan cooking functions for energy efficiency.
  • For cooking durations longer than 30 minutes, reduce the temperature 3-10 minutes before the end of cooking to use residual heat.
  • Use residual heat to warm up other dishes or keep meals warm at the lowest possible temperature setting.

Maintenance Features

The manual provides detailed instructions for cleaning and maintenance to ensure the appliance's longevity and safe operation.

General Cleaning:

  • Clean the oven's front with a moist microfibre cloth, warm water, and a mild detergent.
  • Check and clean the door gasket regularly.
  • Use a cleaning solution for metal surfaces and a mild detergent for stains.
  • Clean the cavity after each use to prevent fat accumulation.
  • Dry the cavity with a microfibre cloth after use.
  • Clean all accessories after each use with a moist microfibre cloth, warm water, and a mild detergent. Do not use abrasive cleaners or sharp-edged objects on non-stick accessories.
  • If using an oven spray, follow its safety instructions.

Aqua Clean Function: This function uses humidity to remove fat and food particles. To use it:

  1. Pour 150 ml of water into the cavity embossment.
  2. Set the function to "Aqua Clean".
  3. Set the temperature to 90°C.
  4. Let the oven work for 30 minutes.
  5. Turn off the oven and allow it to cool.
  6. Dry the cavity with a soft cloth.

Removing Shelf Supports: Shelf supports can be removed for easier cleaning of the oven cavity:

  1. Turn off the oven and wait for it to cool.
  2. Pull the front of the shelf support away from the side wall.
  3. Pull the rear end of the shelf support away from the side wall and remove it.
  4. Install in the opposite sequence, ensuring retaining pins on telescopic runners point to the front.

Removing and Installing the Door: The oven door has two glass panels that can be removed for cleaning:

  1. Open the door fully and hold both hinges.
  2. Lift and pull the latches until they click.
  3. Close the door halfway to the first opening position, then lift and pull to remove it from its seat.
  4. Place the door on a soft cloth and release the locking system to remove the internal glass panel.
  5. Turn the fasteners by 90° and remove them.
  6. Carefully lift and remove the glass panel.
  7. Clean glass panels with water and soap; do not use a dishwasher.
  8. After cleaning, install the glass panel and oven door, ensuring the internal glass panel is correctly seated and the door trim clicks.

Replacing the Lamp:

  1. Turn off the oven and wait for it to cool.
  2. Disconnect the oven from the mains.
  3. Place a cloth on the bottom of the cavity.
  4. Turn the glass cover to remove it.
  5. Clean the glass cover.
  6. Replace the lamp with a suitable 300°C heat-resistant lamp.
  7. Install the glass cover.

Electrolux EOF3H50BX Specifications

General IconGeneral
AC input voltage220 - 240 V
AC input frequency50 Hz
Energy efficiency scaleA+++ to D
Energy efficiency index (EEI)95.1
Energy consumption (conventional)0.89 kWh
Energy consumption (forced convection)0.78 kWh
Door hingedown
Cord length1.5 m
Control typeRotary, Touch
Display typeLED
Product colorStainless steel
Control positionFront
Interior materialEnamel
Oven door openingDrop down opening
Appliance placementBuilt-in
Fingerprint resistantYes
Oven sizeMedium
Oven typeElectric
Number of ovens1
Total oven power- W
Microwave cookingNo
Full surface grill-
Cleaning technologyAquaClean
Oven thermostat range50 - 250 °C
Number of cooking programs7
Total oven(s) interior capacity65 L
Timer typeDigital
Timer modesCooking time, Timer
Weight and Dimensions IconWeight and Dimensions
Depth590 mm
Width594 mm
Height600 mm
Installation compartment depth550 mm
Installation compartment width560 mm
Installation compartment height593 mm
Interior dimensions (W x D x H)437 x 401 x 328 mm

Related product manuals