This document describes the Electrolux ESS48300UX and ESS48300UW dishwashers, providing comprehensive information on their function, technical specifications, usage, and maintenance.
Function Description
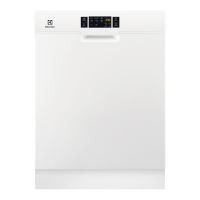
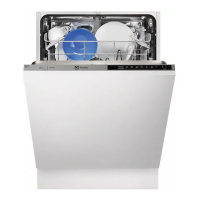
The Electrolux dishwashers are designed for cleaning household-type dishes and tableware. They are intended for single household domestic use in an indoor environment. These appliances can be used in offices, hotel guest rooms, bed & breakfast guest rooms, and farm guest rooms. The dishwashers are equipped with various programmes and options to cater to different cleaning needs, including specific settings for delicate glassware (GlassCare), enhanced cleaning power (ExtraPower), and improved hygiene (ExtraHygiene). They feature a control panel with an on/off button, programme selection, indicators, and a display for easy operation.
Important Technical Specifications
- Dimensions: Width / height / depth (mm): 597 / 818 - 878 / 576
- Electrical connection: Voltage (V): 220 - 240, Frequency (Hz): 50
- Water supply pressure: Min. / max. bar (MPa): 0.5 (0.05) / 10 (1.0)
- Water supply: Cold water or hot water (max 60 °C)
- Capacity: 14 place settings
- Energy Consumption (ECO programme): 0.848 kWh
- Water Consumption (ECO programme): 10.5 liters
- Duration (ECO programme): 240 minutes
The appliance is designed to clean the inside of the appliance effectively and efficiently. It removes limescale and grease buildup. The programme should be run at least once every 2 months with a descaler or a cleaning product designed for dishwashers and without any load.
Usage Features
The dishwashers offer a range of programmes and options:
Programmes:
- ECO (1): Normal, lightly dried-on crockery, cutlery, pots, pans. Phases: Prewash, Dishwashing 50 °C, Intermediate rinse, Final rinse 55 °C, Drying.
- 160min: Normal to heavy, dried-on crockery, cutlery, pots, pans. Phases: Prewash, Dishwashing 60 °C, Intermediate rinse, Final rinse 60 °C, Drying.
- 90min: Normal, lightly dried-on crockery, cutlery, pots, pans. Phases: Dishwashing 60 °C, Intermediate rinse, Final rinse 55 °C, Drying.
- 60min: Fresh, lightly dried-on crockery, cutlery. Phases: Dishwashing 60 °C, Intermediate rinse, Final rinse 50 °C, Drying.
- 30min: Fresh crockery, cutlery. Phases: Dishwashing 50 °C, Intermediate rinse, Final rinse 50 °C, Drying.
- AUTO (3): All crockery, cutlery, pots, pans. Phases: Prewash, Dishwashing 50 - 60 °C, Intermediate rinse, Final rinse 60 °C, Drying.
- (4): None. Cleaning the appliance interior. Phases: Cleaning 70 °C, Intermediate rinse, Final rinse, AirDry.
- (5): All. Prewash.
Options:
- GlassCare: Protects delicate load, glassware in particular, from damaging.
- ExtraPower: Improves dishwashing results and increases wash temperature and duration.
- ExtraHygiene: Provides better cleaning results by keeping the temperature between 65 and 70 °C for at least 10 minutes during the last rinsing phase.
Settings:
- Programme selection mode: Allows selection of programmes.
- User mode: Allows adjustment of water softener level, activation/deactivation of rinse aid notification, and activation/deactivation of AirDry.
Water Softener: The appliance has a water softener to adjust to the hardness of the water in your area. The water softener level can be set from 1 to 10, with higher levels for harder water. The regeneration process for the water softener needs to be regulated regularly.
Rinse Aid Dispenser: The rinse aid dispenser needs refilling when the rinse aid indicator is on. The rinse aid helps to dry the dishes without streaks and stains.
Salt Container: The salt container needs refilling when the salt indicator is on. The salt helps to regenerate the resin in the water softener.
Starting a Programme:
- Press the on/off button to activate the appliance.
- Make sure the appliance is in programme selection mode.
- Close the appliance door.
- Press P repeatedly until the indicator of the desired programme is on. The display shows the programme duration.
- Set applicable options if desired.
- Press ▷ to start the programme. The indicator of the running phase is on. The programme duration counts down in minutes.
Delay Start:
- Set a programme.
- Press ↻ repeatedly until the display shows the desired delay time (from 1 to 24 hours).
- Press ▷ to begin the countdown. The indicator ↻ is on. The remaining time counts down in hours. The final hour is displayed in minutes.
AirDry: The appliance door opens automatically during the drying phase, improving drying results with less energy consumption.
Maintenance Features
Care and Cleaning:
- Internal Cleaning: Clean the appliance interior with a soft damp cloth. Do not use abrasive products, abrasive cleaning pads, sharp tools, strong chemicals, scourers or solvents. Wipe clean the door, including the rubber gasket, once a week.
- External Cleaning: Clean the appliance with a moist soft cloth. Only use neutral detergents. Do not use abrasive products, abrasive cleaning pads or solvents.
- Filter Cleaning: The filter system is made of 3 parts.
- Turn the filter (B) counterclockwise and remove it.
- Remove the filter (C) out of filter (B).
- Remove the flat filter (A).
- Wash the filters.
- Make sure that there are no residues of food or soil in or around the edge of the sump.
- Put back in place the flat filter (A). Make sure that it is correctly positioned under the 2 guides.
- Reassemble the filters (B) and (C).
- Put back the filter (B) in the flat filter (A). Turn it clockwise until it locks.
- Cleaning the Lower Spray Arm: Remove the lower spray arm, pull it upwards. Wash the spray arm under running water. Use a thin pointed tool, e.g. a toothpick, to remove particles of soil from the holes.
- Cleaning the Ceiling Spray Arm: Remove the upper basket to the lowest level to reach the spray arm more easily. To detach the spray arm (C) from the delivery tube (A), turn the mounting element (B) counterclockwise and pull the spray arm downwards. Wash the spray arm under running water. Use a thin pointed tool, e.g. a toothpick, to remove particles of soil from the holes. Run the water through the holes to wash soil particles away from the inside. To install the spray arm (C) back, insert the mounting element (B) in the spray arm and fix it in the delivery tube (A) by turning it clockwise. Make sure that the mounting element locks into place. Install the cutlery drawer on the sliding rails and block the stoppers.
Troubleshooting: The manual provides a comprehensive table of problems and possible causes and solutions, covering issues like the appliance not draining water, anti-flood device activation, water level detection sensor malfunction, pump malfunction, temperature issues, technical malfunctions, water level issues, programme duration, and display errors.
Dishwashing and Drying Results: The manual also addresses common issues related to dishwashing and drying results, such as poor washing, whitish streaks, stains, wet interior, unusual foam, rust traces, detergent residues, and odours. Solutions often involve checking detergent usage, rinse aid levels, water softener settings, and proper loading of baskets.