EasyManua.ls Logo

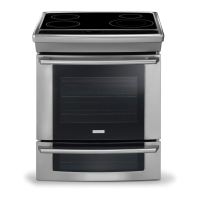
Electrolux EW30IS6CJSA User Manual

Electrolux EW30IS6CJSA
36 pages
To Next Page IconTo Next Page
Page #1 background imageLoading...
Page #1 background image
United States
iNSTALLATiON AND SERVICEMUST BEPERFORMED BY A QUALiFiED iNSTALLER.
iMPORTANT: SAVE FOR LOCAL ELECTRICAL iNSPECTOR'S USE.
READ AND SAVE THESE iNSTRUCTiONS FOR FUTURE REFERENCE.
FOR YOUR SAFETY: Do not store or use gasoline or other
flammable vapors and liquids in the vicinity of this or any other appliance.
Canada
For existing 29" (73,7 cm) cutout wide opening, you must call the Service Center for
optional thinner side trims. Also you must prepare the countertop edge as shown in
the "Countertop Preparation" section (see page 8).
These surfaces should be flat &
leveled (hatched area).
/2"min,
30" Min.
(76,2 cm) Min. ,
30" Min. (see Note 3) T
(76,2 cm) Min. (See Note 3) |
18" Min.
/8"min. (45,7 cm) Min.
Shave Raised
Edge To Clear
Space for
31 1/2"
(80 cm)
Wide
Cooktop Rim.
1 1/2"Max.
(3,8 cm Max.)
Locate Cabinet Doors 1" (2,5 cm)
Min. From Cutout Opening
Grounded Junction Box or Wall Outlet Should Be
Located 8" to 17" (20,3 - 43,2 cm) From Right
Cabinet and 2" to 4" (5,1-10,2 cm) From Floor
_rox. 1 7/8"
(4,8 cm)
24" Min.
(61 cm) Min
Do not install the unit in the cabinet before reading next two pages.
A: HEIGHT B: WIDTH C. CooKToP B: TOTAL DEPTH TO
(Under Cooktop) WIDTH FRONT OF RANGE
E. CUTOUT WIDTH***
(Countertop
and cabinet)
353/4"(90,8cm) 30"(76,2cm) 31 1/2" 285/16"(71,9cm) 30_+1/16"
(80 cm) (76,2_+0,15 cm)
36 5/8" (93 cm)
F: cUTouT' G: HEIGHT
DEPTH OF COUNTERTOP
|
21 3/4" (55,2 cm) Min.
22 1/8" (56,2 cm) Max
24" (61 cm) Min. with
backguard
35 3/4" (90,8 cm) Min.
36 5/8" (93 cm) Max.
Printed in United States
P/N318201615 (1003) Rev.G
English - pages 1-12
Espahol - p_iginas 13-24
Fran_ais - pages 25-36
Question and Answer IconNeed help?

Do you have a question about the Electrolux EW30IS6CJSA and is the answer not in the manual?

Electrolux EW30IS6CJSA Specifications

General IconGeneral
TypeSlide-In
Fuel TypeElectric
Width30 inches
Number of Burners5
Self-CleaningYes
Convection OvenYes
ColorStainless Steel
Product TypeRange
Warming DrawerYes
Voltage240 V
Amperage40 Amps

Summary

Important Safety Instructions

General Safety Precautions

Covers warnings about cold temperatures, children, door usage, and cabinet storage above the range.

Electrical Grounding and Installation Codes

Details requirements for proper electrical grounding and compliance with local codes.

Floor and Wall Covering Requirements

Specifies requirements for floor coverings and wall coverings to withstand heat.

Serial Plate Location

Identifies the location of the model and serial number for future reference.

Electrical Connection

Factory Connected Power Supply Cord (Canada)

Instructions for connecting the factory-equipped power cord in Canada.

Power Supply Cord Kit (U.S.A.)

Details on connecting a power supply cord kit for U.S.A. installations.

Access to Terminal Block & Grounding Strap

Guides on accessing the terminal block and proper grounding strap connection.

Electrical Connection to the Range (U.S.A.)

Specific instructions for electrical connections to the range unit in the USA.

Direct Electrical Connection to Circuit Breaker

Procedure for direct electrical connection to circuit breakers, fuse boxes, or junction boxes.

Cabinet Construction and Countertop Preparation

Cabinet Storage Above Range

Caution regarding cabinet storage above the range and risk of burns or fire.

Countertop Preparation

Instructions for preparing the countertop, including flat, formed, and tile surfaces.

Existing Cutout Width Considerations

Guidance for existing cutout widths greater than 30 1/16" and specific dimensions for 29" cutouts.

Range Installation

Standard Installation Procedure

Step-by-step guide for standard range installation, including cabinet fitting and leveling legs.

Accessory Installation Options

Information on optional accessories like side trims, backguards, and end panels.

Leveling the Range

Adjusting Leveling Legs and Wheels

Detailed instructions on how to adjust the front leveling legs and rear leveling wheels.

Checking Range Levelness

Methods for checking if the range is level using an oven rack and a level.

Check Operation

Surface Element Operation

Procedure to test the operation and heating of all surface elements.

Oven Element and Control Operation

Verification of oven controls including Bake, Broil, Self-Clean, and Convection functions.

Anti-Tip Brackets Installation

Purpose and Risk of Tipping

Explains the importance of anti-tip brackets to prevent range tipping and potential injuries.

Bracket Installation Procedure

Step-by-step guide for marking, drilling, and securely attaching anti-tip brackets to the floor.

Related product manuals