EasyManua.ls Logo

Electrolux EW30ES65GSF User Manual

Electrolux EW30ES65GSF
36 pages
To Next Page IconTo Next Page
Page #1 background imageLoading...
Page #1 background image
United States
iNSTALLATiON AND SERVICEMUST BEPERFORMED BY A QUALiFiED iNSTALLER.
iMPORTANT: SAVE FOR LOCAL ELECTRICAL iNSPECTOR'S USE.
READ AND SAVE THESE iNSTRUCTiONS FOR FUTURE REFERENCE.
FOR YOUR SAFETY: Do not store or use gasoline or other
flammable vapors and liquids in the vicinity of this or any other appliance.
Canada
For existing 29" (73,7 cm) cutout wide opening, you must call the Service Center for
optional thinner side trims. Also you must prepare the countertop edge as shown in
the "Countertop Preparation" section (see page 8).
These surfaces should be flat &
leveled (hatched area).
/2"min,
30" Min.
(76,2 cm) Min. ,
30" Min. (see Note 3) T
(76,2 cm) Min. (See Note 3) |
18" Min.
/8"min. (45,7 cm) Min.
Shave Raised
Edge To Clear
Space for
31 1/2"
(80 cm)
Wide
Cooktop Rim.
1 1/2"Max.
(3,8 cm Max.)
Locate Cabinet Doors 1" (2,5 cm)
Min. From Cutout Opening
Grounded Junction Box or Wall Outlet Should Be
Located 8" to 17" (20,3 - 43,2 cm) From Right
Cabinet and 2" to 4" (5,1-10,2 cm) From Floor
_rox. 1 7/8"
(4,8 cm)
24" Min.
(61 cm) Min
Do not install the unit in the cabinet before reading next two pages.
A: HEIGHT B: WIDTH C. CooKToP B: TOTAL DEPTH TO
(Under Cooktop) WIDTH FRONT OF RANGE
E. CUTOUT WIDTH***
(Countertop
and cabinet)
353/4"(90,8cm) 30"(76,2cm) 31 1/2" 285/16"(71,9cm) 30_+1/16"
(80 cm) (76,2_+0,15 cm)
36 5/8" (93 cm)
F: cUTouT' G: HEIGHT
DEPTH OF COUNTERTOP
|
21 3/4" (55,2 cm) Min.
22 1/8" (56,2 cm) Max
24" (61 cm) Min. with
backguard
35 3/4" (90,8 cm) Min.
36 5/8" (93 cm) Max.
Printed in United States
P/N318201615 (1003) Rev.G
English - pages 1-12
Espahol - p_iginas 13-24
Fran_ais - pages 25-36
Question and Answer IconNeed help?

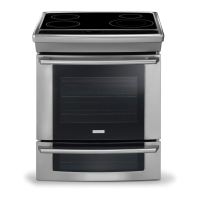
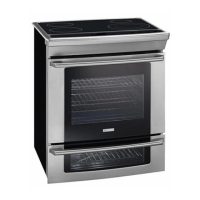
Do you have a question about the Electrolux EW30ES65GSF and is the answer not in the manual?

Electrolux EW30ES65GSF Specifications

General IconGeneral
BrandElectrolux
ModelEW30ES65GSF
CategoryRanges
LanguageEnglish

Summary

Installation Overview and Safety

General Safety Warning

Warning against storing or using flammable vapors and liquids near the appliance for safety.

Installation Dimensions Table

Table detailing critical dimensions (A-G) for cabinet and countertop installation.

Installation Procedure Steps

Preventing Cooktop Damage

Instructions to avoid damaging the cooktop during installation by not handling it improperly.

Step-by-Step Installation Guide

Detailed numbered steps for installing the range, including leveling and positioning.

Important Notes and Safety Information

Installer and Consumer Guidance

Key notes for installers and consumers, including safety instructions and serial plate location.

Comprehensive Safety Guidelines

Detailed safety guidelines covering operation, electrical grounding, and environmental factors.

Electrical Connection: Power Supply

Canada: Factory Connected Cord

Information for Canadian installations using a factory-connected power supply cord.

USA: Power Supply Cord Kit

Guidance for U.S.A. installations requiring a power supply cord kit connection.

USA: Terminal Block & Grounding Strap

Procedure for accessing the terminal block and managing the grounding strap in U.S.A.

Electrical Connection: Wiring Types (USA)

Three Conductor Wiring Connection

Instructions for connecting a 3-conductor power supply cord to the range.

Four Conductor Wiring Connection

Instructions for connecting a 4-conductor power supply cord to the range.

Direct Electrical Connection Methods

3-Wire System Connection

Connecting directly to a 3-wire electrical system, utilizing grounded neutral.

4-Wire System Connection

Connecting directly to a 4-wire electrical system, separating neutral and ground.

Cabinet and Countertop Preparation

Cabinet Construction Guidelines

Recommendations for cabinet construction to ensure proper range fit and safety.

Countertop Preparation Details

Specific instructions for preparing countertops, including trimming and leveling.

29-Inch Cutout Width Preparation

Specific preparation steps for existing 29-inch wide countertop cutouts, including trim requirements.

Range Installation Procedures

Standard Installation Process

Steps for installing the range into a standard cabinet opening, including positioning.

Installing in 29-Inch Cutout

Procedure for installing the range in a 29-inch wide cutout, including side trim replacement.

Accessory Installation Options

Guidance for installing optional accessories like backguards, end panels, and side panels.

Leveling and Operational Checks

Leveling the Range

Detailed instructions and diagrams for adjusting leveling legs and wheels to ensure the range is level.

Pre-Operation Testing

How to test surface elements, oven functions, and other features before regular use.

Anti-Tip Bracket Installation

Required Tools for Brackets

List of tools necessary for the correct installation of anti-tip brackets.

Bracket Securing Procedure

Step-by-step guide for securely installing the anti-tip brackets to prevent range tipping.
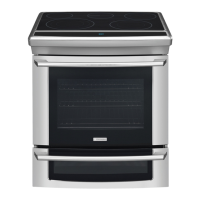
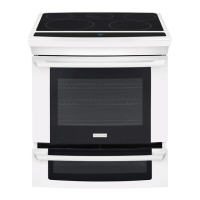
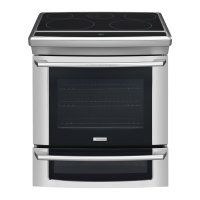
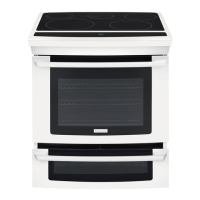
Related product manuals