PROGRAMMING
SELECT dAY
TIME CHANGES
SELECT PROGRAM
CONSTANTS
TEST MOdE
ON OFF
6
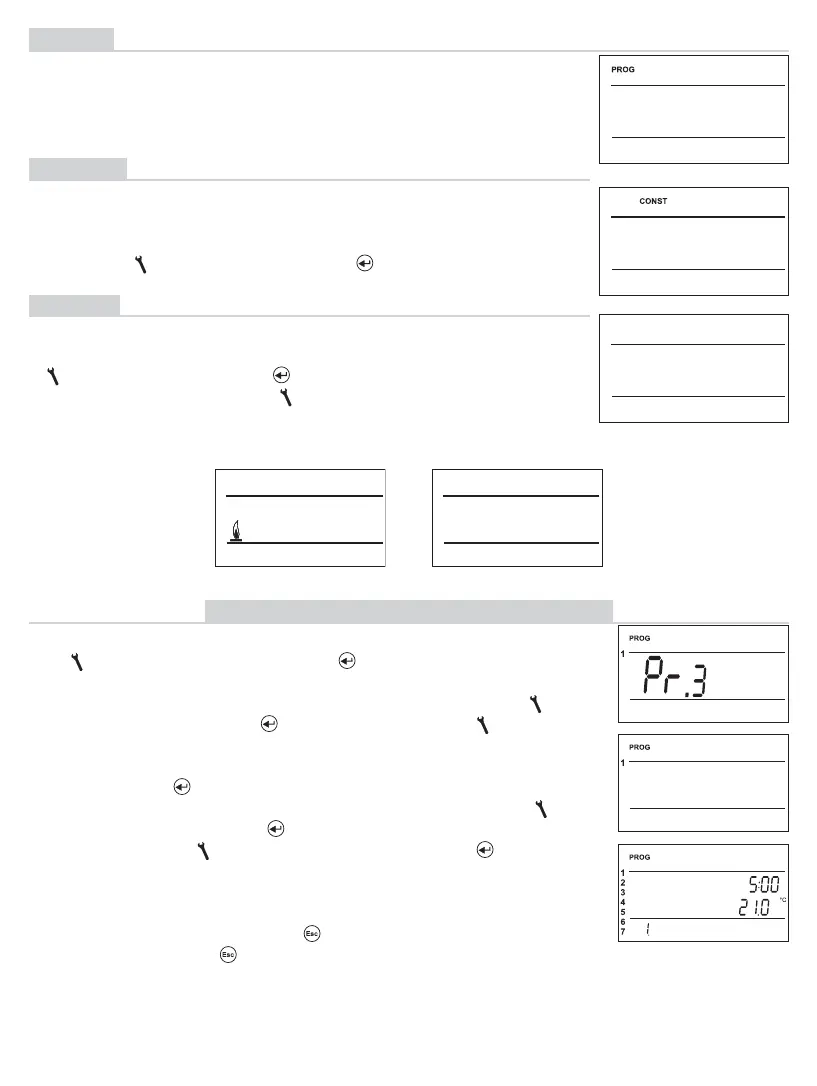
PROG
9 weekly programs with 6 changes per day can be preset. The Pr1 and
Pr2 programs are blank; Pr3 to Pr 7 are factory-set. The PrU and PrL
programs are factory-set as well, intended for the EVEN/ODD week sele-
ction (see page 7,10 for details).
Press the “ MENU “button twice; select the PROG mode by turning
the “
“ button, and confi rm with the “ “ button.
The selected program number is blinking on the display.
Choose the program you wish to modify by turning the “
“
button, and confi rm with the “
“ button. By turning the “ “ button,
choose the number of days programmed (you can program
“day-by-day” or “1-5 = Mon-Fri”, “6-7 = Sat-Sun” or “1-7 = Mon-Sun”).
Confi rm with the “
“ button.
The Change 1 time starts blinking. Set the time by turning the “
“
button, and confi rm with the “
“ button. Enter temperature for this
time by turning the “
“ button, and confi rm with the “ “ button
again. The Change 2 time appears on the display. Proceed in the
same way as with the fi rst time change.
In this way, you can set up to 6 temperature changes per day.
To move one step back, push the “
“button shortly; to return to the
basic screen, push the“
“ button long.
After modifying the preset program, check whether all of the
changes set comply with your requests!
There is no need to apply all six changes in one day!
(PROGRAMMING)
PROGRAM SETTING MODIFICATION
CONST
Setting the control parameters. For a detailed description, see
page 8 -13.
Press twice the “ MENU “ button, choose the CONST mode by
turning the “ “ button, and press the“ “ button to confi rm.
TEST
Testing the correct connection to boiler.
Press twice the “ MENU “, choose the TEST mode by turning the
“ “ button, and press the “ “ button to confi rm (RELAY TEST
is showed on LCD). Turn the “ “ button to start testing.
The output relay will be switched on/off several times
(the ON/OFF messages appear on the LCD).
(CONSTANTS)
 Loading...