7
Your new TV is heavy, please consult with professional
wallmount installer to perform this installation.
PREPARATIONS
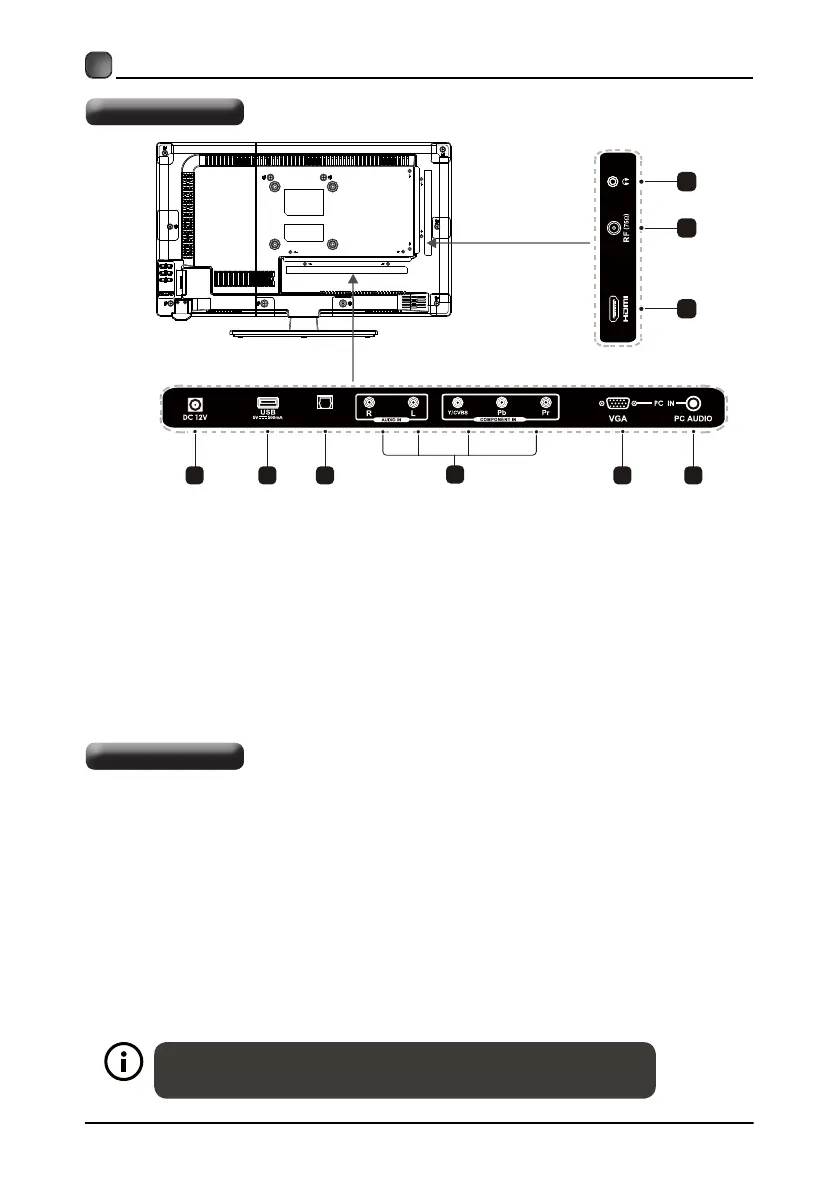
9. Headphone Socket
Connect to the Headphone.
7. HDMI Inputs
Connect to a High-Definition (HD) signal
input device.
5.
VGA Input
Connect to a computer or other devices
with a VGA interface.
6. PC AUDIO Input
Connect to a computer audio output.
8. RF (75Ω) Input
Connect to the antenna (75Ω VHF/UHF)
socket with the RF coaxial cable.
4. COMPONENT Input
Connect to AV devices with component(Y/
Pb/Pr) video and audio input sockets.
2. USB Port
Connect to a USB storage device to play
photofiles.(USB mode).
Rear View
Wall Mounting
4
1
2 5
3.
Optical Audio Signal Output Socket
Connect a digital sound system to
this jack.
3 6
7 8
9
1. DC 12V
Power line interface (12V).
Digital Au di o Out
(Optica l)
A wall mount kit (purchased separately) would allow you to mount your TV on the wall.
For detailed information on installing the wall mount, refer to the instruction. ELEMENT
is not responsible for any damage to the product or injury to yourself or others resulting
from the wall-mounting.
-This TV is compatible with a 100mm ×100 mm mounting hole pattern.
- 4 pcs of type M4×6(ISO metric) screws are required for installing the wall mount
bracket to your TV.
- Do not use screws that are longer than 6mm.Screws that are too long may cause
damage to the inside of the TV set.
-Do not fasten the screws too tight for this may damage the TV or cause the TV to fall.
-Do not mount the TV at more than a 15 degree tilt.
-Always use two people to mount the TV to a wall.
-Do not install your Wall Mount Kit while your TV is turned on. It may result in personal
injury due to electric shock.