6.8
Maintenance
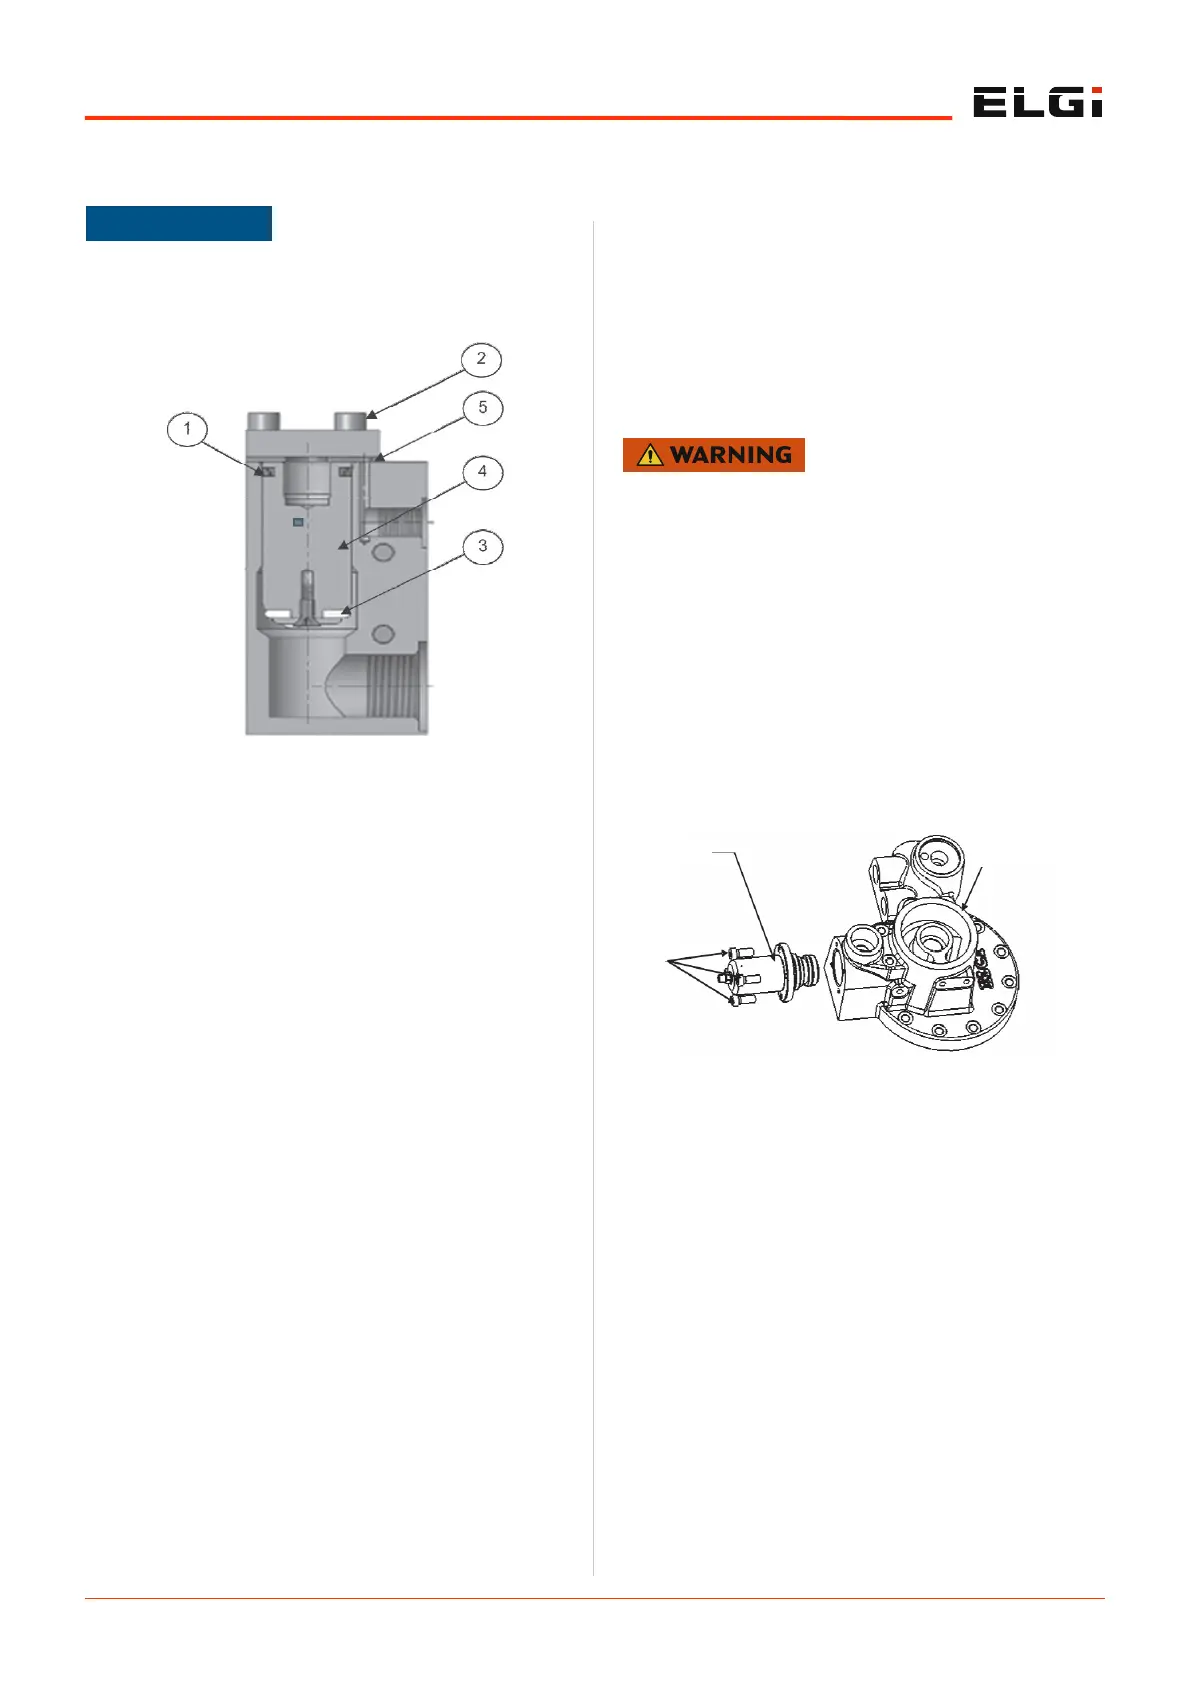
6.1.2.7 Blow down valve
Pre work
Switch off the compressor and disconnect power supply
to the motor.
Close the discharge end ball valve.
Requirements
Liquid cleaner.
Maintenance
Complete Service and Dismantling
Dismantle the valve completely from the compressor.
Unscrew locking screws (2).
Remove the piston unit (4) along with the gasket (5)
Cleaning
Work areas and sealing areas of the housing and their
threads must be cleaned with the liquid cleaner and any
residual Loctite removed.
Piston work areas have to be greased by any means.
Seat and sealing areas must not be damaged.
Reassembly
Insert the piston unit (4) into the housing.
Assemble the gasket (5) cover plate and tighten the
locking screws.
Function testing
Test the valve function after each service or inspection
at the running compressor.
Inspection
Dismantle the valve and check the component for wear.
Work areas and sealing areas of the housing and their
threads must be cleaned with the liquid cleaner and any
residual Loctite removed.
Piston work areas have to be greased by any means.
Seat and sealing areas must not be damaged.
Reassemble the valve as described above and test its
functioning.
6.1.2.8 Minimum pressure valve
Pre work
Switch off the compressor and disconnect power supply
to the compressor.
Close the discharge end ball valve.
Release air oil tank pressure and allow the system to
cool for a few minutes.
Release the receiver tank and downstream pressure.
Requirements
New MPV kit, allen key, grease.
Maintenance
MPV Replacement:
Isolate the machine from the service line, vent
separator tank pressure and allow the system to cool
for a few minutes.
Release the receiver tank and downstream pressure.
Unscrew the four screws.
Remove and replace the old MPV kit with a new one.
Grease the O-ring groove in the new MPV kit.
Assemble the MPV kit and reinstall the spring and cap.
Tighten the bolts.
Adjust stud protrusion (6mm/0.236 inches) to achieve a
minimum pressure of 4.5 bar.g (65 psi.g)
6.1.2.9 Thermal valve
Pre work
Switch off the compressor and disconnect power supply
Extreme caution should be taken while removing the cap
or cover from the body because of the spring.
After completion of intake valve assembly in package,
ensure to verify the performance
NOTE
Figure 18. Blow down valve
Figure 19. Minimum pressure valve
SEPARATOR
BODY BLOCK
MPV
SCREW
 Loading...