6.9
Maintenance
to the compressor.
Close the discharge end ball valve.
Release air oil tank pressure and allow the tank to cool
for a few minutes.
Requirements
Pliers, screw driver, new thermal valve element, new O-
ring.
Procedure
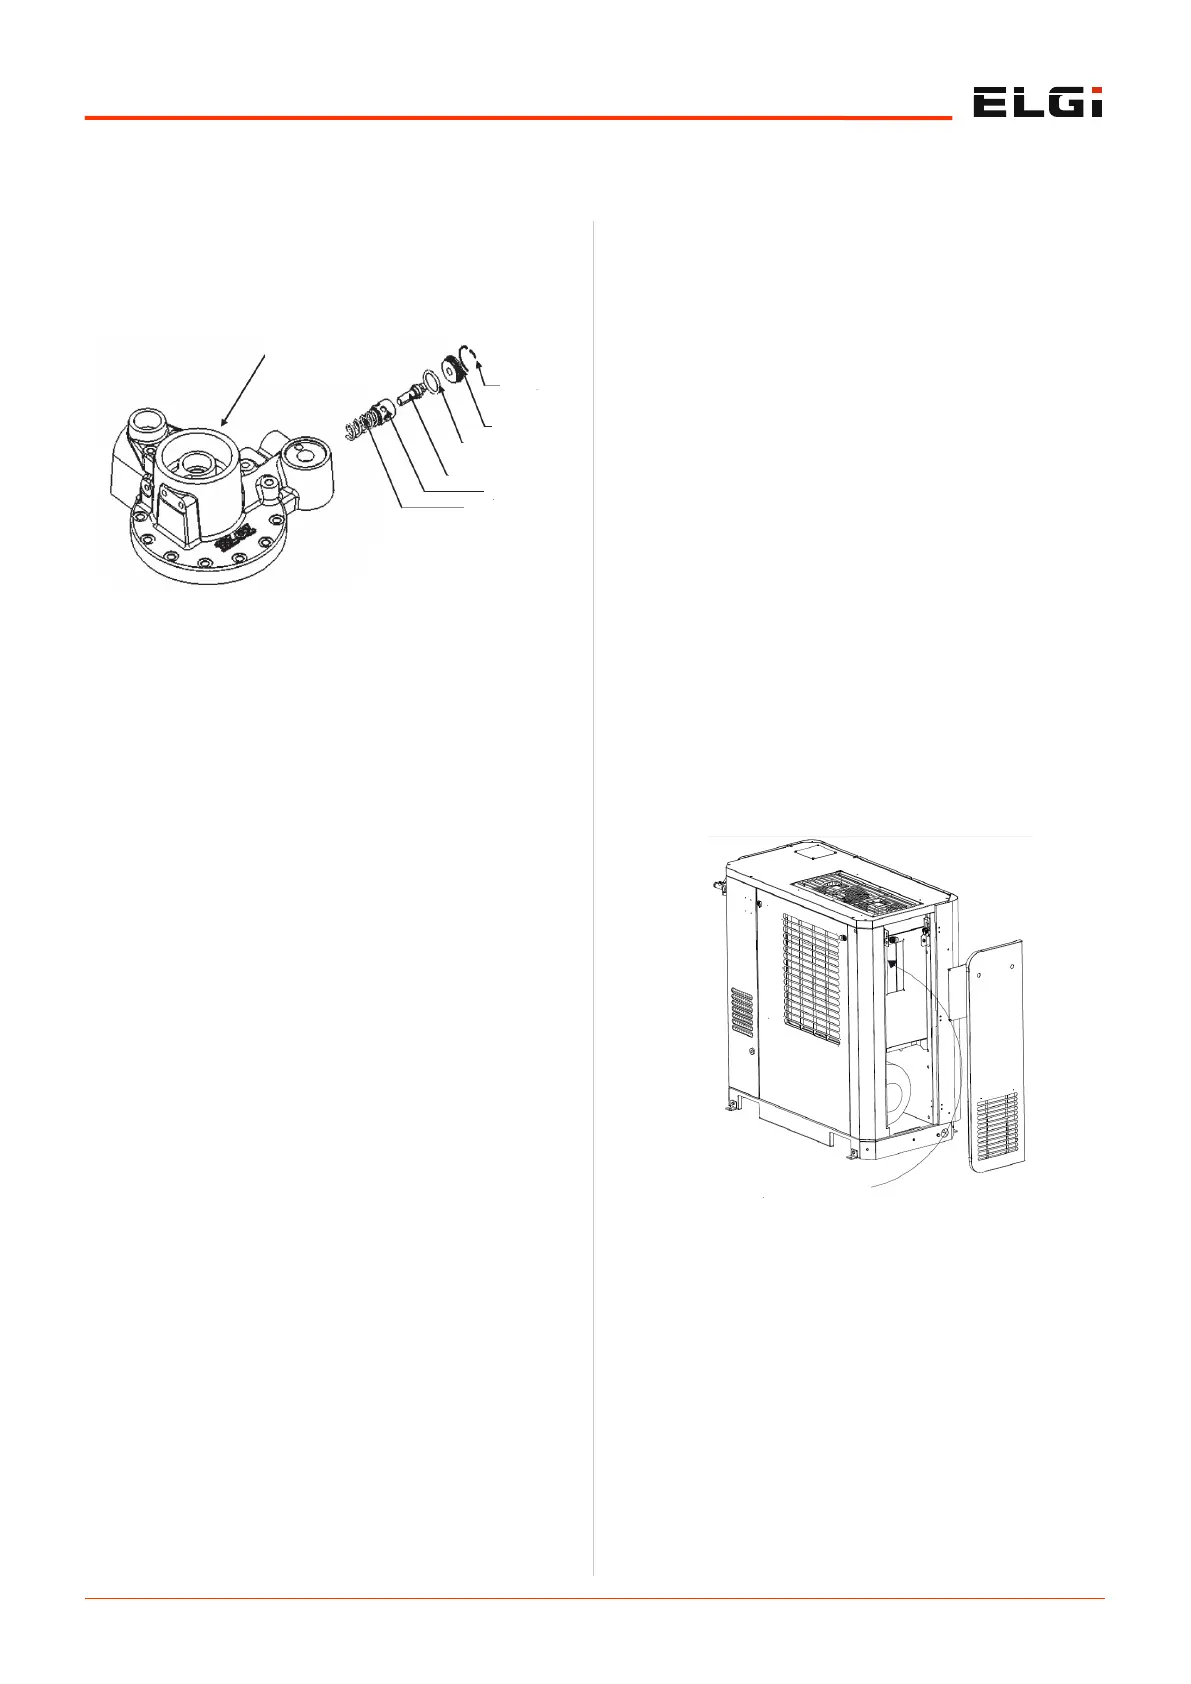
Replacing thermal Valve
Remove the thermal valve element from the thermal
valve block body
Inspect and clean seating area in the housing
Replace with a new thermal valve.
6.1.2.10 Electric motor greasing
Pre work
Switch off the compressor and disconnect power supply
to the compressor.
Close the discharge end ball valve.
Release air oil tank pressure and allow the tank to cool
for a few minutes.
Requirements
Recommended grease, cleaning cloth, grease gun.
Procedure
Stop the motor and lock out the switch.
Thoroughly clean the grease inlet fitting or plug. If the
motor has a plug, remove the plug and clean the inlet.
Remove the drain plug and wipe out any hardened
grease.
Slowly pump the grease into the grease inlet until the
new grease comes out of the drain plug.
Start the motor and let it run for a minimum of one
hour to expel any excess grease from the drain opening
before re-installing the drain plug.
Stop the motor and lock out the switch.
Re-install the drain plug.
Put the motor back in operation.
6.1.2.11 After and oil coolers
Pre work
Switch off the compressor and disconnect power supply
to the compressor.
Close the discharge end ball valve.
Release air oil tank pressure and allow the tank to cool
for a few minutes.
Requirements
Pliers, allen keys.
Maintenance
External surfaces:
Isolate the machine from the service line
Vent the separator tank pressure before attempting
maintenance
Open both the LH panel and cooler inspection cover
Use compressed air below 2.5 bar/36.3 psi maximum to
clean the outer surface of the cooler. Supply a jet of air
in the direction opposite to cooling airflow direction
After cleaning the outer surface of the cooler properly
close the cooler with a cleaning plate and an LH panel.
6.1.2.12 Cooler prefilter accessory (optional)
Cooler prefilter cleaning & maintenance instructions
Switch off the machine.
Lift upward & take out the cooler pre filter from the
compressor.
Hold or fix the prefilter assembly in the cleaning area.
Clean the pre-filter with compressed air at less than 2.5
bar.g (36.3 psi.g) from the reverse / back side of the
cooler prefilter.
In case of major dust / dirt accumulation in the pre-
filter element, wash with clean water or light detergent.
Do not rinse.
Figure 20. Thermal valve
SEPARATOR BODY
BLOCK
CIRCLIP
PLUG
O-RING
THERMAL ELEMENT
PISTON
SPRING
Figure 31. Cooler external surface
COMPRESSED AIR JET
 Loading...