EasyManua.ls Logo

Elite Screens Saker Tension Series User Manual

Elite Screens Saker Tension Series
6 pages
To Next Page IconTo Next Page
Page #1 background imageLoading...
Page #1 background image
051215-JA 1 www.elitescreens.com
Electric Wall/Ceiling Projection Screen
Saker Tension Series
User’s Guide
Important Safety & Warning Precautions
Make sure to read this user’s guide and follow the procedures below.
Caution: The screen’s Black Top Drop is already set to its maximum drop distance. There is NO extra
Black Top Drop in the roller. Please be aware of this as it will void your warranty with Elite Screens.
Unapproved changes or modifications (except for cutting the power cord for hardwire installations) to this
unit are prohibited and will void your warranty.
Please retain this user’s guide for future reference.
To avoid damaging the unit, do not use with any unauthorized accessories not recommended by the
manufacturer.
Handle the unit carefully during transportation to avoid any damages.
To ensure safe and reliable operation, direct connection to a properly grounded power source is
advised.
The power outlet supplying power to the unit should be close to the unit and easily accessible.
Do not install the unit on uneven or inclined surfaces.
Do not put heavy objects on the power cord and position it properly to avoid creating a trip
obstacle.
Never overload the power cord to prevent an electric shock or fire due to a loose contact or a short
circuit.
There are not user serviceable parts in this unit. Do not attempt to disassemble this unit by yourself.
No one except authorized technicians can open and make repairs to this unit.
Make sure the power source this unit is connected to has a continuous power flow.
If there is need to use an extension cord, make sure the cord has an equal rating as the appliance to
avoid overheat.
Do not handle the power plug when your hands are wet or your feet are in contact with water.
Do not use this unit under the following circumstances.
Disconnect the power cord under the conditions of heavy rain, wind, thunder or lightning.
Avoid direct Sunshine, rain shower and moisture.
Keep away from fire sources and high temperature to prevent this device from overheating.
Cut off the power supply first before transportation or maintenance.
Fully disconnect from the power supply when the unit is not in use for a long period of time, as
should be done with any other electric household appliance.
To avoid possible injury and/or an electric shock, do not attempt to use the screen if there is
obvious damage or if there are any evident broken parts.
Question and Answer IconNeed help?

Do you have a question about the Elite Screens Saker Tension Series and is the answer not in the manual?
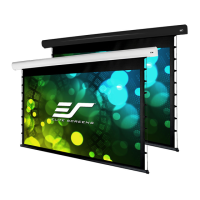
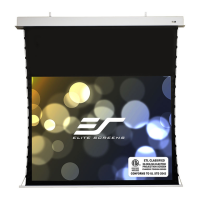
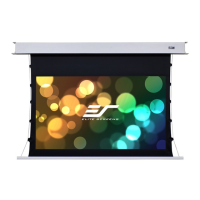
Elite Screens Saker Tension Series Specifications

General IconGeneral
Screen TypeTensioned
Gain1.1
OperationElectric
Installation TypeCeiling or wall mount
Frame ColorBlack
Aspect Ratio16:9
Housing ColorWhite
Motor Type12V trigger
Voltage110V
Control Options12V trigger
FeaturesTensioned for flat surface
Screen MaterialMaxWhite® FG (Fiberglass Backed)

Summary

Important Safety & Warning Precautions

General Safety Guidelines

Follow manufacturer recommendations, handle carefully, ensure proper grounding, and avoid hazards.

Conditions for Non-Use

Avoid use during extreme weather, direct sunlight, high temperatures, or when damaged.

Warnings and Pre-Installation

FCC Compliance Statement

Equipment complies with FCC limits for Class B digital devices, designed for residential installations.

Pre-Installation Steps

Unpack carefully, handle on a clean surface, and protect from dust, sawdust, and liquids.

Hardware Parts List

List of included hardware for screen installation, verify before proceeding.

Installation Instructions

Wall Mount Installation

Instructions for mounting the screen to a wall.

Ceiling Mount Installation

Instructions for mounting the screen to a ceiling.

Screen Material Tension Adjustment

Adjusting screen tension using an Allen wrench; factory setting recommended.

Controls and Accessories

Screen Operation

The screen operates on AC110V @ 60hz; plug in and control.

IR Remote Control

Controls screen via infrared line-of-sight contact up to 30 feet.

IR 'Eye' Receiver

Low profile receiver for IR remote control, plugs into RJ-45.

RF Remote Control

Controls screen via radio waves, no line-of-sight needed, range up to 100 feet.

3-Way Wall Switch

Wall mount control box with up/stop/down button, plugs into RJ-45.

5-12 Volt Trigger

Synchronizes screen drop/rise with projector power cycle via RJ45 cable.

Wireless 5-12 Volt Trigger Setup

Wireless synchronization of screen movement with projector using RF remote.

Related product manuals