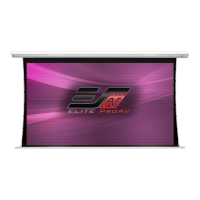
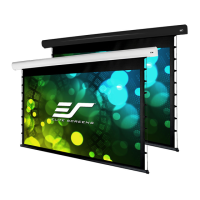
The Elite Screens Saker Series is an electric wall/ceiling projection screen designed for both wall and ceiling installations, offering a versatile solution for home theater and professional environments. This user-friendly screen comes with a comprehensive guide to ensure safe and optimal operation, as well as instructions for various control methods and limit switch adjustments.
Function Description:
The Saker Series projection screen is an electrically operated screen that deploys and retracts smoothly, providing a clean and professional viewing surface when needed and discreetly disappearing when not in use. It is designed to synchronize with a projector's power cycle, automatically deploying when the projector turns on and retracting when it turns off, enhancing convenience and integration into a smart home or office setup. The screen features a black top border that is pre-set to its maximum drop distance, ensuring a consistent and optimal viewing experience. The design allows for both flush hidden mounting and suspended installations, offering flexibility in placement to suit different room aesthetics and structural requirements.
Usage Features:
The Saker Series offers multiple control methods, providing users with flexibility and convenience in operating the screen:
- IR Remote Control: The screen can be operated using an infrared remote control. This method requires a direct line of sight to the circular window on the left side of the screen, with a range of up to 30 feet.
- IR "Eye" Receiver: For installations where direct line of sight to the screen's IR window is challenging, an extended IR "Eye" Receiver can be plugged into the screen's RJ-45 input. This low-profile receiver accommodates recessed ceiling installations, allowing the IR remote to function effectively even when the screen's main IR window is obscured.
- RF Remote Control: A radio frequency (RF) remote control is also provided, which eliminates the need for a direct line of sight and offers a wider operating range of up to 100 feet. This is particularly useful in larger rooms or when the screen is installed in a hidden compartment.
- 3-Way Wall Switch: For a more permanent control solution, a wall-mounted 3-way wall switch is included. This switch plugs directly into the screen's RJ-45 input and features up/stop/down buttons for easy operation.
- 5-12 Volt Trigger: A built-in 5-12V trigger input allows the screen to synchronize its deployment and retraction with the projector's power cycle. When the projector powers up, the screen deploys; when the projector powers down, the screen retracts. This feature requires a 5-12 volt RJ45 cable to connect to the projector's trigger output.
- Wireless 5-12 Volt Trigger: The RF remote control can also function as a wireless 5-12 volt trigger. By connecting a wireless 5-12 volt trigger cable to the RF remote, the screen can be programmed to receive a wireless signal that synchronizes its movement with the projector's power cycle, offering a clean, cable-free integration.
Installation is designed to be straightforward, with options for both wall and ceiling mounting. The flush hidden mount allows the screen to slide horizontally for precise positioning. Suspended installation is also possible using eyebolts and snap links, ensuring secure attachment from the ceiling. The screen's power connection should be secure and easily accessible, and the unit should be handled carefully during transportation and installation to prevent damage.
Maintenance Features:
The Saker Series is designed for durability and ease of maintenance, with specific guidelines to ensure its longevity and optimal performance:
- General Handling: Always handle the screen upright on a level, clean surface to prevent damage. Keep the screen free from foreign particles such as dust, sawdust, and liquids.
- Power Cord Management: Position the power cord properly to avoid creating a trip hazard and prevent electrical shock or fire by not overloading it.
- Internal Components: The internal and external parts of the unit are not end-user serviceable. Users are advised not to attempt to disassemble the unit themselves and to consult an authorized technician for any repairs or internal issues.
- Limit Switch Adjustment: The screen features limit adjustment screws located on the power cord side, allowing for fine-tuning of the screen's drop and rise positions. A 5/32 allen wrench is required for these adjustments.
- Reducing Top Black Drop: To reduce the length of the top black drop, the screen is lowered to its full extent, and the allen wrench is inserted into the lower limit adjustment screw and turned clockwise. After adjustment, the screen needs to be raised and dropped again to observe the change.
- Increasing Top Black Drop: Increasing the top black drop is only recommended if no black drop is visible when fully deployed. Users should contact Elite Screens for specifications on the maximum allowable top black drop.
- Adjusting Rise for Further Retraction: If the screen does not fully retract, the allen wrench can be inserted into the upper limit adjustment screw (from the back of the screen) and turned counter-clockwise. This will cause the screen to rise further. It's crucial to ensure the weight bar does not rise too high into the housing.
- Motor Protection: In cases where the screen does not stop at the top, it is critical to stop it using the remote to prevent permanent damage to the motor's gears. Adjustments for this issue involve turning the allen wrench clockwise in small increments, ensuring the weight bar remains about 5 inches from the housing during testing.
- Environmental Precautions: The screen should not be installed on uneven or inclined surfaces. Avoid placing heavy objects over the power cord. Do not install the device in damp places. Disconnect the power cord if exposed to moisture, rain, wind, snow, or other electrical storms. Keep the screen away from fire or other high-temperature heat sources.
- Damage Inspection: Do not attempt to use the screen if there are obvious signs of damage or broken parts.
- Disposal: At the end of its life cycle, the screen should be disposed of according to local environmental guidelines.
The Saker Series is designed to comply with FCC Rules for Class B digital devices, ensuring reasonable protection against radio interference in residential installations. Should RF interference occur with other household electronics, users are advised to reorient or relocate the receiving antenna, increase the distance between the screen and the interfering device, or connect the screen to a different power source.