EasyManua.ls Logo

Elite Screens Tripod B Series - User Manual

Elite Screens Tripod B Series
2 pages
Print Icon
To Next Page IconTo Next Page
Loading...
Rev. 041318BR
www.elitescreens.com
1
Tripod B Series
Tripod Portable Projection Screen
Z Type - USER’S GUIDE
Tripod Screen Parts Identification
Screen Material
Tripod Screen Setup
A. Setting up the screen:
Follow the steps below and Fig. 1 & 2.
1. Place the screen in an upright position (fig.1) with the
1
legs toward the ground.
2. Deploy the Tripod Support legs by pushing down on
the Tripod Junction.
3. Turn the tripod’s screen casing in a 90-degree
3
horizontal position so that the screen casing is now
parallel to the ground with the screen handle facing the
bottom of the top hook.
4. Completely extend the legs as much as possible so
2
they are stable and position them away from objects that
may interfere with their balance. DO NOT stand the
4
tripod on an unstable platform to avoid an injury should
the tripod screen collapse.
Support beam
Top hook, Keystone
Eliminator and Screen
Handle
Vertical
Extension Bar
Locking Adjustment Tab
End cap
Tripod junction
Screen case
Tripod support leg
Fig.1
Fig. 2
Question and Answer IconNeed help?

Do you have a question about the Elite Screens Tripod B Series and is the answer not in the manual?

Summary

Tripod Screen Parts Identification

Setting Up the Tripod Screen

Position Screen Upright

Place the screen in an upright position with the legs toward the ground.

Deploy Tripod Support Legs

Deploy the tripod support legs by pushing down on the Tripod Junction.

Orient Screen Casing Horizontally

Turn the tripod's screen casing to a 90-degree horizontal position parallel to the ground.

Extend Tripod Legs for Stability

Completely extend the legs for stability and position them away from objects.

Preparing Screen for Projection

Hook Screen Handle to Top Hook

Pull the screen handle up vertically and hook it onto the Top Hook.

Adjust Vertical Extension Bar Height

Unlock the Vertical Extension Bar using the tab and raise it to the desired height.

Adjust Screen Height

Use the Screen Height Adjustment tab to raise or lower the bottom of the screen.

Disassembling the Tripod Screen

Lower Screen Case

Unlock the adjustment handle and slide it down to lower the screen's case.

Retract Extension Bar and Screen

Unlock the extension bar, retract it, unhook the screen, and retract it into the case.

Secure Screen Case

Turn the screen case vertically and insert the Top Hook's pin into the end cap hole.

Close Tripod Legs

Close the tripod legs by pushing them inward.

Overview

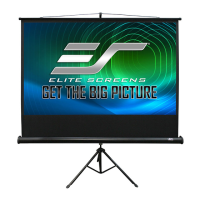
The Elite Screens Tripod B Series is a portable projection screen designed for easy setup and versatile use in various environments. It features a Z-type design, emphasizing portability and straightforward operation for users.

Function Description

The primary function of the Tripod B Series screen is to provide a stable and adjustable surface for projecting images and videos. It is ideal for presentations, home theater setups, educational purposes, and other applications where a temporary or mobile projection solution is needed. The screen material is designed to display projected content clearly, ensuring a good viewing experience. A key feature is the integrated Keystone Eliminator, which addresses the "Keystone Effect." This effect occurs when a projector is angled downward, causing the projected image to appear trapezoidal. The Keystone Eliminator is designed to counteract this by allowing the screen to slope forward, thereby correcting the image distortion and ensuring a rectangular display.

Usage Features

The Tripod B Series screen is engineered for user-friendly setup and adjustment.

Setting Up the Screen:

  1. Initial Positioning: The setup begins by placing the screen in an upright position with its legs facing the ground. This ensures a stable base for subsequent steps.
  2. Deploying Support Legs: The tripod's support legs are deployed by pushing down on the Tripod Junction. This action spreads the legs, creating a wide and stable footprint. It is crucial to extend the legs as much as possible to maximize stability and prevent interference with other objects. The manual explicitly warns against setting up the tripod on unstable platforms to avoid collapse and potential injury.
  3. Horizontal Positioning of Screen Casing: The screen casing is then rotated 90 degrees horizontally, aligning it parallel to the ground. During this step, the screen handle should face the bottom of the top hook, preparing it for extension.

Preparing for Projection:

  1. Screen Extension and Hooking: To prepare for projection, the screen handle is pulled vertically upwards and hooked onto the Top Hook. This action extends the screen material.
  2. Height Adjustment: The screen's height can be adjusted using the Locking Adjustment Tab. Pulling this tab unlocks the Vertical Extension Bar, allowing the user to raise or lower the screen to the desired height. Once the height is set, pushing the tab back in locks the position securely.
  3. Fine-Tuning Screen Bottom Height: Further adjustment of the screen's bottom edge is possible using the Screen Height Adjustment Lock/Release tab, located just above the Carrying Handle. Pulling this tab out allows the user to raise or lower the bottom of the screen. Pushing the tab back in locks the desired position.

Disassembling the Screen:

  1. Lowering the Screen Case: Disassembly starts by unlocking the Adjustment Handle (by pulling the locking tab to the left) and slowly sliding it down. This action brings down the screen's case.
  2. Retracting Screen Material: The Extension Bar is held, and the Locking Adjustment Tab is pulled out to unlock and release its position. Once the extension bar is fully down, the screen material is unhooked from the Top Hook and slowly retracted back into the case. A critical safety note emphasizes holding the extension bar first before unlocking the adjustment tab to prevent it from slamming down, which could cause injury or damage.
  3. Securing the Screen Case: The screen's case is then turned vertically clockwise, and the Top Hook's bottom pin is inserted into the screen's end cap hole, securing it in place.
  4. Folding Tripod Legs: Finally, the tripod legs are closed by pushing them in, making the unit compact for storage or transport.

Maintenance Features

The manual provides several important notes regarding the care and longevity of the Tripod B Series screen:

  • Stability: Users are reminded to always extend the tripod's legs as much as possible to ensure maximum stability. This is a crucial safety measure to prevent accidental tipping.
  • Screen Surface Care: It is advised not to fold the screen material itself, nor to allow any sharp objects to come into contact with the screen's surface. This helps prevent creases, tears, or punctures that could impair projection quality.
  • Cleaning: The screen surface should be cleaned often as needed. While specific cleaning instructions are not detailed, this general advice suggests regular upkeep to maintain optimal viewing quality.
  • Overall Longevity: The manual concludes with a general statement that careful use will extend the lifetime of the product, encouraging users to handle the screen with care during setup, use, and disassembly.

In summary, the Elite Screens Tripod B Series is a robust, portable projection screen designed with user convenience and image quality in mind, featuring intuitive setup, flexible adjustment options, and clear guidelines for safe and effective use.

Elite Screens Tripod B Series Specifications

General IconGeneral
Gain1.1
Screen SurfaceMatte White
Frame ColorBlack
OperationManual
FoldableYes
Aspect Ratio16:9
Setup TypeTripod
PortabilityYes, portable due to tripod design
Setup TimeUnder 5 minutes

Related product manuals