Rev.071516-MZ www.elitescreens.com 3
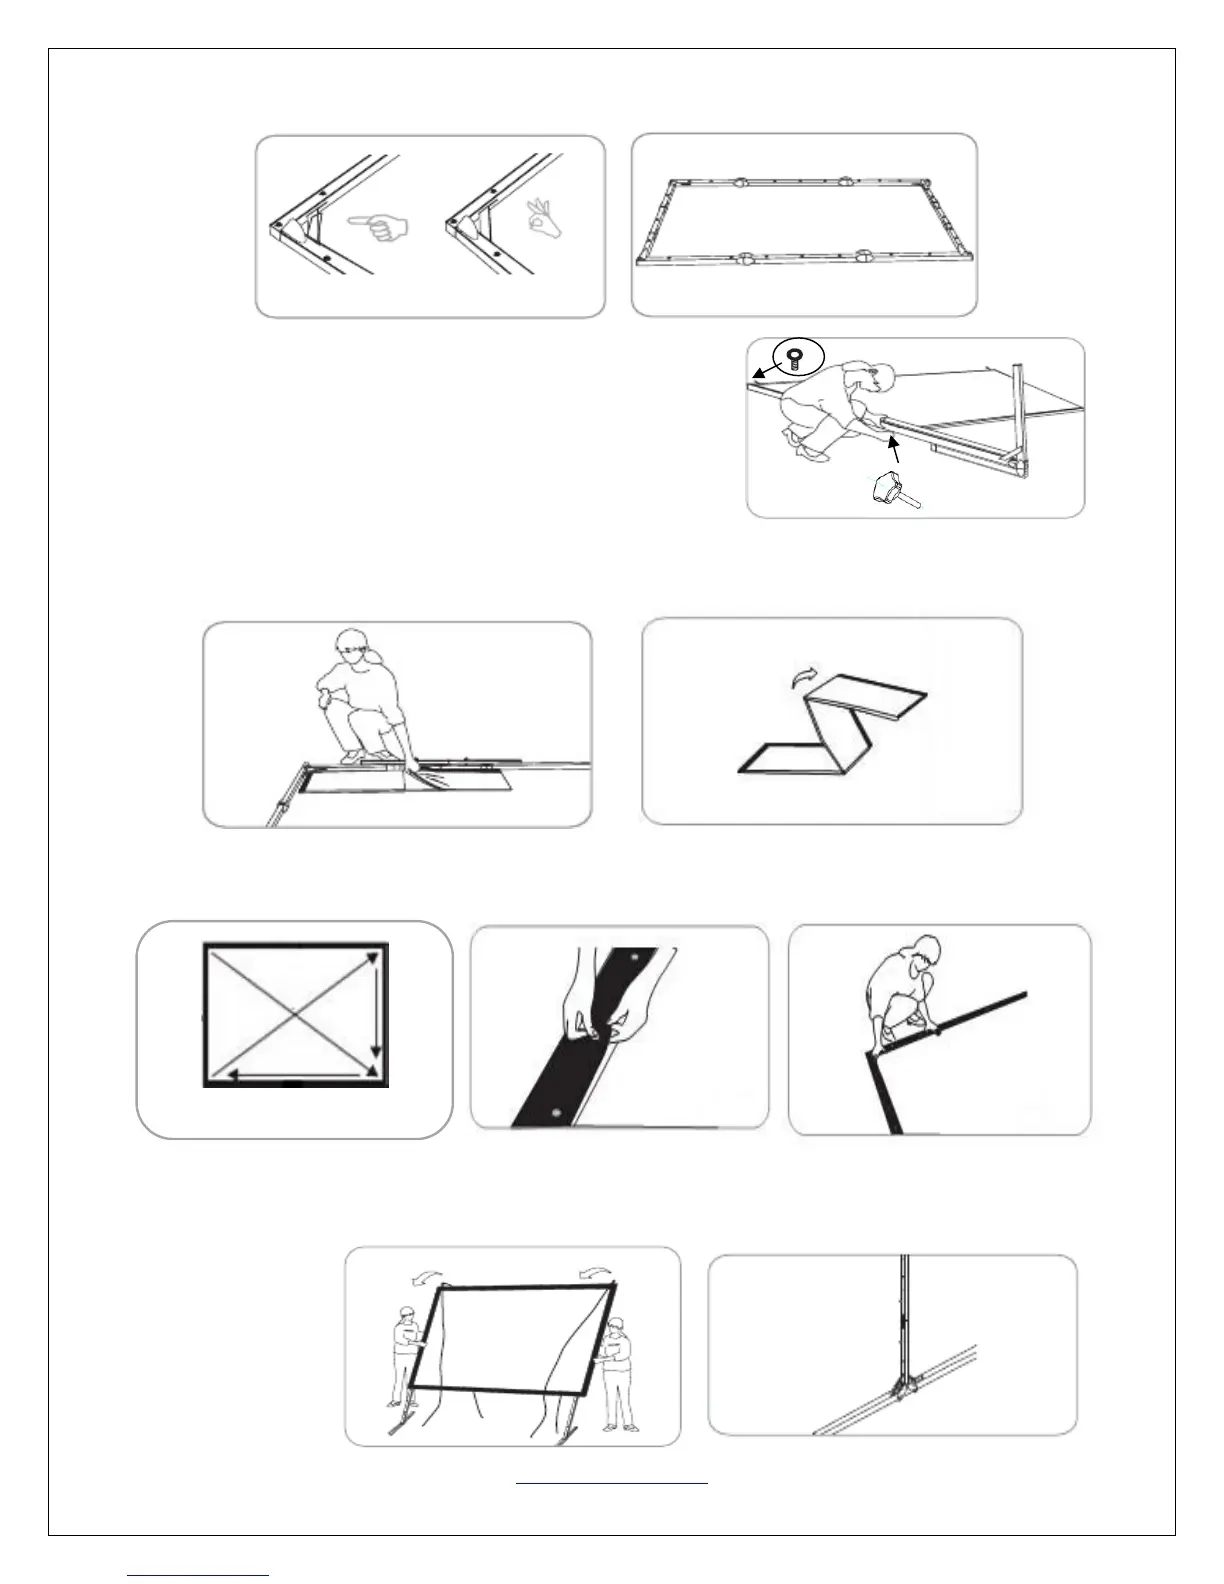
3. Make sure all 4 corners of the frame are at a 90° angle and the hinged support bar is straight and not
bending. (Fig. 7-9)
4.Insert the frame legs (B) into the openings located at the left and
right bottom sides of the folding frame (A). Secure them by
fastening the knob screw (E) into the adjacent hole. Next, screw
the eyebolts (F) into the openings located at the top of the frame
(Fig.10).
5. Take the screen material (D) out of the screen material bag (C) and align the corners of the screen
material with the inside corners of the frame. Unfold as shown in the diagram (Fig.11-12).
6
. Once the screen material (D) is fully extended, secure the material by snapping the buttons onto the
frame studs as shown in Fig. 13-15. Fasten the buttons in the following order AB→CD→EF→GH.
7. Tie 4 pieces of rope (2 on the left and 2 on the right) to the eyebolts (F) that are located at the top of the
frame. Next, lift the screen up while simultaneously opening the frame legs. Two people are needed for
this step. Fig.16-17
Fig.9
Fig.11
Fig14
A
B
D
Fig.16

 Loading...