3
The above format is slightly different for some parameters and can be altered by the
user if required, see below.
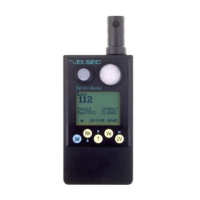
Set Button
The blue Set button is used to access advanced functions, change units etc. If it is
pushed once a menu similar to that below is shown:
Max-Min>
Display>
Units>
Clock>
Calibrate>
The first menu item “Max-Min” is highlighted, different menu items can be
highlighted using the é and ê buttons. The wanted action is done by highlighting the
appropriate menu item and pressing the Set button. To abort without doing anything
press the X button. In some cases a further sub-menu is displayed with more choices.
Elsewhere in this manual directions in the form Set\item1\item2 are given. This means
Press Set, select item1 in the first menu, press Set again, select item2 in the next menu
and press Set.
To take a measurement without having to look at the display while the reading is
taken (for example where the operators head may effect the reading) proceed as
follows:
1. Position the monitor where the reading is to be taken.
2. Push the appropriate button for 1-2 seconds and release.
3. Hold the monitor in position for at least 2 seconds.
1. Without operating any buttons by mistake move the monitor so the reading
can be noted before it turns itself off.