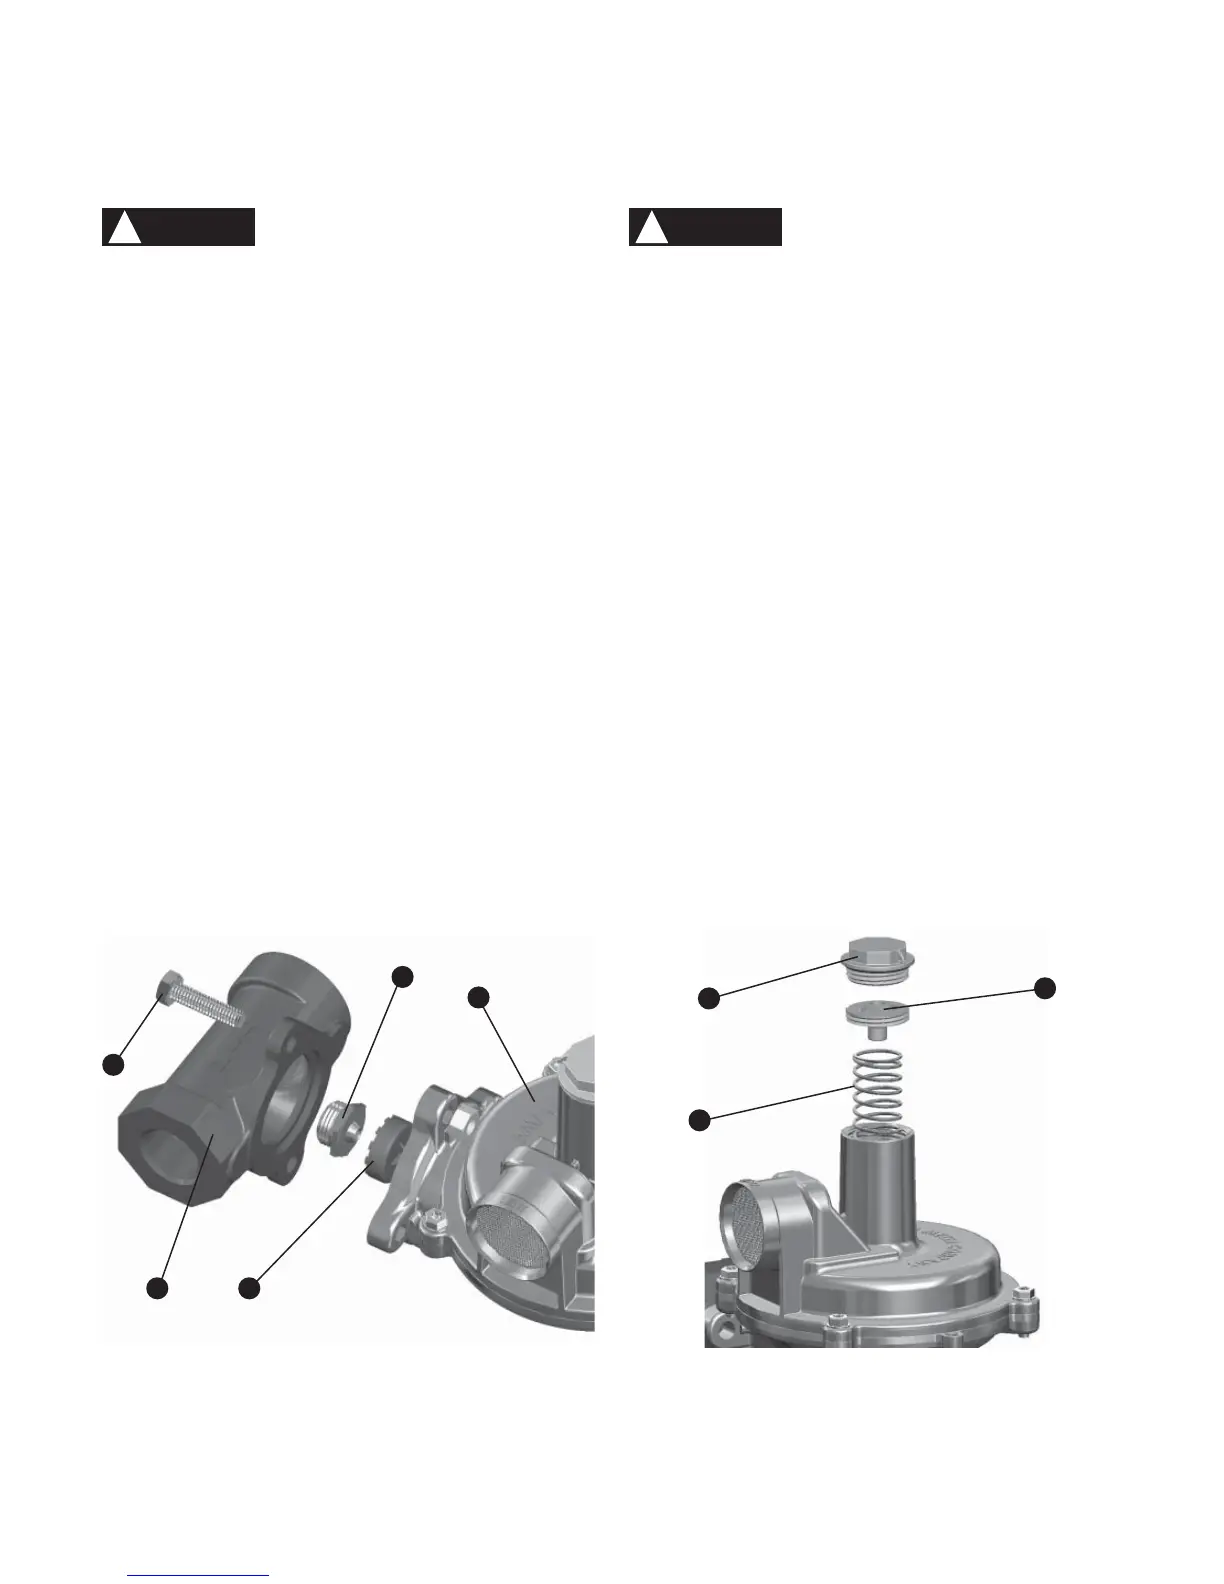
Figure 4
2
3
1
4
2
1
3
Figure 5
5
Regulators that have an orifice size different than
shown on the seal plug tag must have their set
pressure reestablished. Mark the new orifice size
on the regulator seal plug or on its tag.
Regulators that have a pressure spring removed
or replaced must have their set pressure
reestablished. If the pressure spring is different
from that shown on the seal plug or tag, mark
the new spring range on the regulator seal plug
or on its tag.
Replacing the Pressure Spring
(Numbers in parentheses refer to Figure 5.)
Shut off gas supply and depressurize the system.1.
Remove seal plug (1) with a 1" wrench.2.
Unscrew pressure adjusting screw (2) with a 3/8" nut driver. 3.
Completely remove the pressure adjusting screw (2).
Remove the pressure spring (3). Install new pressure spring.4.
Replace the pressure adjusting screw and turn adjusting 5.
screw to about mid position.
Proceed to Steps 4, 5, and 6 of the Installation instructions 6.
on page 4 to set delivery pressure.
Maintenance
!
CAUTION
Maintenance
!
CAUTION
Replacing the Orifice
(Numbers in parentheses refer to Figure 4.)
Shut off gas supply and depressurize the system.1.
Remove the two valve body bolts (2) securing the diaphragm 2.
case (3) to the valve body (1) with a 1/2" wrench. Place the
diaphragm case aside and protect the seat disc (5) from dirt
particles and physical damage.
Remove the orifice valve (4) with a 7/8" hex socket wrench.3.
Sparingly apply Henkell G30 or Loctite "Stainless Steel PST" 4.
thread sealant or equivalent (not supplied) to the new orifice
threads.
Carefully start the threads of the orifice into the valve body 5.
and tighten to 350 ±50 in lbs. Care must be taken to prevent
nicking the orifice.
Proceed to Steps 5, 6, 7 and 8 of the Inspection instructions 6.
on page 5.
SR100 Series Service Regulators 06 Elster American Meter