4
6
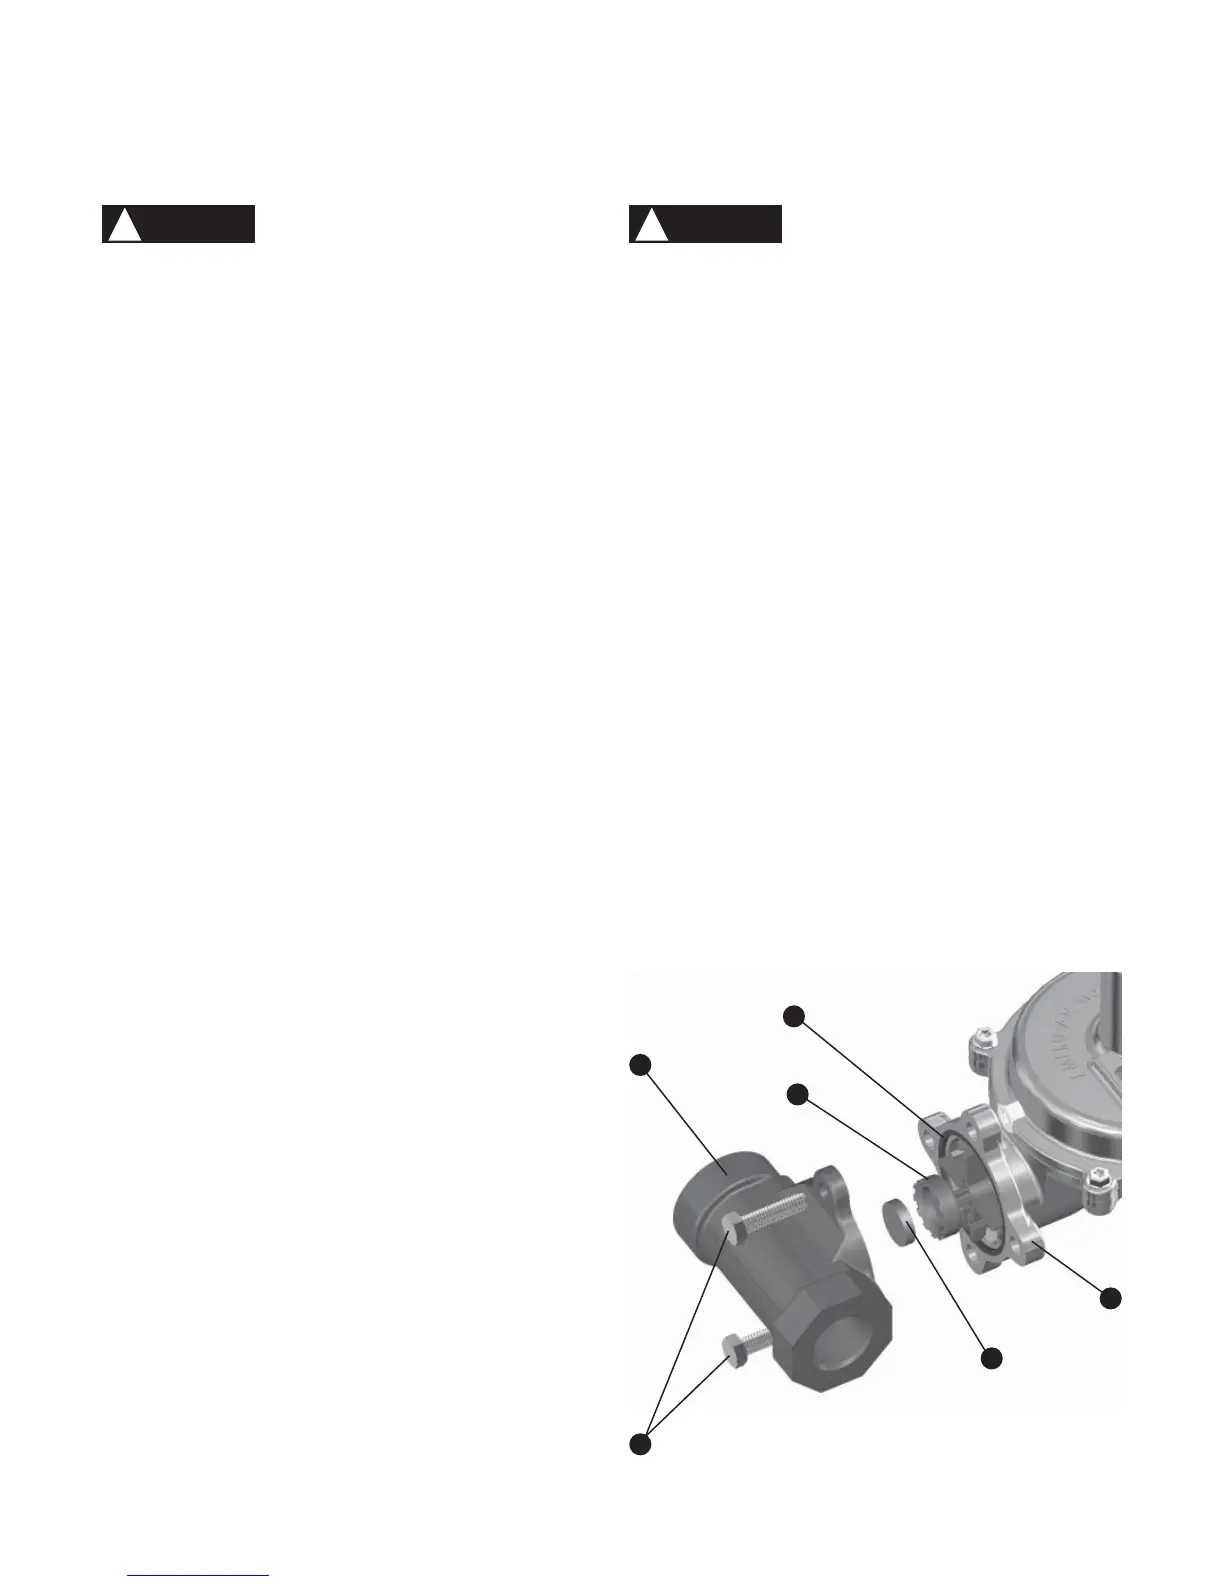
Figure 3
2
3
1
5
As a knowledgeable user of Elster American
Meter Company products, you should be
aware that parts in the Company's meters
and regulators contain, or are coated with,
heavy metals such as cadmium, zinc, lead
and chromium. Repair or refurbishment
of this equipment should take into account
the presence of these materials and should
comply with all state and federal requirements
concerning worker protection, proper disposal,
and safety including protection against exposure
to dust and fumes.
SR100 Series Service Regulators 05 Elster American Meter
Inspection of Valve Seat Disc and Orifice
(Numbers in parentheses refer to Figure 3.)
Shut off gas supply and depressurize the system.1.
Remove two valve body bolts (2) securing the diaphragm 2.
case (3) to the valve body (1) with a 1/2" wrench. Separate
the diaphragm case from the valve body.
Visually check the seating edge of the orifice inside the 3.
valve body (1) . If it is nicked or damaged, it should be
replaced with a new orifice to provide positive shut off. See
Maintenance instructions for replacing orifice on page 6.
Inspect the surface of the valve seat disc (4). If it is scored 4.
or uneven, replace it as outlined in the Maintenance
instructions for replacing the seat disc on page 5.
Install new seal ring (5) in the diaphragm case groove.5.
Inspect unit for cleanliness and proper positioning of the 6.
parts. Pay particular attention to the proper positioning of
the seal ring (5) in the groove.
Install the diaphragm case (3) on the valve body (1). Make 7.
sure the vent is positioned so that it cannot become plugged
or allow water to enter. Replace and tighten the two valve
body bolts (2) to 100 ±25 in. lbs.
Proceed to Steps 4, 5 and 6 of the Installation instructions.8.
Regulators are pressure-control mechanisms
having numerous moving parts which can
wear. In addition, regulator damage may occur
from external sources. For these reasons, the
regulator should be periodically inspected and
checked for proper operation. The frequency
of inspection depends on the severity of the
service conditions and the requirements of
applicable local, state, and federal codes and
regulations.
Follow the procedure below for field inspection
of the orifice and seat disc. Repair parts are
available through Elster American Meter if parts
are worn or damaged. Exercise care to prevent
foreign material from entering the regulator
during any inspection or maintenance activities.
Inspection Maintenance
!
CAUTION
Replacing Seat Disc
(Numbers in parentheses refer to Figure 3.)
Follow steps 1 and 2 of the Inspection instructions on page 5 1.
to access seat disc.
Carefully insert the tip of a knife along the edge of the seat 2.
disc (4) and the lift the seat disc out of the plunger (6).
Install a new seat disc (4) into the plunger (6) by pressing 3.
into place. Make sure that the disc is pressed completely
into the plunger (6).
Proceed to Steps 5, 6, 7, and 8 of the Inspection instructions 4.
on page 5.
!
CAUTION
 Loading...