9
For more information, refer to Celerra Tools on http://Powerlink.EMC.com
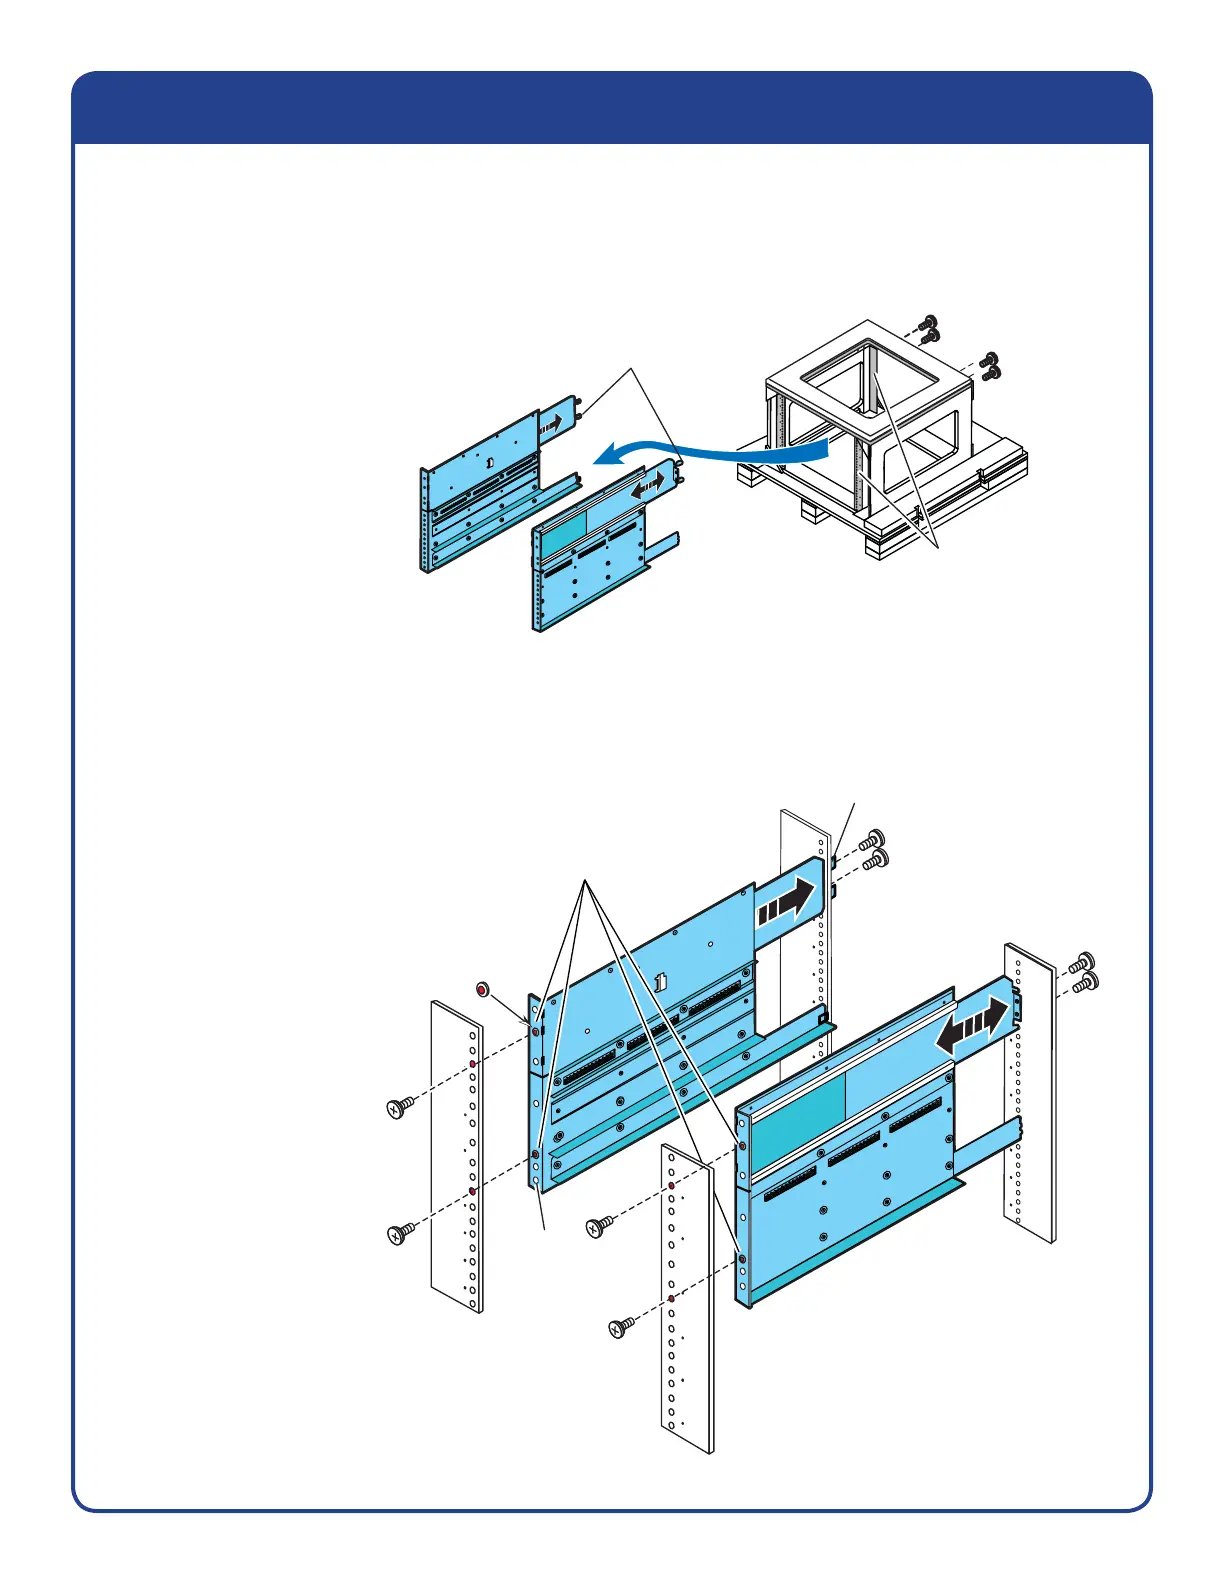
Ganged rail slide
Rail extensions
Remove rear screws.
CNS-001411MOD
Front of your rack
Rear of your rack
Rail slide
Rail slide
Install 2 screws
to hold the rail
in place.
Rail extensions
Install rear screws.
Only remove the screws
holding the ganged rails
in the mini-rack.
Protruding PEM screw holes
are located in 4 places on
the front of the rails.
Marked holes on both rails
indicate the place
for initial screws.
Threaded
screw holes
Remove the
ganged rails
Install 2 screws
on each side
of the rack to
hold the rail
in place.
Ganged rail slide
1. Remove the larger-headed screws holding the ganged rails in place. Keep the screws to install the
ganged rails in your rack.
2. Remove the ganged rails. Do not remove the metal mini-rack, it is part of the shipping container. The
components are to be installed into your rack with the smaller-headed screws
3. Insert the ganged rail slides and seat the
rail extensions into the rear channels. With
the larger-headed screws you have kept,
start installing the ganged rails into your
rack.
4. Do not fully tighten
the initial two front
screws that join the
rails to the rack.
This allows some
adjustment space
for the installation
of the components.
Remove rails from mini-rack