Installing an LCC
!
CAUTION
If you are replacing a failed LCC, wait at least 30 seconds after
removing the failed LCC before installing the replacement LCC.
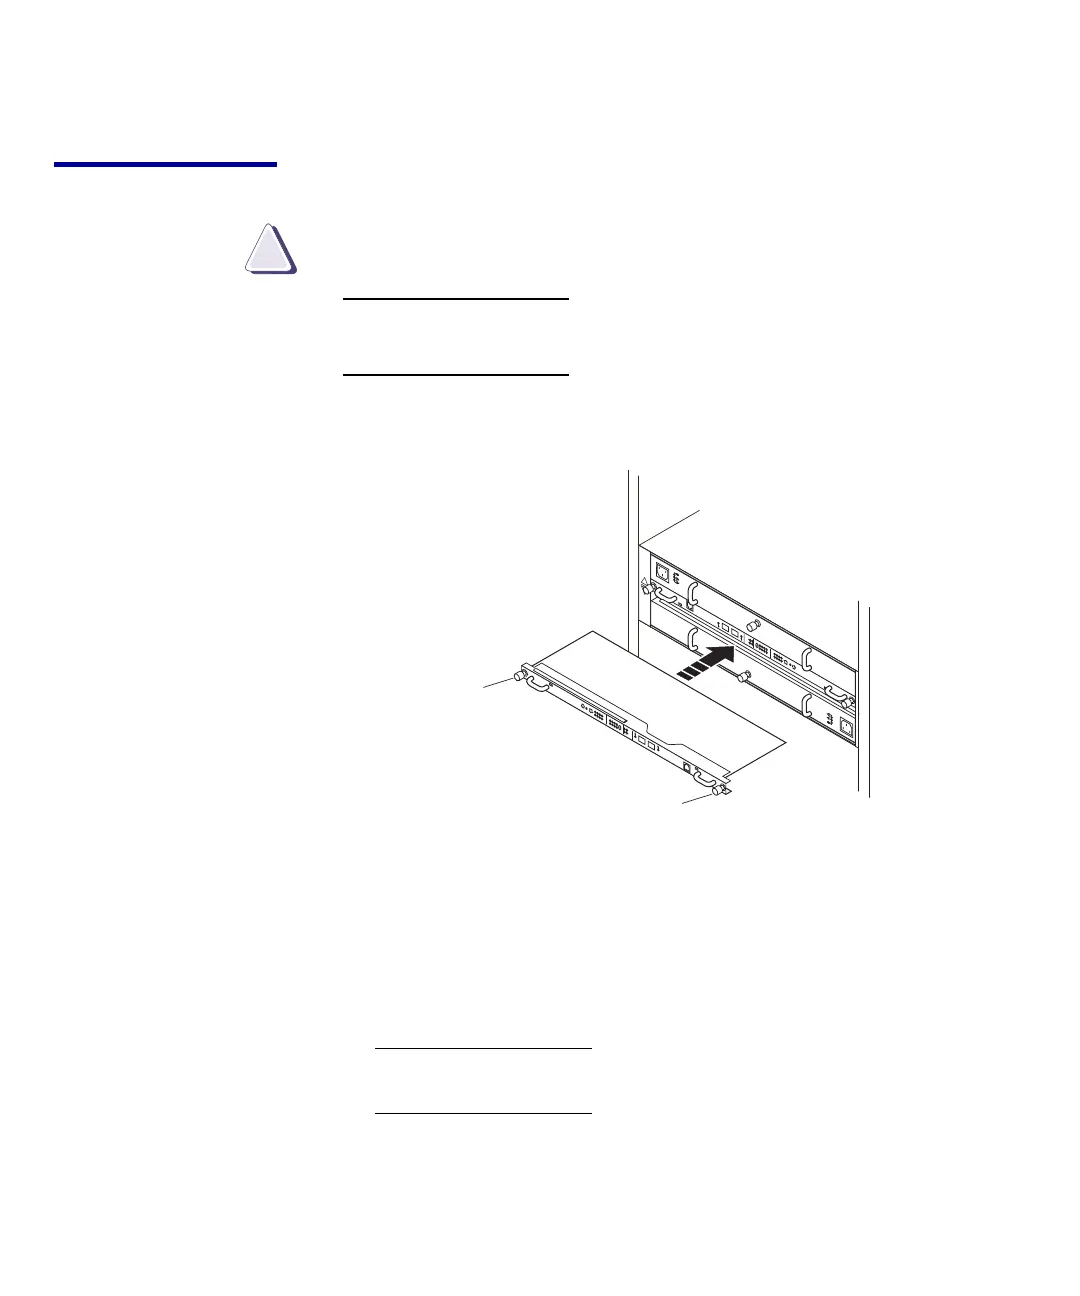
1. Gently push the LCC into the enclosure until it is completely seated
in the enclosure midplane (Figure 3 ).
!!
!!
!
EX
P
PR
I
E
X
P
PR
I
#
A
B
EMC3181
Captive Screw
Captive Screw
!
E
XP
P
RI
EX
P
PR
I
#
Figure 3 Installing an LCC
The LCC Power light turns on.
2. Securethemodulewiththecaptivescrews.
3. Reattach the copper cables (a PRI cable and a possible EXP cable) to
thesameconnectorsfromwhichyouremovedthem(Figure4).
The orient
ation of the connector for the EXP cable is opposite the
orientat
ion of the connector for the PRI cable.
6
Replacing a DAE2P/DAE3P LCC Module
 Loading...