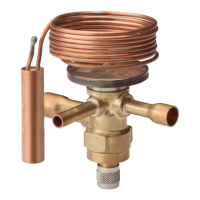
11
CROSBY STYLE JOS-E, JBS-E, JLT*-JBS-E, JLT*-JOS-E VALVES
InstallatIon and MaIntenance InstructIons
6.2.8 Remove the spindle, guide (15), disc
holder and disc insert (8). For balanced
bellows valves (Style JBS-E and
JLT-JBS-E) special care must be taken
not to damage the bellows subassembly
(6). If parts are difficult to remove, due
to the presence of corrosive or foreign
materials, soaking in a suitable solvent
may be required.
6.2.9 Remove the spindle from the disc holder.
6.2.10 Lift the guide off the disc holder.
6.2.11 Disc insert removal
Note: for removal of threaded inserts
supplied with JOS/JBS valves,
see IS-V3137A.
• Orifice sizes D through M (metal seats)
Screw a standard bolt into the tapped
hole (see Table 7) in the face of the disc
insert. Using hand force pull the bolt
straight out. The disc insert with the
retention clip (9) should come out with
moderate force. If the valve has been
in dirty service, it may be necessary to
use a suitable solvent to aid in removal.
If additional pullout force is required, a
bolt with a T handle may be used. The
method described below for orifice sizes
N through T may be used if necessary.
• Orifice sizes N through T (metal seats)
Safety precautions should be followed
whenever heavy parts are being lifted
or transported. Dropping disc holder
assembly may dislodge the insert. The
removal of the insert is accomplished by
the use of a tool as shown in Figure 6.
This tool consists of a rectangular steel
bar which spans the outside diameter
of the disc holder with a center hole
through which the standard bolt can be
inserted before screwing into the disc
insert. A nut and washer is also required
as shown. Tightening the nut with a
wrench will exert a pulling force on the
disc insert and cause it to be removed
from the disc holder.
FIGURE 8
Vise jaws
Bellows
Tailpiece
Tailpiece
gasket
Disc holder
6.3 Cleaning
External parts such as the valve body, bonnet
and cap should be cleaned by immersion in a
bath such as hot Oakite solution or equivalent.
These external parts may be cleaned by wire
brushing, provided the brushes used do not
damage nor contaminate the base metals.
Onlyclean stainless steel brushes should be
used on stainless steel components.
The internal parts such as the guide, disc
holder, disc insert, nozzle ring and spindle
should be cleaned by immersion in a
commercial high alkaline detergent.
Guiding surfaces on the disc holder and guide
may be polished using a fine emery cloth.
Thebellows and other metal parts may be
cleaned using acetone or alcohol, then rinsed
with clean tap water and dried.
• Orifice sizes D through K (O-ring seats)
The O-ring seat design for orifice sizes
D through K has a retaining screw in
the center of the disc insert. A drilled
and tapped hole (4-40 UNC) is provided
in the center of the retaining screw for
removal of the disc insert (Figure 7).
Screw a standard bolt into the hole in the
retaining screw. Using hand force pull
the bolt straight out. The disc insert with
the retention spring should come out
with moderate force.
• Orifice sizes L through T (O-ring seats)
Safety precautions should be followed
whenever heavy parts are being lifted or
transported. Dropping the disc holder
may dislodge the insert. Remove the
three retaining screws from the insert.
Remove the retainer and O-ring seat.
Atapped hole (refer to Table 7) is
provided in the disc insert for insertion
of a removal bolt. Follow instructions for
metal seated insert removal.
6.2.12 For bellows valves only, place the disc
holder in a vise (the larger sizes may
require a 3-jaw vise) as shown in Figure8.
Using a suitable wrench
unscrewthe
tailpiece and bellows from thedischolder.
6.2.13 Remove the nozzle ring (3) from the
nozzle (2).
6.2.14 R
emove the nozzle (2) from the valve
body (1) if necessary. Unless the valve
seat on the nozzle has been damaged
mechanically or shows signs of corrosive
attack, it will not be necessary to remove
the nozzle. In most cases the nozzle can
be reconditioned without removal from
the valve body. To remove the nozzle,
turn the valve body over taking care not
to damage the bonnet studs (21). Turn
the nozzle counterclockwise by using
the wrench flats on the nozzle flange or
a nozzle wrench designed to clamp onto
the nozzle flange.
 Loading...