Instruction Manual
D101957X012
V150 and V300 Valves
February 2011
10
It might be necessary to remove the HD metal seal by carefully tapping it with a soft punch and hammer. Take care
not to damage the seal protector ring surfaces.
4. Inspect, clean, or obtain replacement parts as necessary. Inspect the gasket and sealing surfaces on the valve body
(key 1), ball (key 2), ball seal (key 11), and seal protector ring (key 3) for damage.
5. If a replacement ball, drive and follower shafts, or bearings (keys 2, 6, 9, and 10) are needed, proceed to the Bearing
and Ball Maintenance procedure for disassembly and assembly procedures. If only the seal is to be replaced,
proceed to the assembly procedure below.
Assembly
Refer to figure 5 for part and key number locations during seal installation.
1. Thoroughly clean all parts that are to be re‐used or obtain replacement parts. Be sure that all sealing surfaces are in
good condition without scratches or wear. If the valve has been installed between line flanges and the flange studs
and nuts have been tightened, always replace the gasket (key 15).
If you have not already done so, lift the valve and place it with the outlet flange face flat on the protected working
surface. Use the lever from the actuator, or provide some other safe method to rotate the ball into the closed position.
The inlet flange face should be up, and the ball approximately centered within the opening.
2. Make sure the ball cannot rotate during seal assembly procedures (read the Warning on page 9).
3. For valves with composition ball seals:
D Install the composition seal (key 11) into the valve body.
D Install the gasket (key 15) on the valve body.
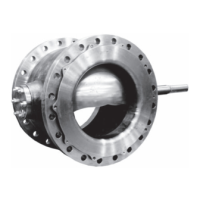
Figure 5. Ball Seal Assembly Detail
43B7128‐A
A6066‐1
D Install the seal protector ring (key 3) into the valve body. (Go to step 6 below.)
4. For valves with HD metal seals:
D Lubricate with Mag Lub or an equivalent lubricant, and install the radial seal (key 37) into the appropriate groove in
the seal protector ring making sure the open side of the radial seal faces away from the ball.
D Install the wave spring (key 13) on the seal protector ring (key 3).
 Loading...


