Instruction Manual
D101957X012
V150 and V300 Valves
February 2011
13
Assembly
1. Inspect all sealing surfaces to ensure they are in good condition and without scratches or wear. Thoroughly clean all
parts and make sure they are free of oil or grease.
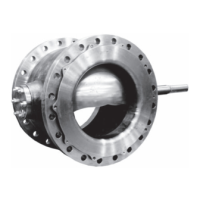
2. Installing bearings (key 10):
a. For PEEK bearings, install the drop‐in bearings by hand. The bearing flanged end should touch the drive shaft
bearing support surface (see figure 10). Also, install the bearing (key 10) into the bottom flange (key 44). The
bearing flange should touch the surface of the bottom flange.
b. For metal bearings (key 10):
D For the valve body, use a press and ram to install the bearings. Refer to figure 7 for dimensions and tolerances of the
ram and bearings.
D Press the bearing in until it is flush with the valve body (key 1).
The acceptable tolerance for bearing location is: flush with the valve body to 1.5 mm (0.06 inches) inside the bearing
bore. That is, the bearings should not protrude into the flow cavity of the valve.
D Press the bearing into the bottom flange, using the same tolerances shown for bearing installation into the valve
body.
WARNING
The ball might be damaged if it is allowed to fall into the valve body. To avoid personal injury or damage to the sealing
surfaces, support the ball to prevent it from falling into the valve body cavity.
3. Installing the ball, drive and follower shafts (keys 2, 6, and 9):
D If you have not already done so, place the valve body (key 1) on a flat protected working surface with the seal side
flat on the working surface.
D In the the next step, make sure the splined ear of the ball is aligned with the packing box side of the valve body.
CAUTION
The ball might be damaged if it is allowed to hit the flange edge or interior of the valve cavity while it is being lowered into
the valve body.
D Using the ”eye” bolt in the center of the ball cavity, lift the ball above the valve. Carefully, start lowering the ball,
splined ear first, down into the valve body through the outlet flange. When the ball ear enters the valve body, it
needs to be misaligned with the drive shaft bearing support.
As the ball clears the outlet opening, turn and rotate the ball as necessary to align the splined ball ear with the drive
shaft bearing support (see figure 10).
Allow the ball to come to rest on the contoured sealing surface of the ball on the protected surface.
4. Carefully lift the valve body until the drive shaft (key 6) can be inserted through valve shaft bore and bearing (key
10), and into the drive shaft/splined ear of the the ball.
 Loading...


