Instruction Manual
D101957X012
V150 and V300 Valves
February 2011
9
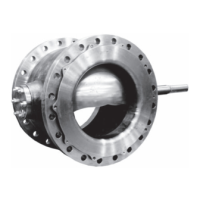
Figure 4. Optional Shaft‐to‐Body Bonding Strap Assembly
VALVE BODY
ACTUATOR
A
A
VIEW A‐A
37A6528-A
A3143-2/IL
The flow ring construction does not use a seal (key 11), radial seal (key 37), or wave spring (key 13). Use this procedure
to remove the seal protector ring for flow ring constructions, but disregard any instructions calling for the seal and
other seal parts.
Disassembly
WARNING
If the actuator is removed from the valve, the ball/shaft assembly may suddenly rotate, resulting in personal injury. To avoid
injury, carefully rotate the ball to the stable position after the actuator is removed. If necessary, lock the ball in a specific
position when directed by the following steps.
Key numbers are shown in figure 10, unless otherwise indicated.
1. Isolate the control valve from the line pressure, release pressure from both sides of the valve, and drain the process
media from both sides of the valve. If using a power actuator, also shut off all pressure lines to the power actuator
and release all pressure from the actuator.
2. Remove line bolting, remove the control valve/actuator assembly from the pipeline, and place the valve on a
protected flat surface with the seal protector ring facing up. Carefully rotate the ball to the open position.
Note
Lifting bolt holes are provided in the seal retainer or flow ring to assist in its removal from the valve body.
3. Remove the retainer screws (key 21). Carefully remove the seal protector ring and gasket (keys 3 and 15). (For flow
ring constructions, go to step 4.)
a. For valves with composition seal, remove the seal (key 11) from the valve body (key 1).
b. For valves with HD metal seal, once the protector ring has been removed from the valve, push the metal seal
(key 11) out of the seal protector ring (key 3). Remove the radial seal (key 37). Inspect, clean, or obtain
replacement parts as necessary.
 Loading...


