3
NON-ADJUSTABLE STEM PACKING SEAL
INSTALLATION (Standard)
1. Lubricate stem packing seal with a coating
of lubricant-silicone grease.
2. Install stem packing seal (12) on upper
plug stem and into cap counter bore with
the "U" shaped side facing valve interior.
Usethebushing to (4) push the seal into
thestem bore.
NOTE: Use thin strapping material inserted in
between stem diameter and stem seal inside
diameter to help release air trapped under stem
seal.
3. Install retaining ring (11) in stem grove
tohold bushing (4) in place.
NOTE: Care should be taken when installing
retaining ring. Use only properly sized snap ring
pliers and wear appropriate safety glasses. Take
care so that the retaining ring does not spring out
and hit you.
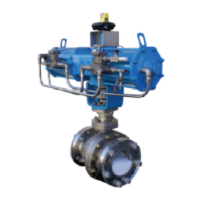
KEYSTONE FIGURE 580 AND 583 BALLCENTRIC VALVES
INSTALLATION AND REPAIR INSTRUCTIONS
ASSEMBLY INSPECTION AND
TESTING THE VALVE
1. Rotate plug to ensure proper operation by
hand, wrench, or operator.
2. Visually check to ensure full contact of
plugand seat.
3. Valve assembly is now ready to be tested.
Rotate the valve to the full close position.
Applywater pressure to the inlet side of the
valve and check for leaks at the stem seal
andplug.
TROUBLESHOOTING
Symptom Probable cause Solution
Leakage past the flange face Flange bolts are not evenly torqued Loosen the flange bolts and re-tighten the to correct torque per
ASME requirements. Loosen the flange bolts and re-tighten the to
correct torque per ASME requirements.
Improper flanges Confirm mating flange type by referring to AS2129
Leakage in the closed position
(leakage in the pipeline)
The plug is not closing fully
Actuator is not properly adjusted
Refer to actuator adjustment procedures.
Damage or improperly aligned plug Follow 'Plug Installation' procedures or replace plug if damaged.
Line pressure exceeds valves working pressure Reduce line pressure to valve working pressure.
Leakage at the valve stem Packing (grit excluder) failure Refer to plug installation
Excessively high torque Obstruction in the pipeline Remove valve from pipeline and remove obstruction
Valve stem or plug is bent Replace plug/stem assembly (check for water hammer or freezing
of line material)
Scale build-up on stem or seat Open and close the valve several times. Operate the valve at least
once a month.
ADJUSTABLE PACKING GLAND AND
BRIDGEINSTALLATION (Optional)
1. Place packing gland (16) on upper plug stem
over stem bushing.
2. Insert packing bridge studs (15) into body
cap holes (Note: one end of the studs is
a left handed thread and one end is right
handed - the left handed thread should be
inserted in the cap) and rotate CCW until two
(2) to three (3) threads have been engaged.
3. Place packing bridge (17) on upper plug
stem over packing bridge studs and stem
packing gland. Place nuts on packing bridge
studs and tighten by hand. Use appropriate
tool and adjustment nut to further tighten
studs until snug.

 Loading...

