EasyManua.ls Logo

Emerson KGA User Manual

Emerson KGA
37 pages
To Next Page IconTo Next Page
Page #1 background imageLoading...
Page #1 background image
CLARKSON SLURRY KNIFE GATE VALVES
KGA And KGA+
KGA+ INDEX
1. General information ...................................... 2
2. Initial inspection ............................................ 2
3. Installation instructions ................................ 3
4. Operation ....................................................... 4
5. Lockouts ........................................................ 6
6. General maintenance.................................... 6
7. Spare parts .................................................... 7
8. Storage ........................................................... 8
9. Sleeve replacement ...................................... 9
10. Secondary seal replacement ...................... 10
11. Disassembly and assembly instructions ... 12
12. Field replacement of gates ......................... 15
13. Installation instructions for splash guard . 16
14. Installation instructions for drainplate ..... 16
15. Lifting ........................................................... 17
16. Manual handwheel actuator assembly ...... 18
17. Bevel gear actuator assembly .................... 18
18. Air cylinder actuator assembly................... 19
19. Hydraulic cylinder actuator assembly ....... 19
KGA INDEX
20. General information .................................... 20
21. Initial inspection .......................................... 20
22. Installation instructions .............................. 21
23. Operation ..................................................... 22
24. Lockouts ...................................................... 24
25. General maintenance.................................. 24
26. Spare parts .................................................. 25
27. Storage ......................................................... 26
28. Sleeve replacement .................................... 27
29. Wiper replacement ...................................... 28
30. Disassembly and assembly instructions ... 28
31. Field replacement of gates ......................... 32
32. Installation instructions for splash guard . 33
33. Lifting ........................................................... 34
34. Manual handwheel actuator assembly ...... 35
35. Bevel gear actuator assembly .................... 35
36. Air cylinder actuator assembly................... 36
37. Hydraulic cylinder actuator assembly ....... 36
This instruction manual provides installation,
operation and maintenance recommendations
for both the Clarkson KGA and Clarkson KGA
Plus (KGA+) slurry knife gate valves. The KGA
was first introduced in the 1970’s and the
KGA+ design was introduced in2010. While
both products are very similar, the KGA+ offers
additional features with resulting differences in
maintenance procedures and parts lists.
The first section covers the KGA+, the second
the KGA. Please refer to the KGA+ or KGA
section for complete instructions.
KGA+ and KGA identified
The KGA+ is easily identified from the KGA by
several prominent features:
Mating flanges: the KGA has slotted mating
flanges to mate with ASME B16.5/150 pipe
flanges in sizes above NPS 8 (DN 200). The
KGA+ features full flange design in all size
and can beadapted to many different flange
drillings.
CLARKSON KGA+
VALVE ASSEMBLIES
Installation and maintenance instructions
© 2017 Emerson. All Rights Reserved.Emerson.com/FinalControl VCIOM-06601-EN 17/09
Question and Answer IconNeed help?

Do you have a question about the Emerson KGA and is the answer not in the manual?

Emerson KGA Specifications

General IconGeneral
BrandEmerson
ModelKGA
CategoryControl Unit
LanguageEnglish

Summary

Installation and Maintenance Instructions

Initial Inspection - KGA+

Installation Instructions - KGA+

KGA+ Valve Installation Orientation

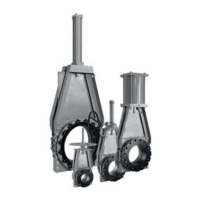
KGA+ installed with gate in fully open position with sleeves inserted.

Retainer Flanges as Gaskets

Retainer flanges function as gaskets for pipeline installation.

Flange Standards and Bolt Torque

Details on flange standards and maximum bolt tightening torques.

Operation - KGA+

Lockouts and Safety - KGA+

General Maintenance - KGA+

Spare Parts and Interchangeability - KGA+

KGA+ Gate Redesign Impact

Gates redesigned for KGA+ sizes NPS 3-16; peripheral parts also impacted.

Non-Interchangeable Stem Assembly and Seal

Stem assembly and secondary seals are not interchangeable between KGA and KGA+.

Storage Recommendations - KGA+

Sleeve Replacement - KGA+

Secondary Seal Replacement - KGA+

Disassembly for Secondary Seal Replacement

Steps for disassembling the valve to replace the secondary seal.

Secondary Seal Removal Technique

Remove the secondary seal using a screwdriver and prying action.

Secondary Seal Reassembly - KGA+

Reassembly Steps After Secondary Seal Replacement

Detailed steps for reassembling the valve after secondary seal replacement.

Disassembly and Assembly Instructions - General

Visual Inspection of Parts Before Reassembly

Reassembly Procedure

Reassembly Continuation - KGA+

Field Replacement of Gates - KGA+

Reassembly After Gate Replacement

Steps for reassembling the valve after gate replacement.

Installation of Splash Guard (B7 Option) - KGA+

Installation of Drain Plate (B9 Option) - KGA+

Lifting Procedures - KGA+

General Information - KGA

Design Responsibility and Operation Limits

Piping designer's role and valve operation within design parameters.

Initial Inspection - KGA

Valve and Component Inspection

Examine valve, sleeves, retainer flanges, and operators for damage or wear.

Gate Position for Installation

Ensure valve gate is in the open position for proper installation.

Installation Instructions - KGA

Line Flange Alignment and Support

Critical steps for flange alignment, pipe supports, and companion flange types.

Valve Installation Position Flexibility

Valve suitable for vertical or horizontal lines; consider solids buildup.

Flange Standards and Bolt Torque for KGA

Details on flange standards and maximum bolt tightening torques.

Operation - KGA

On-Off Service and Throttling Exclusion

Valves are strictly for on-off service, not throttling applications.

Gate Movement and Sleeve Sealing

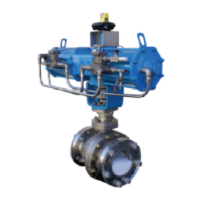
Actuator moves gate between sleeves for flow control and isolation.

Adherence to Design Parameters

Operate valves strictly within specified design pressure and temperature ranges.

Recommended Actuated Stroke Speed

Actuated valves have a maximum stroke speed; exceeding it can shorten sleeve life.

Operator Safety and Precautions - KGA

Position Seating vs. Torque Seating

KGA valves are position seated only; never torque seat the valve.

Lockouts and Safety - KGA

Optional Lockout Bracket Function

Optional lockout brackets resist normal operating thrust for safety.

Zero Energy State Requirement

Actuated valves require a ZERO ENERGY STATE for complete lockout compliance.

Spring Cylinder Mechanical Energy Caution

Caution for spring-loaded cylinders due to stored mechanical energy; handle with care.

General Maintenance - KGA

Recommended Inspection Schedule

Inspect products at least every 60 days for wear and corrosion.

Valve Stem Lubrication Procedure

Lubricate valve stems and nut assemblies using provided grease fittings.

Functionality Stroke Check

Stroke valve through full open/closed positions to ensure proper function.

Housing and Sleeve Lubrication

Lubricate KGA valves via fittings into the chest area for gate and sleeve lubrication.

Lubrication Frequency Guidelines

Lubricate KGA valves every 100 strokes (NPS 3-10) or 50 strokes (NPS 12-60).

Lubricant Type and Warranty Warning

Use of recommended lubricants is critical; improper use voids warranty.

Spare Parts and Interchangeability - KGA

KGA+ vs. KGA Spare Parts Identification

Understanding impact of KGA+ changes on spare parts and interchangeability with KGA.

Exterior Clues for KGA/KGA+ Identification

Exterior clues like wiper retainer identify KGA from KGA+.

Actuation System Interchangeability Notes

AC/HC actuators interchangeable; clevis assembly and BG stem revised for KGA+.

Storage Recommendations - KGA

Spare Sleeve Shelf Life and Storage

Guidelines for storing spare sleeves to maintain shelf life and condition.

Optimal Sleeve Storage Conditions

Store sleeves at ambient temp, 60-90% RH, away from direct sun and motors.

Genuine Clarkson Parts Importance

Emerson recommends genuine Clarkson parts; non-OEM parts may void warranty.

Valve Storage Guidelines

Store valves in open position, protected from sunlight, heat, ozone, and weather.

Caution for Spring-Loaded Actuator Storage

Caution for spring-to-extend actuators; remove sleeves for storage.

Actuator Orientation for Storage

Preferred actuator orientation for storage to optimize protection.

Sleeve Replacement - KGA

Component Inspection for Sleeve Replacement

Verify quantity of sleeves, retainer flanges, bolts, and nuts required.

Sleeve and Retainer Flange Surface Inspection

Inspect sealing surfaces of sleeves and retainer flanges for damage or wear.

Disassembly for Sleeve Replacement

Step-by-step instructions for disassembling the valve for sleeve replacement.

Depressurize Valve Before Disassembly

Ensure line is not pressurized before removing valve; parts may be heavy.

Installation Steps for New Sleeves

Detailed steps for installing new sleeves and retainer flanges.

Sleeve Replacement Continuation - KGA

Wiper Replacement - KGA

Disassembly for Wiper Replacement

Steps for disassembling the valve to replace the wiper assembly.

Reassembly After Wiper Replacement

Steps for reassembling the valve after wiper replacement.

Disassembly and Assembly Instructions - General KGA

General Valve Disassembly Steps

Step-by-step instructions for disassembling the valve.

Reassembly - General KGA

Reassembly Continuation - General KGA

Field Replacement of Gates - KGA

Disassembly for Gate Replacement

Steps for disassembling the valve to replace the gate.

Installation of Splash Guard (B7 Option) - KGA

Lifting Procedures - KGA

Caution: Valve Assembly Lifting

Valve assemblies are heavy; use proper lifting techniques. Do not lift with adjoining pipe or media.

Primary Lift Point: Frame (Yoke) Assembly

Lift all valves using the frame (yoke) assembly as the lift point; do not use lockout brackets.

Related product manuals