29
3 80 4.45 113.03 4.49 114.05 4.55 115.57
4 100 5.39 136.91 5.43 137.92 5.49 139.45
6 150 7.79 197.87 7.83 198.88 7.89 200.41
8 200 9.42 239.27 9.46 240.28 9.52 241.81
10 250 11.92 302.77 11.96 303.78 12.02 305.31
12 300 13.94 354.08 13.97 354.84 14.00 355.60
14 350 15.80 401.32 15.83 402.08 15.86 402.84
16 400 17.44 442.98 17.47 443.74 17.50 444.50
18 450 19.06 484.12 19.10 485.14 19.19 487.43
20 500 21.06 534.92 21.10 535.94 21.19 538.23
24 600 26.06 661.92 26.10 662.94 26.19 665.23
26 650 28.28 718.31 28.36 720.34 28.45 722.63
30 750 32.06 814.32 32.12 815.85 32.21 818.13
36 900 38.20 970.28 38.30 972.82 38.39 975.11
42 1050 45.06 1144.52 45.19 1147.83 45.31 1150.87
48 1200 50.74 1288.80 50.77 1289.56 50.89 1292.61
54 1350 55.74 1415.80 55.77 1416.56 55.89 1419.61
60 1500 63.95 1624.33 63.99 1625.35 64.11 1628.39
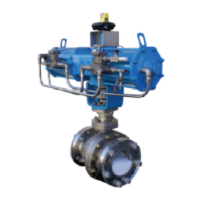
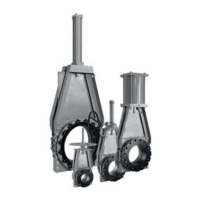
CLARKSON SLURRY KNIFE GATE VALVES
KGA
Disassembly
1. Before working on the KGA valve, verify that
the valve is in the open position. If it isnot,
move it to the open position.
2. Remove the valve from the piping.
3. For ease of reassembly, using a permanent
marker, draw a line on the gate face
along the top of the wiper retainer plate. If
marking gate is not an option, make note
of the dimension from top of valve housing
to top of gate in full open position (refer to
Table 5, Figure 13, dimension A).
4. Visually inspect and verify that the sleeve
bore is clear of all debris, scale and
elastomer residue.
5. Remove the retainer flange bolts taking
caution to prevent retainer flanges from
falling free if in vertical position. Remove
theretainer flanges from the valve.
6. For valves with segmented retainer flanges
(see Figure 9), loosen retainer bolts and pull
each individual segment straight up away
from the valve, do not remove more than
one section at a time.
7. Remove the two elastomer sleeves by
simply pulling each sleeve out of the
housing assembly. (Sometimes a putty knife,
large screwdriver or pry bar is necessary to
pry the retainer flange away from the sleeve
and the sleeve from the valve flange).
8. Remove the cotter pin from the clevis pin
and remove the clevis pin from the gate. It
may be necessary to actuate the valve down
slightly in order to relieve pressure on the
clevis pin to facilitate removal.
9. Remove the actuator/frame subassembly at
one time by removing the frame bolts that
fasten the frames to the housing and pulling
it away from the housing assembly.
FIGURE 11
Wiper retainer
Wiper
TABLE 4 - HOUSING I.D.
Valve size I.D. minimum I.D. maximum
Maximum allowable
housing I.D.
NPS DN inch mm inch mm inch mm
10. Remove the gate.
11. Remove the wiper retainer mounting
screws, the retainer plates and wipers
fromthe housing.
12. For ease in reassembly, mark the spacer
plates in the as-assembled position. As
there is a proper orientation to the plates,
use these marks to properly place retainers
at reassembly.
13. Remove housing bolts, taking care as
spacer plates may fall free.
14. Pull housing halves apart, remove spacer
plates.
Visual inspection of parts prior to reassembly
1. Check and ensure all housing interior
surfaces and drain ports are free and clear
of hardened slurry or other obstructions.
Clean as required.
2. Inspect the valve housing ensuring that the
bores at the center of the valve are aligned
with each other. Check the bore diameter
for wear per Table 4. Replace if there are
signs of excessive or unusual wear.
3. Examine exterior housing surfaces for
buildup of hardened slurry or other
contamination, clean as required.
4. Examine sleeves for signs of wear, cracking,
chunking, deep cuts, severe abrasion or
chemical attack (softening or gumming).
Replace if in doubt; sleeves must be
replaced as a set.
5. Examine wiper assembly parts for signs
of wear or cracking, severe abrasion or
chemical attack (softening or gumming).
Replace if indoubt.
 Loading...